- web apps
 Why Install Chrome Extension?
- Steps to Test Locally Hosted Apps
- How to Turnoff Onboading Tutorial?
- Non-Text Keys in Test Cases
- Basic Authentication for Web
- Why Bypass CAPTCHA?
- Test Case Failures Due to Link Text Capture Issues
- Why Is a Single Video for All Test Cases in a Test Plan Unavailable in Some Cases?
- How to Handle Browser-Related Permission Issues?
- Why Can’t Selenium ChromeDriver Interact With 3DS Authentication Pages?
- What Should I Do If My Browser Blocks Local Network Access?
- Why Am I Getting an Error While Registering the Agent?
- Why Does the Try Again Error Appear While Installing the Testsigma Agent in a Proxy Environment?
- How to Enable IE Mode in Microsoft Edge?
- mobile apps
- Apple Pay Automation with Testsigma
- How do I Enhance the Execution Speed for Mobile Native Apps?
- Why am I Facing Permission Error During Local Test Execution?
- How to Resolve App Launch Issues?
- Why does the iOS App Close Right After Opening in Testsigma?
- How to Execute Android/iOS Tests in Emulators/Simulators?
- Why Does Scroll to Element Fail in Mobile Native Apps and How Do I Fix It??
- general
- Why am I Unable to Download the XLS File from the Edge Browser?
- How to Handle Browser-Related Pop-Up Issues?
- How to Handle Text-Based CAPTCHA in Testsigma?
- Why does Test Execution Fail with the Error No Route to Host?
- Why do Errors Occur When I Try to Download Files from The Exports Page?
- How to Test Flutter Apps Using Accessibility Mode?
- How to Add Multiple Runtime Variables in Data Generator Functions?
- How to Insert Test Data in RAW Body for POST API?
- What is Chrome for Testing and How Does it Work?
- How Can I Set Up Authenticator-Based Authentication in Testsigma?
- How to Update an Excel File in Testsigma Uploads?
- What Causes Longer Automation Test Execution Times in a Test Plan?
- How Do I Retrieve the OTP When it’s Embedded within HTML Tags?
- How to Configure the OracleDB Add-on in Testsigma?
How to Configure the OracleDB Add-on in Testsigma?
In Testsigma, the configuration of the Oracle Database add-on requires specific database connection details to ensure successful communication between the application and the Oracle database. This article discusses how to install the add-on and set up the database connection.
Steps to Install the Addon
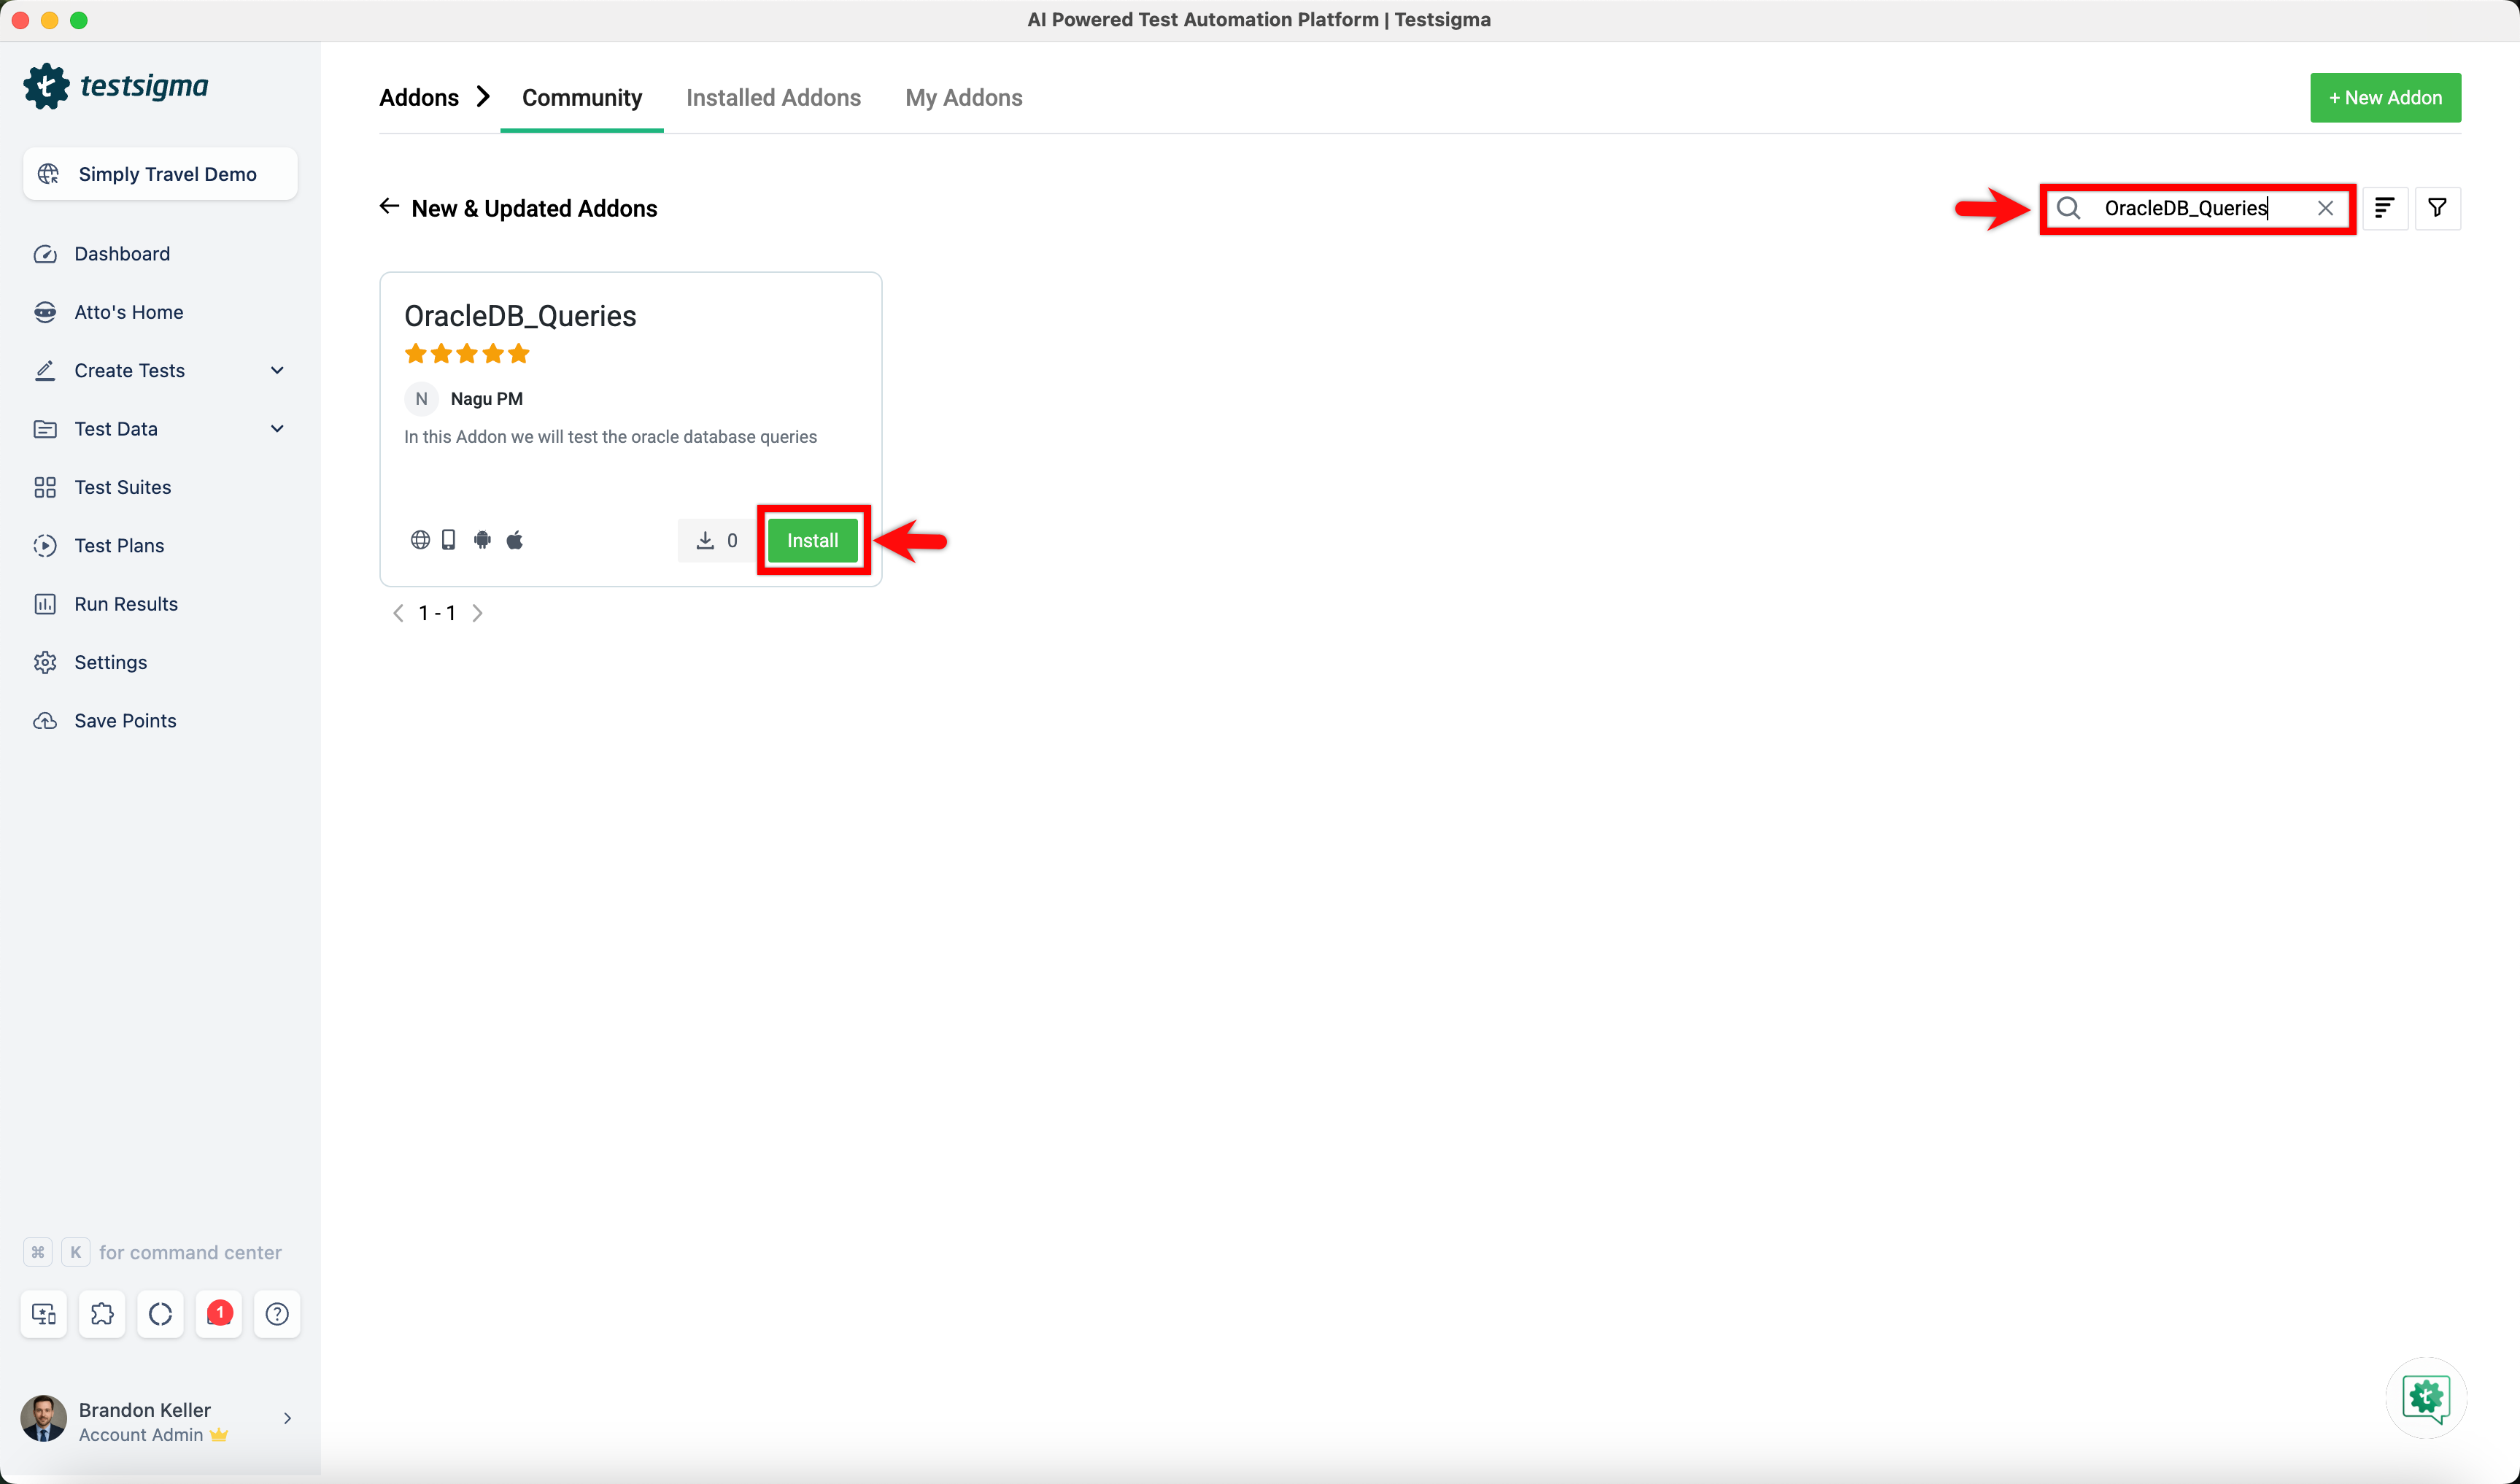
- From the left navigation bar, go to Addons and click Add-ons.
- Under the New & Updated Addons section, search for the OracleDB_Queries addon and click Install.
Steps to Set Up the Database Connection
- In your test case, use the Execute OracleDB Query on the Connection DBConnectionURL and verify affected rows count is Row-Count NLP to execute the query and fetch the required database details.
-
Click the Query placeholder and enter the SQL query to be executed on the Oracle database.
Example query:
SELECT * FROM employees WHERE employee_id = 103;
This query fetches all details of the employee whose ID is 103 from the employees table. Use this example as a reference and replace it with the required query based on your test scenario.
-
Click the DBConnectionURL placeholder and use the following syntax to enter the URL:
jdbc:oracle:thin:@//<host>:<port>/<servicename>?user=<username>&password=<password>&internallogon=<role>
Now, replace the placeholders with your Oracle database details:
- Host Name – The hostname of your database server (e.g., localhost).
- Port – The port on which the database is running (e.g., 1521).
- Service Name – The service name of the database (or select SID if service name is unavailable).
- Username – Your database username (e.g., SYS).
- Password – Your database password.
- Role – Database role (e.g., SYSDBA).

SID Example:
jdbc:oracle:thin:@//localhost:1521/FREE?user=SYS&password=Test@123&internal_logon=SYSDBA
Service Name Example:
jdbc:oracle:thin:@//testing-email.com:1521/TFCP?user=testfcpdevelop&password=sigma&internal_logon=default
NOTE:In the Service Name field:
- If you select SID, enter FREE (the default service).
- If you select Service Name, enter your actual service name.
- Click the Row-Count placeholder and specify the expected number of affected rows for validation.
- Click Create Step.
Want to contribute or report missing content?