- integrations

Zephyr Cloud Integration with Testsigma
With the Zephyr Cloud integration in Testsigma, you can link Zephyr test cases and test plans with their corresponding Testsigma test cases and test plans. You can also export Testsigma run results to Zephyr. This article discusses how to integrate Zephyr Cloud with Testsigma.
Prerequisites
Before you begin, ensure that:
- You have a valid Personal Access Token from Zephyr Cloud.
- You have your Jira Account URL, Username, and API key.
- You have referred to the documentation on creating test cases.
- You have referred to the documentation on creating test plans.
Steps to Integrate Testsigma with Zephyr Cloud
- From the left navigation bar, go to Settings > Integrations.
- Turn on the toggle for Zephyr Cloud.

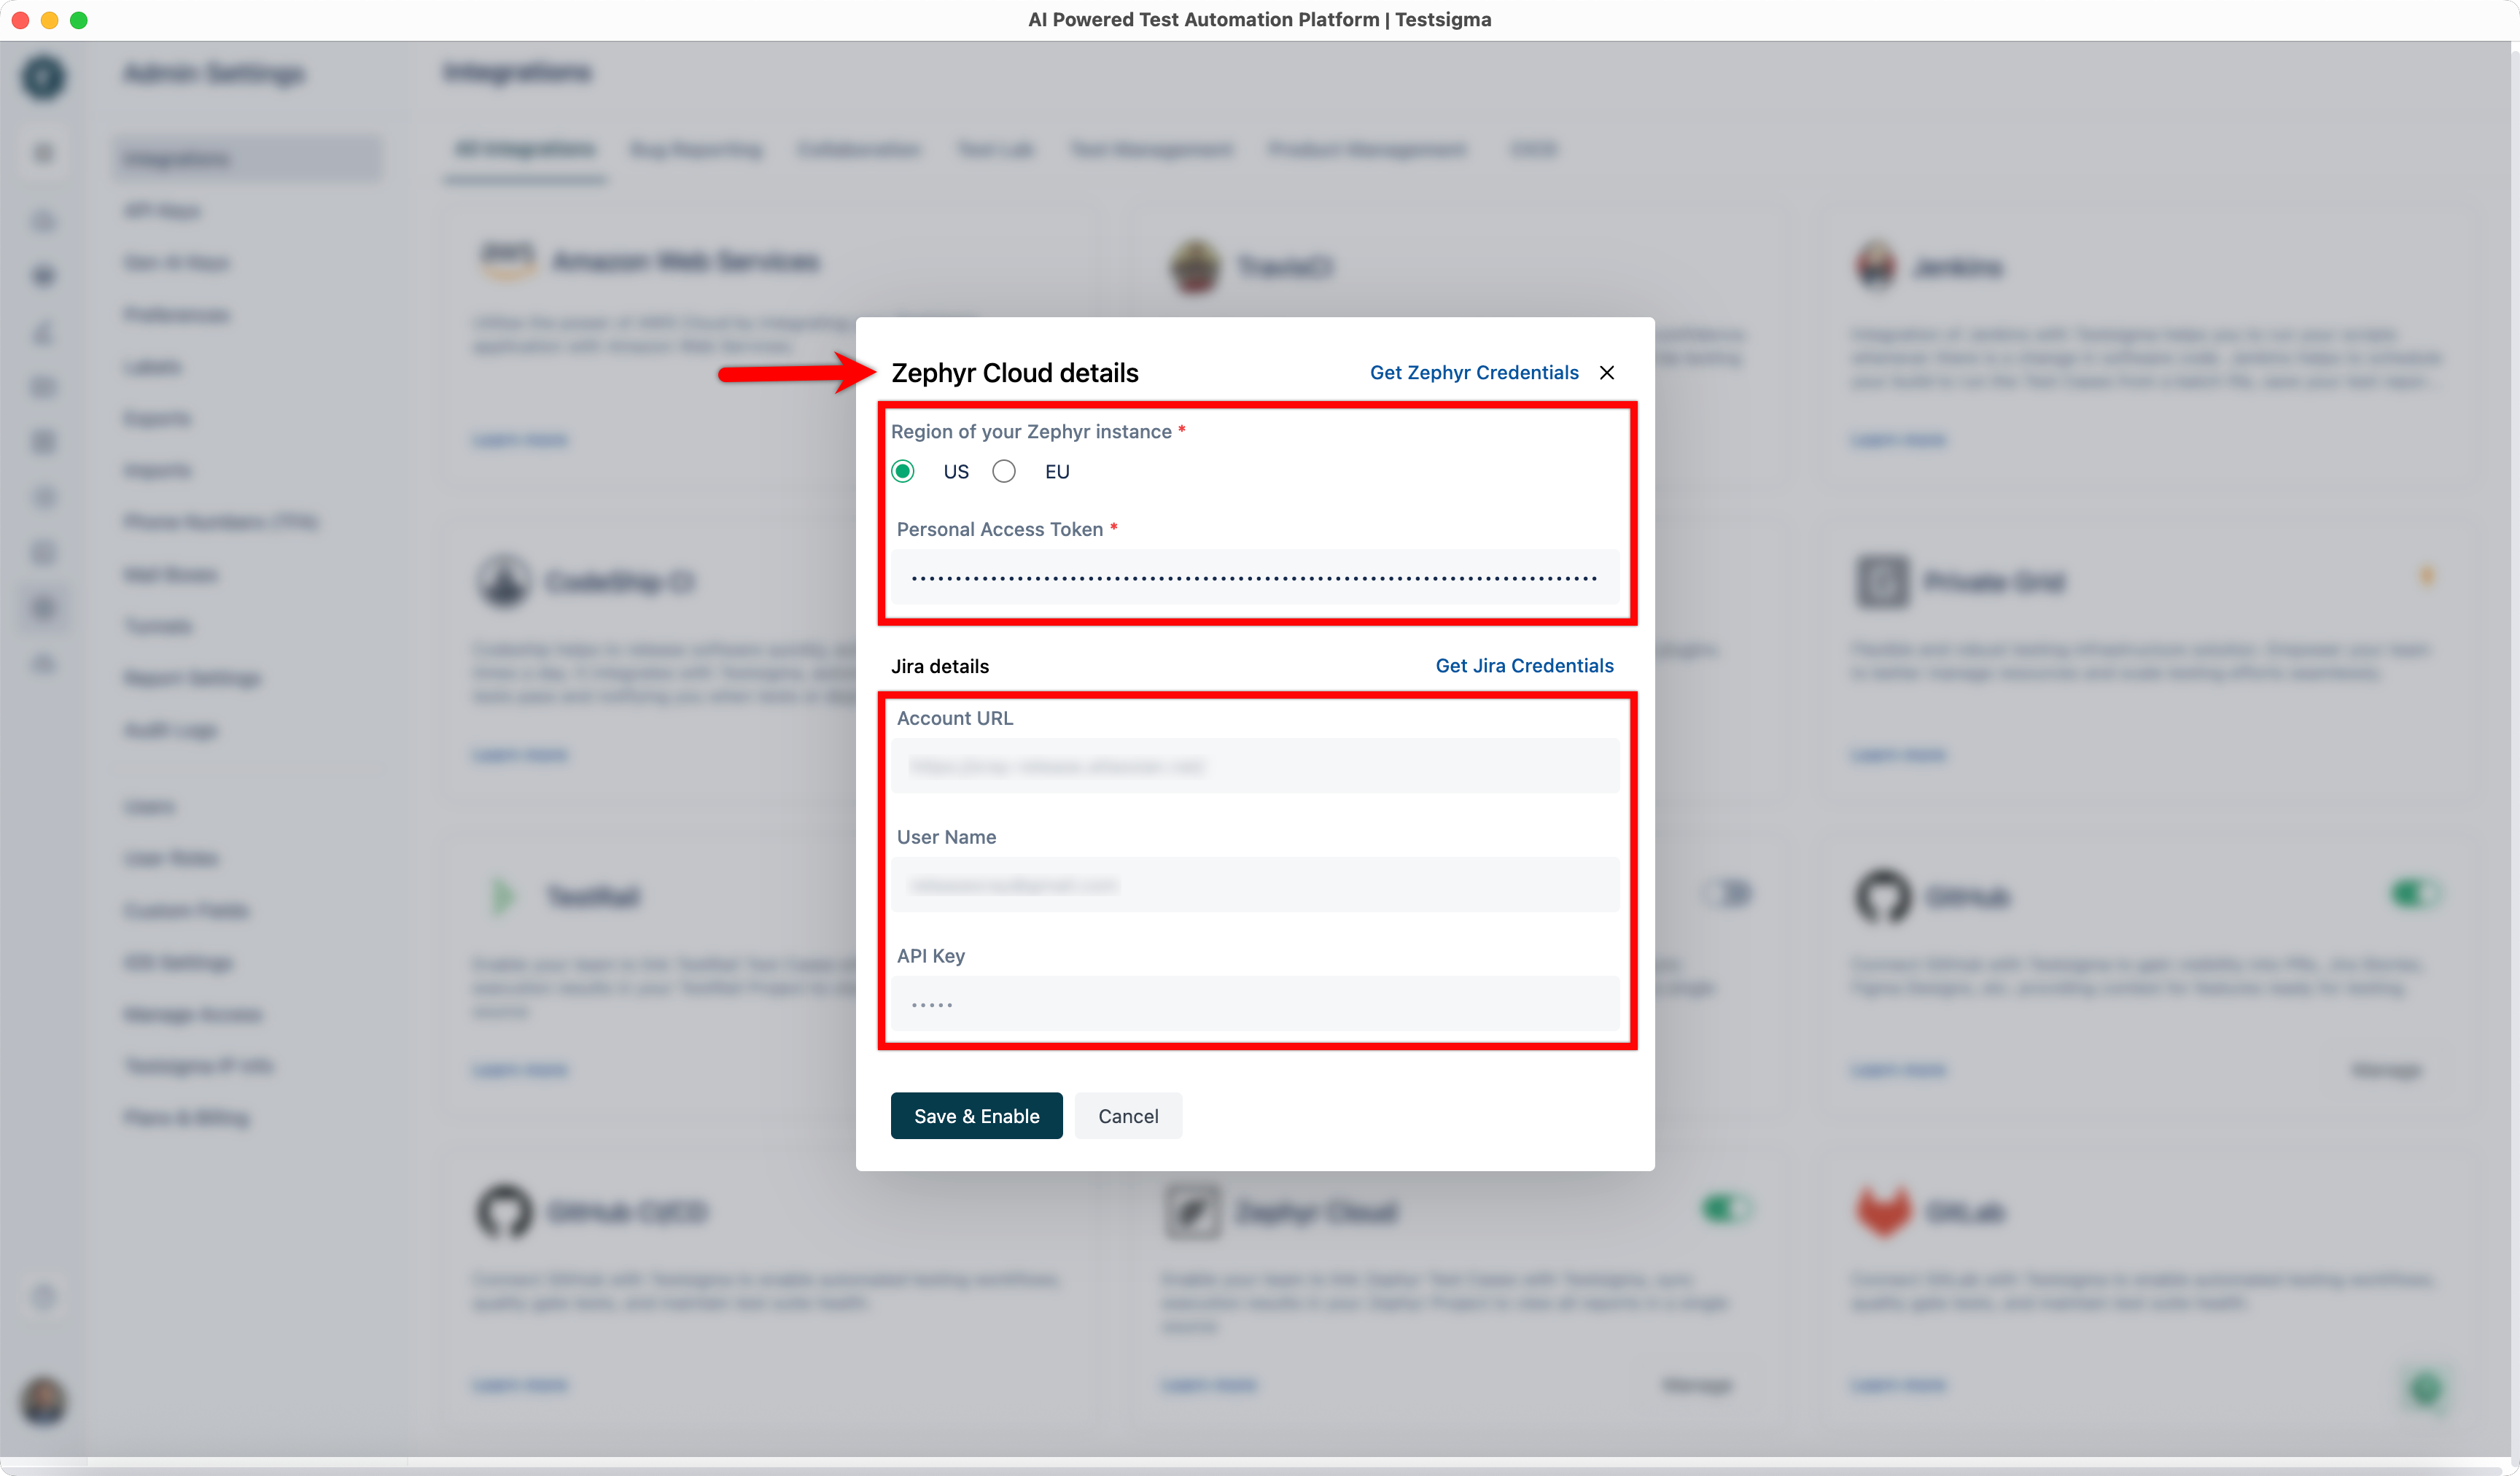
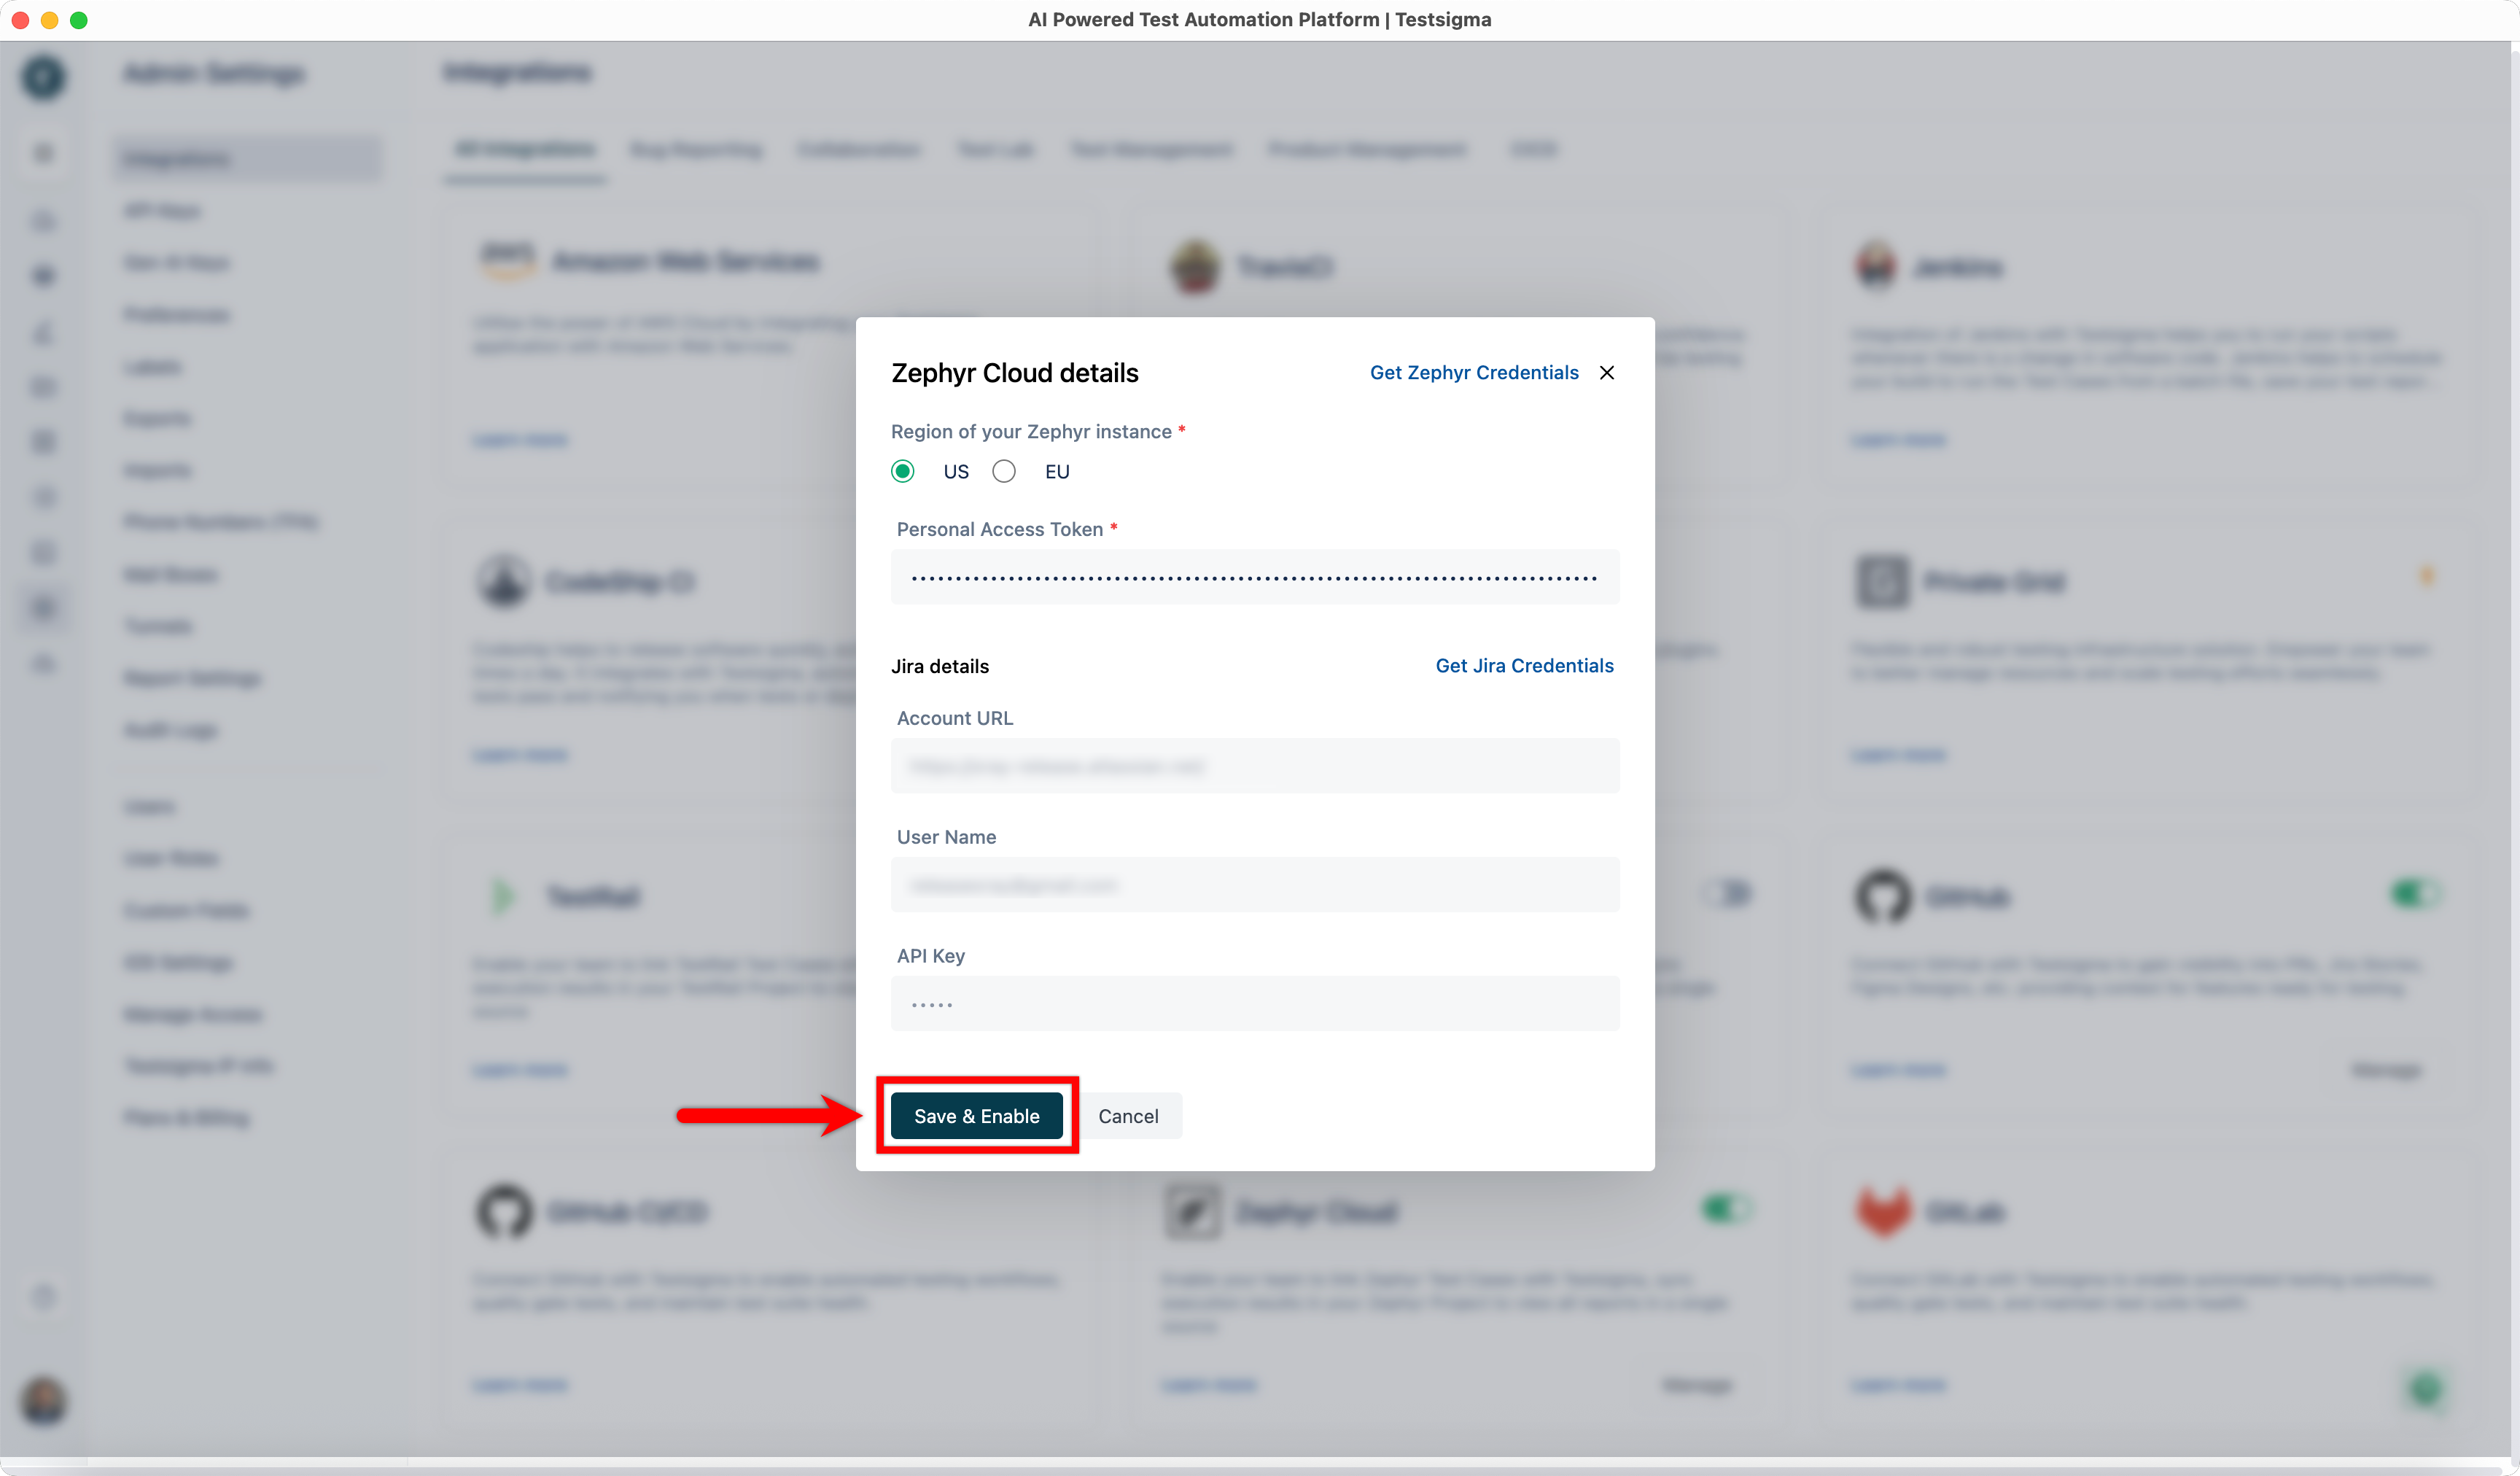
- In the Zephyr Cloud Details dialog box, select Region of your Zephyr instance, enter your Personal Access Token and Jira Details.
- Click Save & Enable.
Link a Zephyr Test Case to a Testsigma Test Case
- Get the ID of an existing test case from Zephyr Cloud.
- In Testsigma, go to Create Tests > Test Cases.
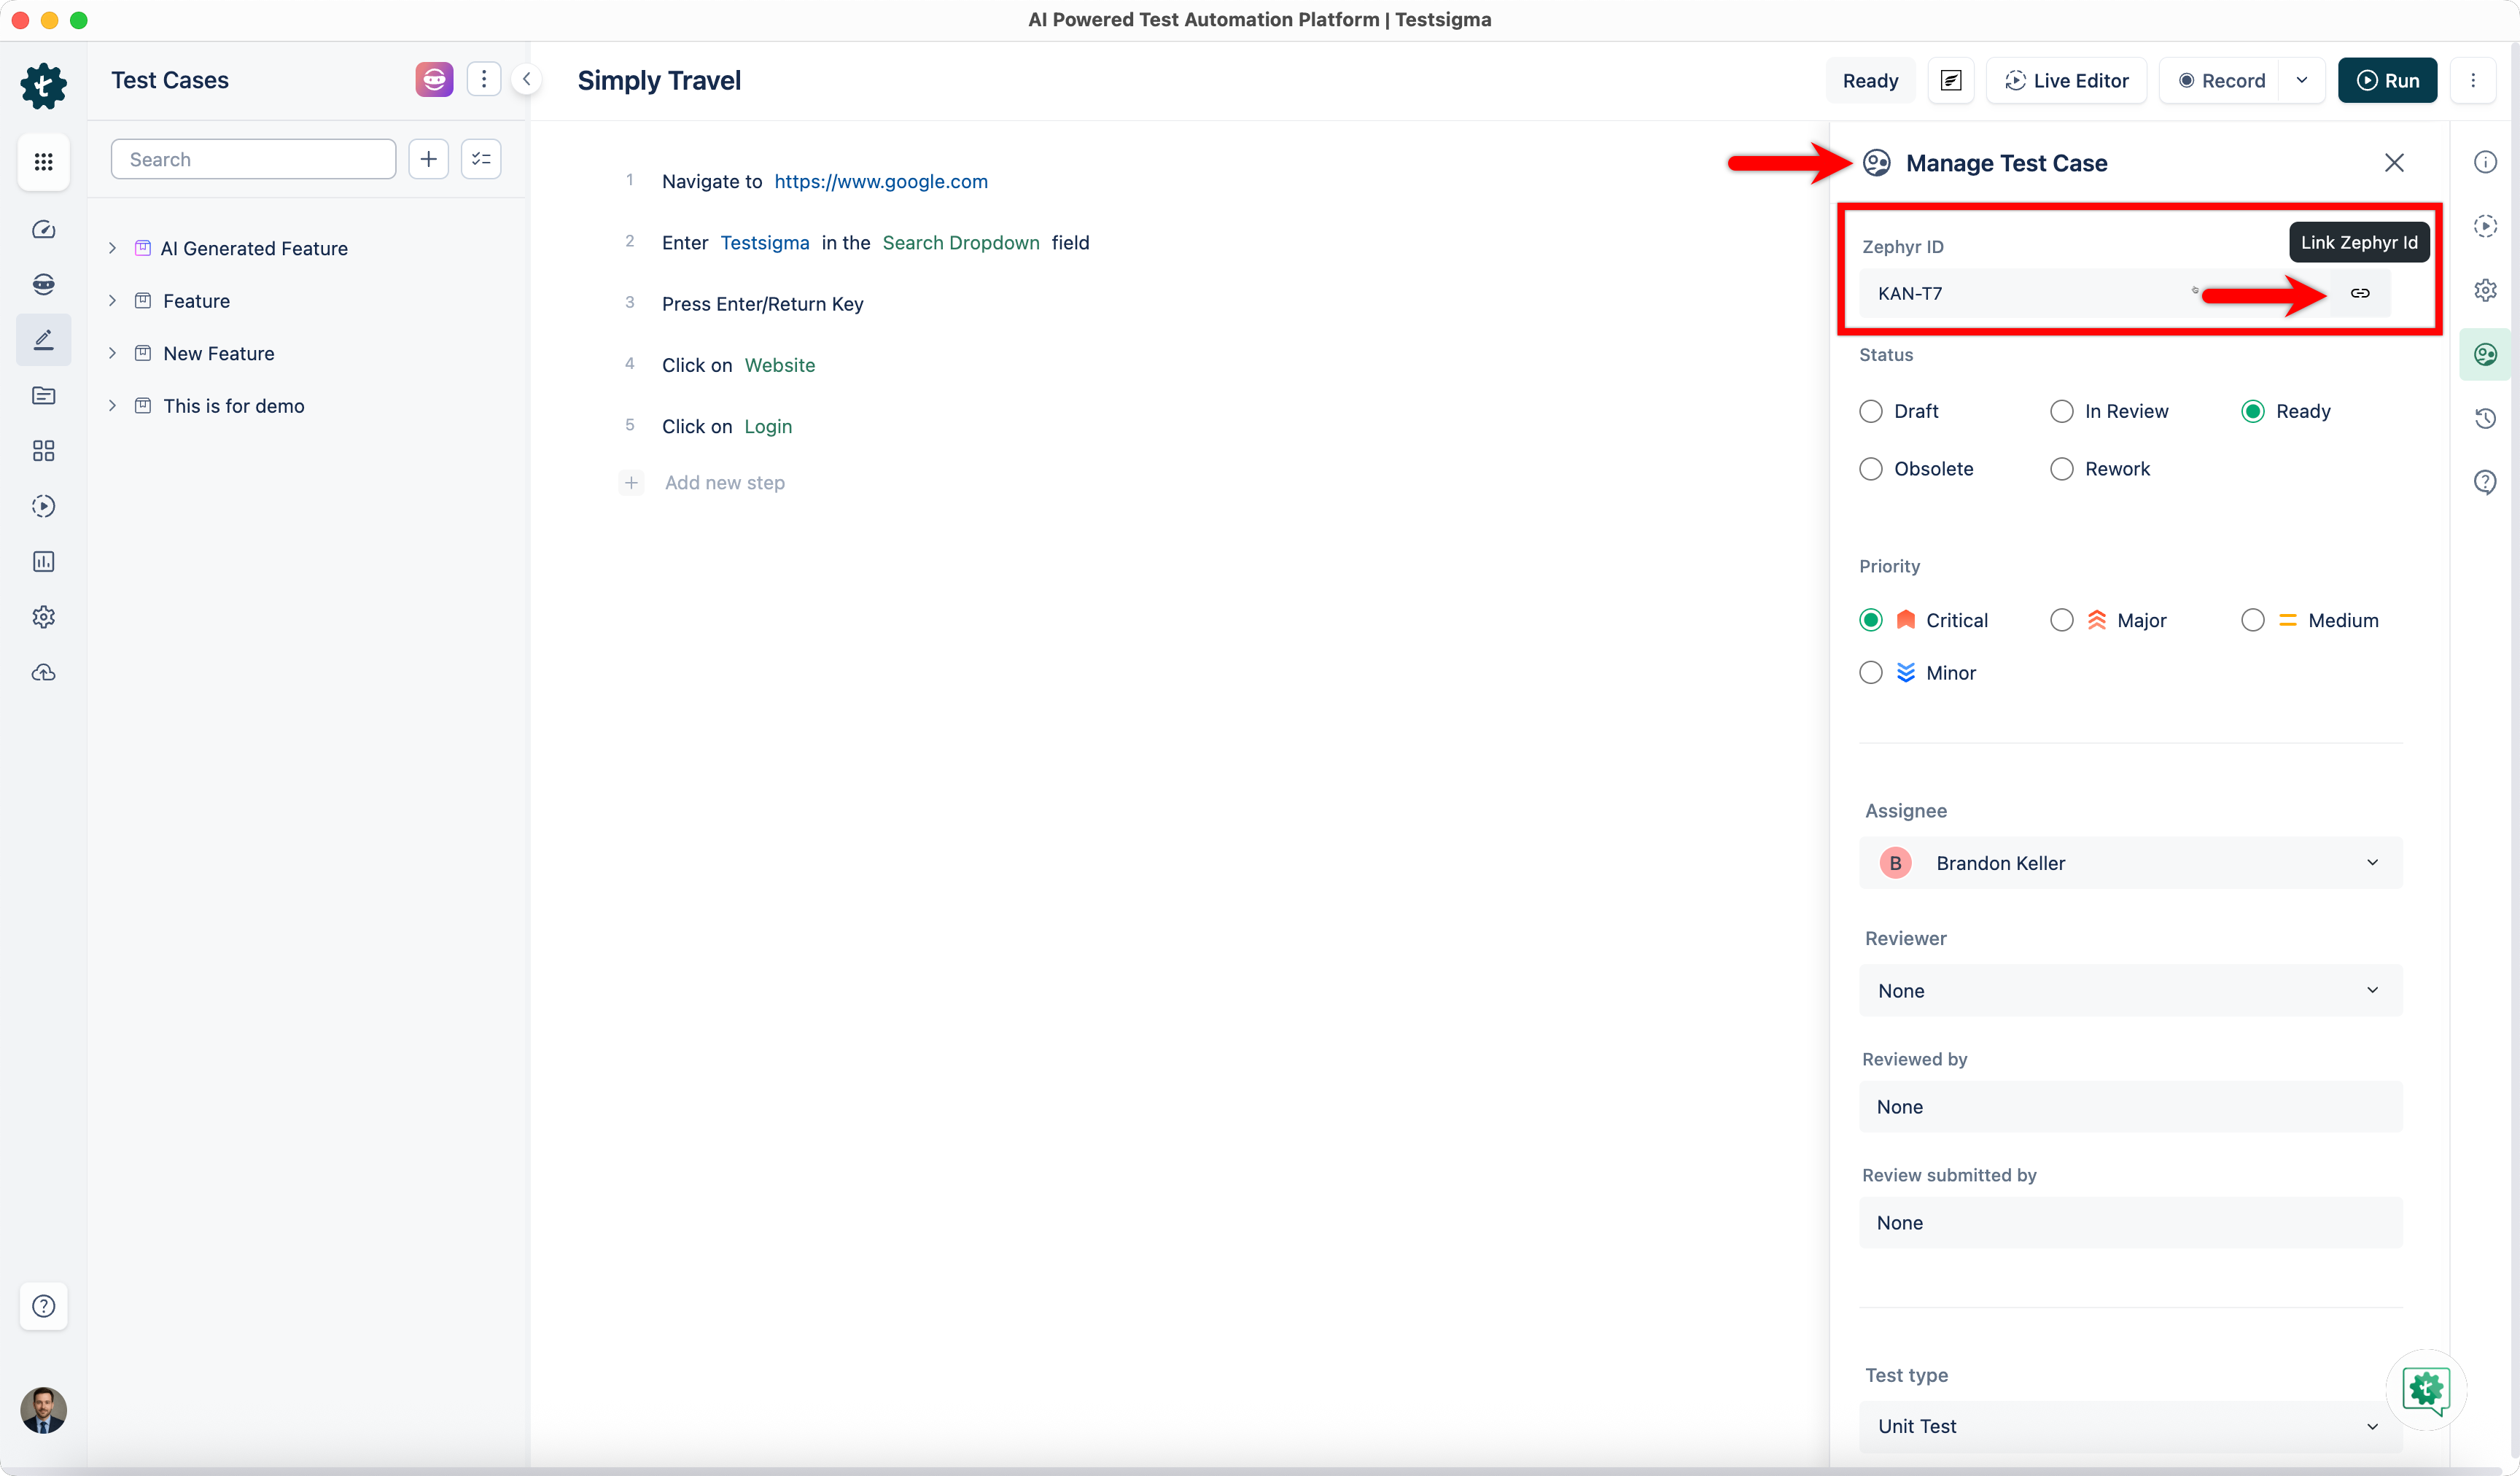
- Open the test case you want to link, and click Manage Test Case.
- Enter the Zephyr test case ID, and click the Link button.
Link a Zephyr Test Plan to a Testsigma Test Plan
- Get the ID of an existing test plan from Zephyr Cloud.
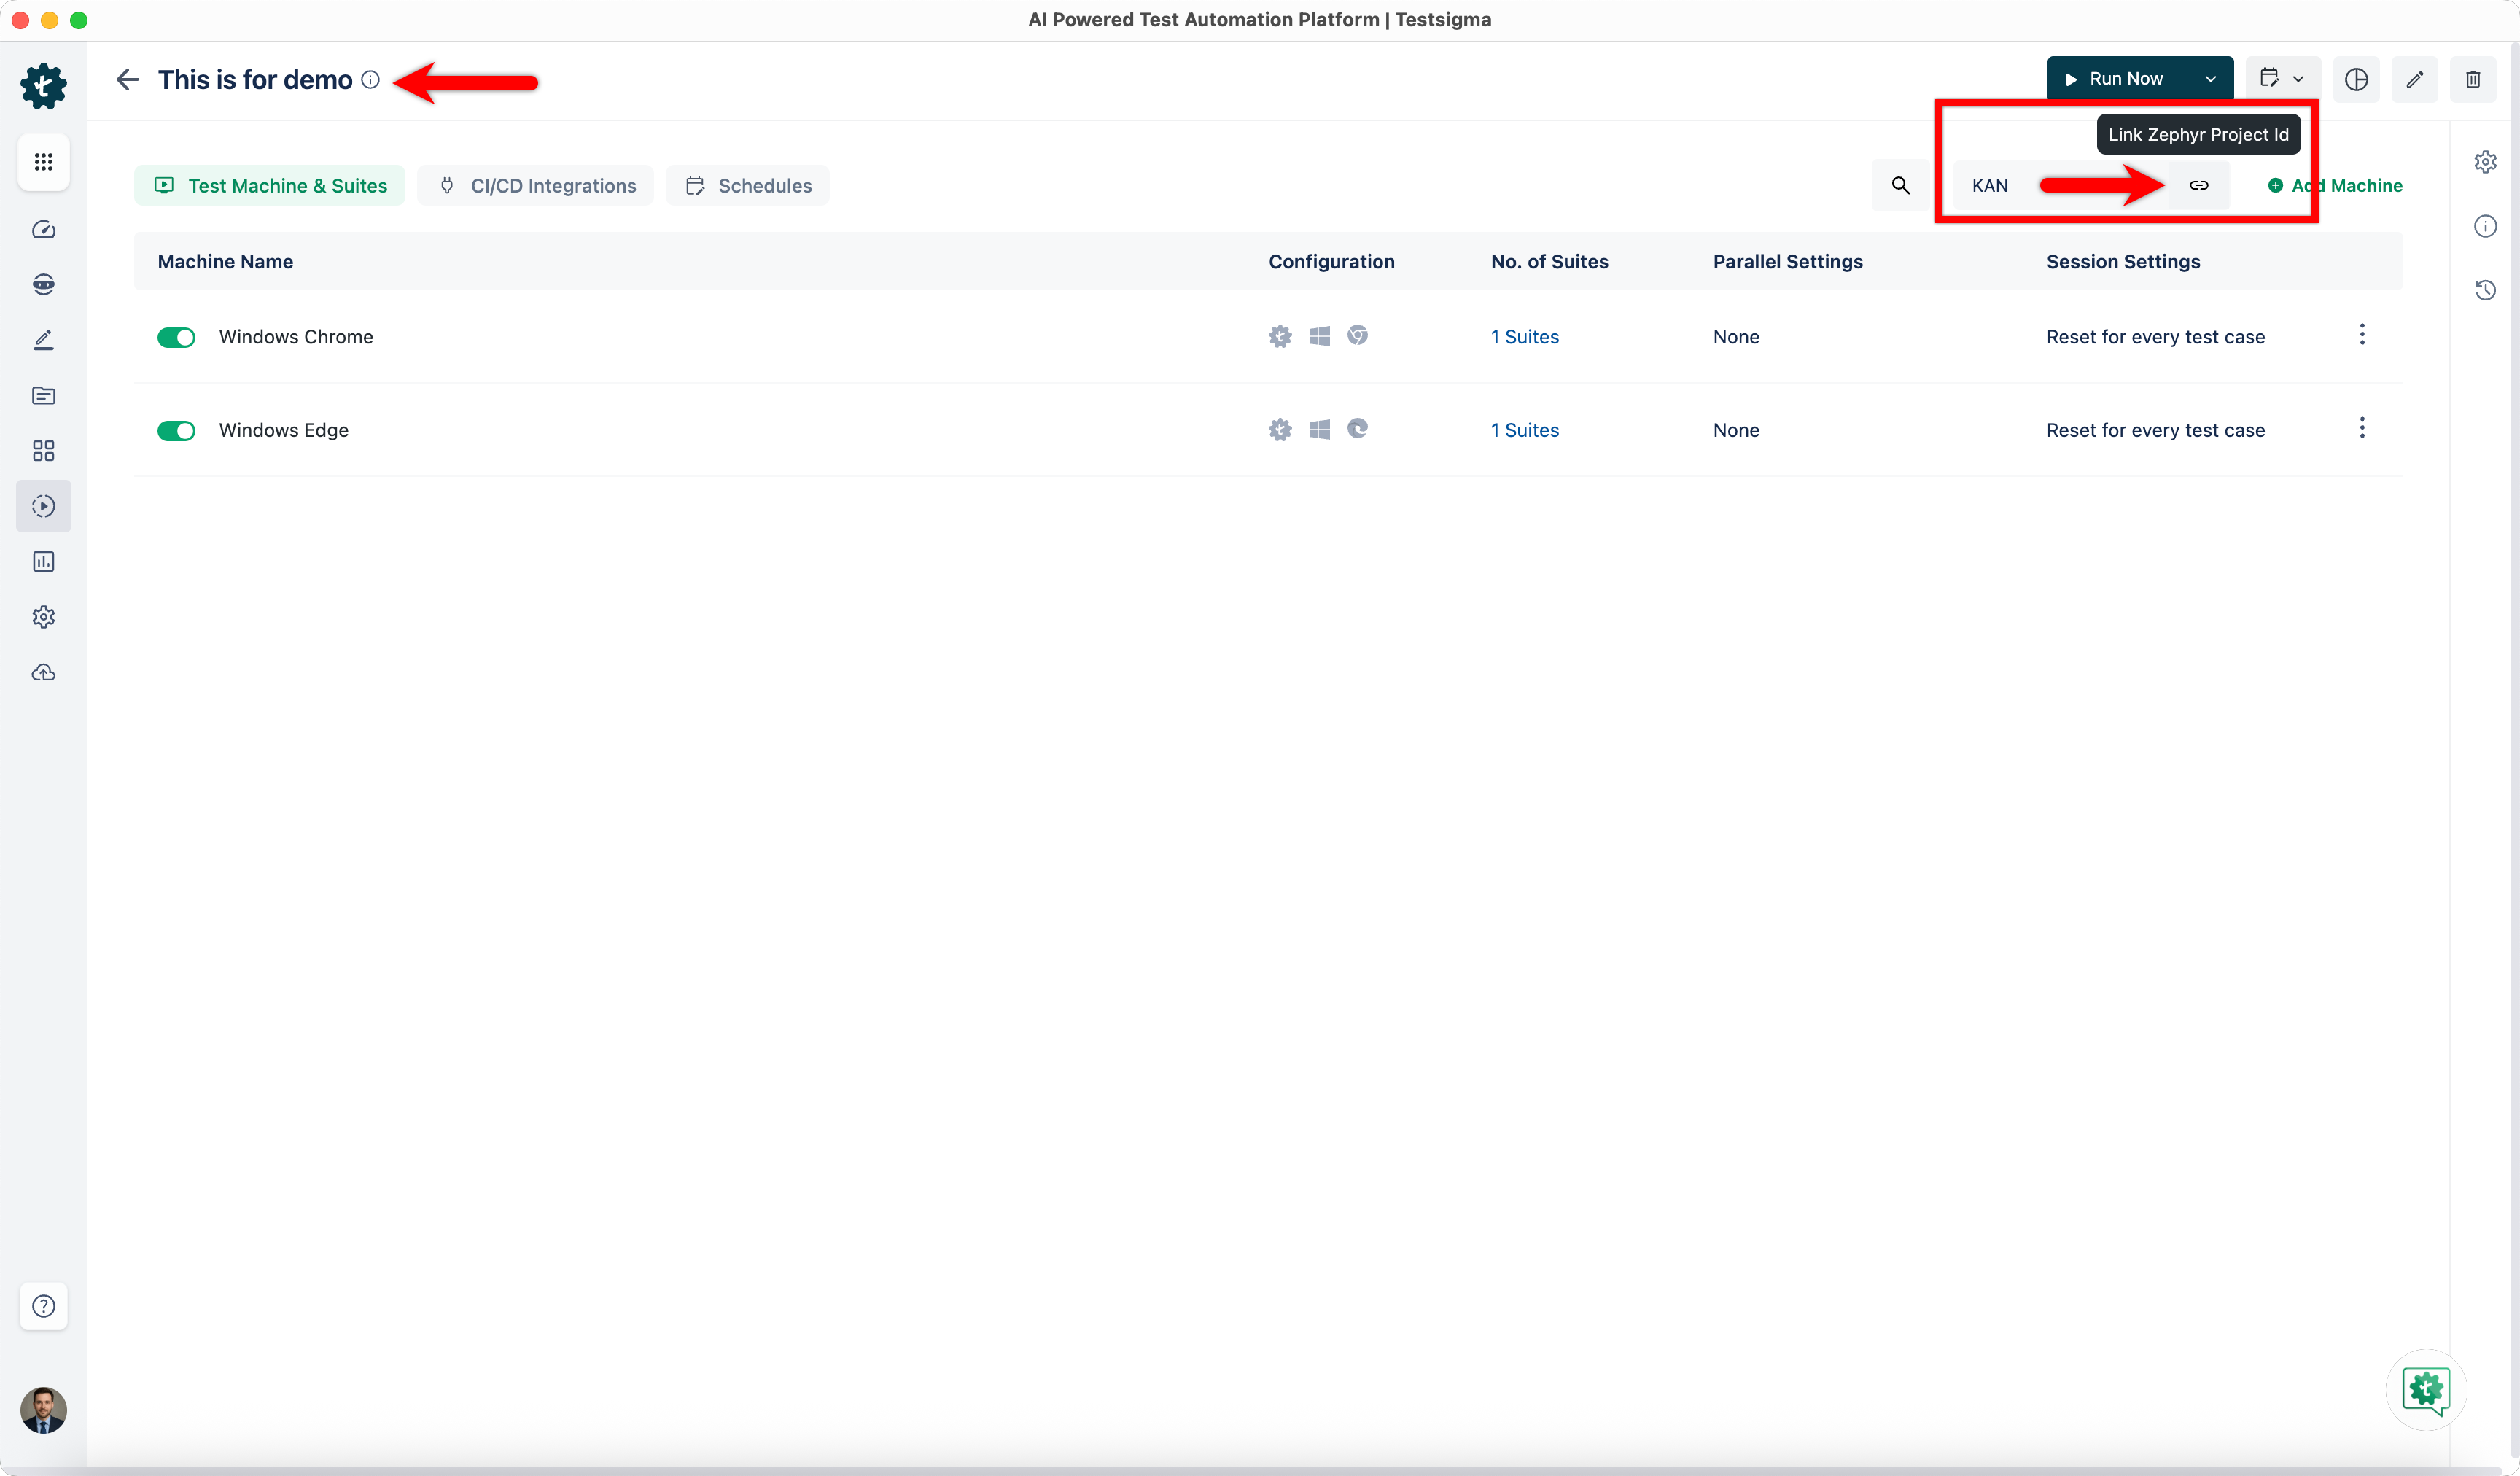
- In Testsigma, go to Test Plans, and open the test plan you want to link.
- Enter the Zephyr Project ID, and click the Link button.
Check Results in Zephyr
- Execute the linked test plan in Testsigma, and wait for the execution to complete.
- Once the execution is complete, click Zephyr Execution.
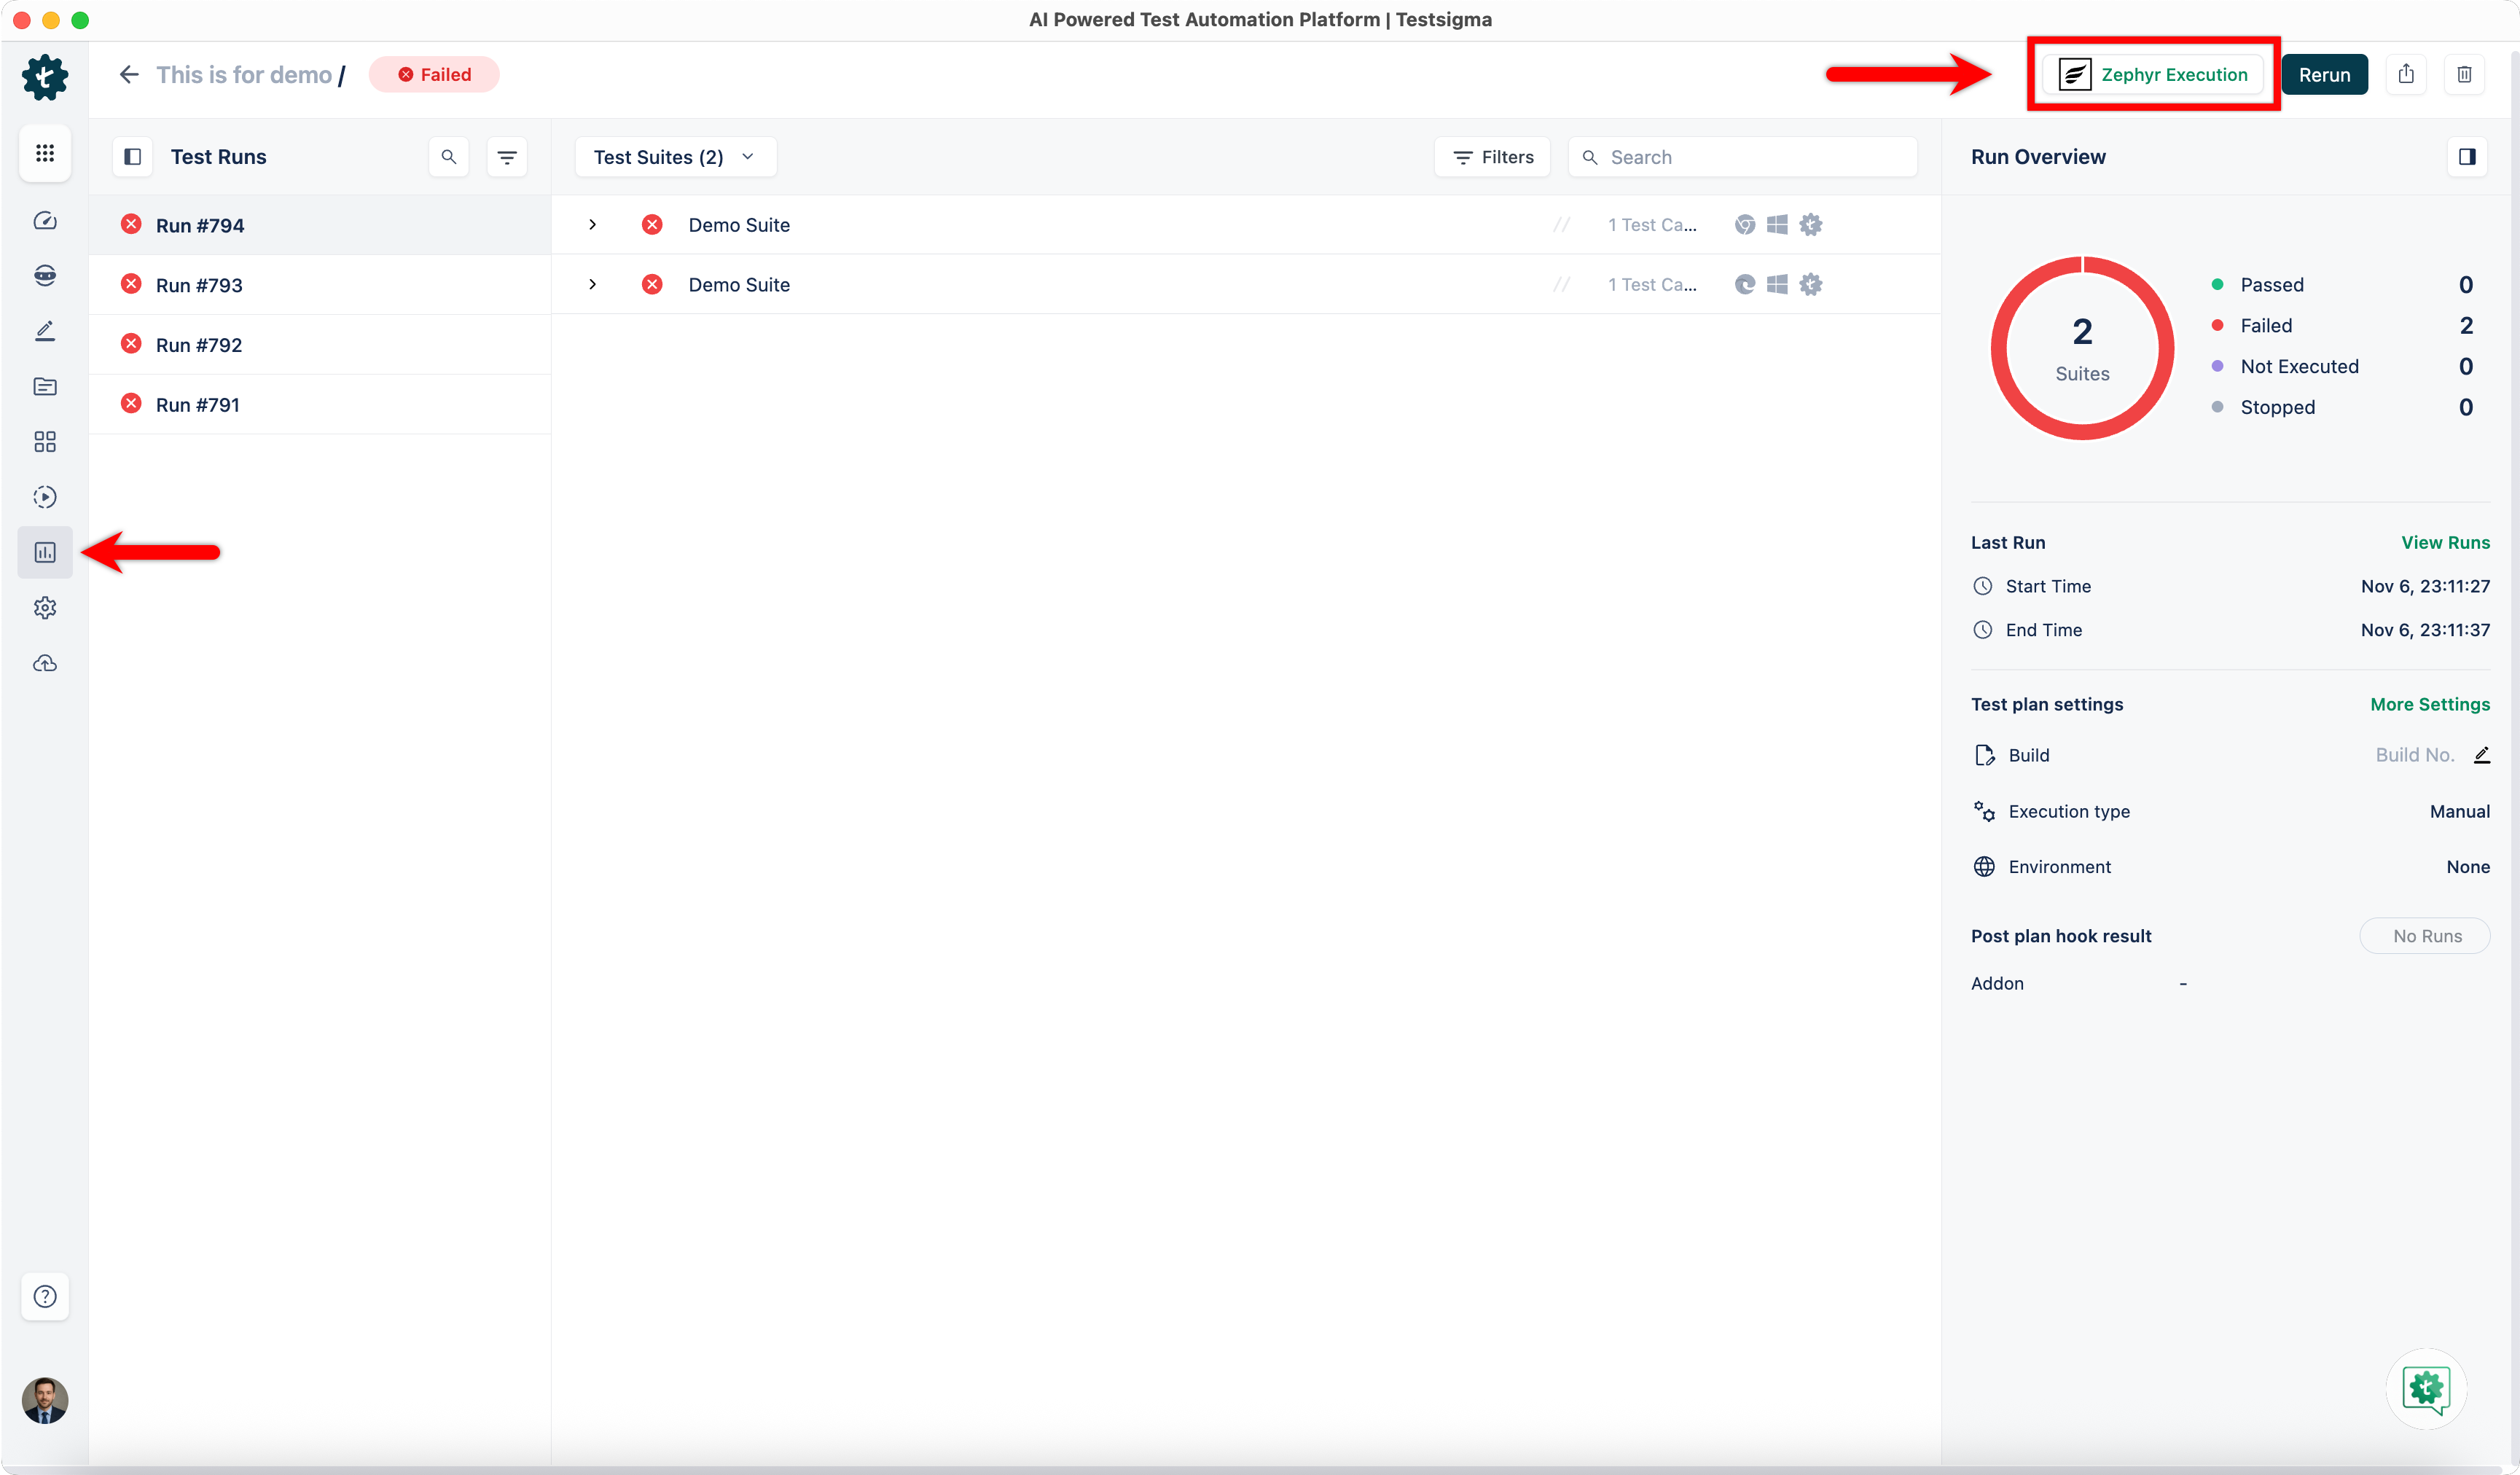
- You’ll be redirected to Zephyr Cloud, where you can view the execution details.
Want to contribute or report missing content?