- auto healing
 Introduction: Auto-Healing
- Enable the Auto-Healing Feature
- AI-Enabled Auto-Healing for Web Applications
- AI-Enabled Auto-Healing for Salesforce Applications
- AI-Enabled Auto-Healing for Mobile Applications
- Auto-healing for AI-Generated Test Cases
- Using Auto-Healing in Copilot Test Execution
- Auto-Healing Insights
Auto-Healing Insights
Review how auto-healing behaved during a run to see which locator failed, what replaced it, and whether to keep the change. Insights open from the healed step on the results page.
Prerequisites
Before you begin, ensure that:
- Auto-healing is enabled for the project.
- A run has been completed in which at least one step was healed.
Review a Healed Step in Run Results
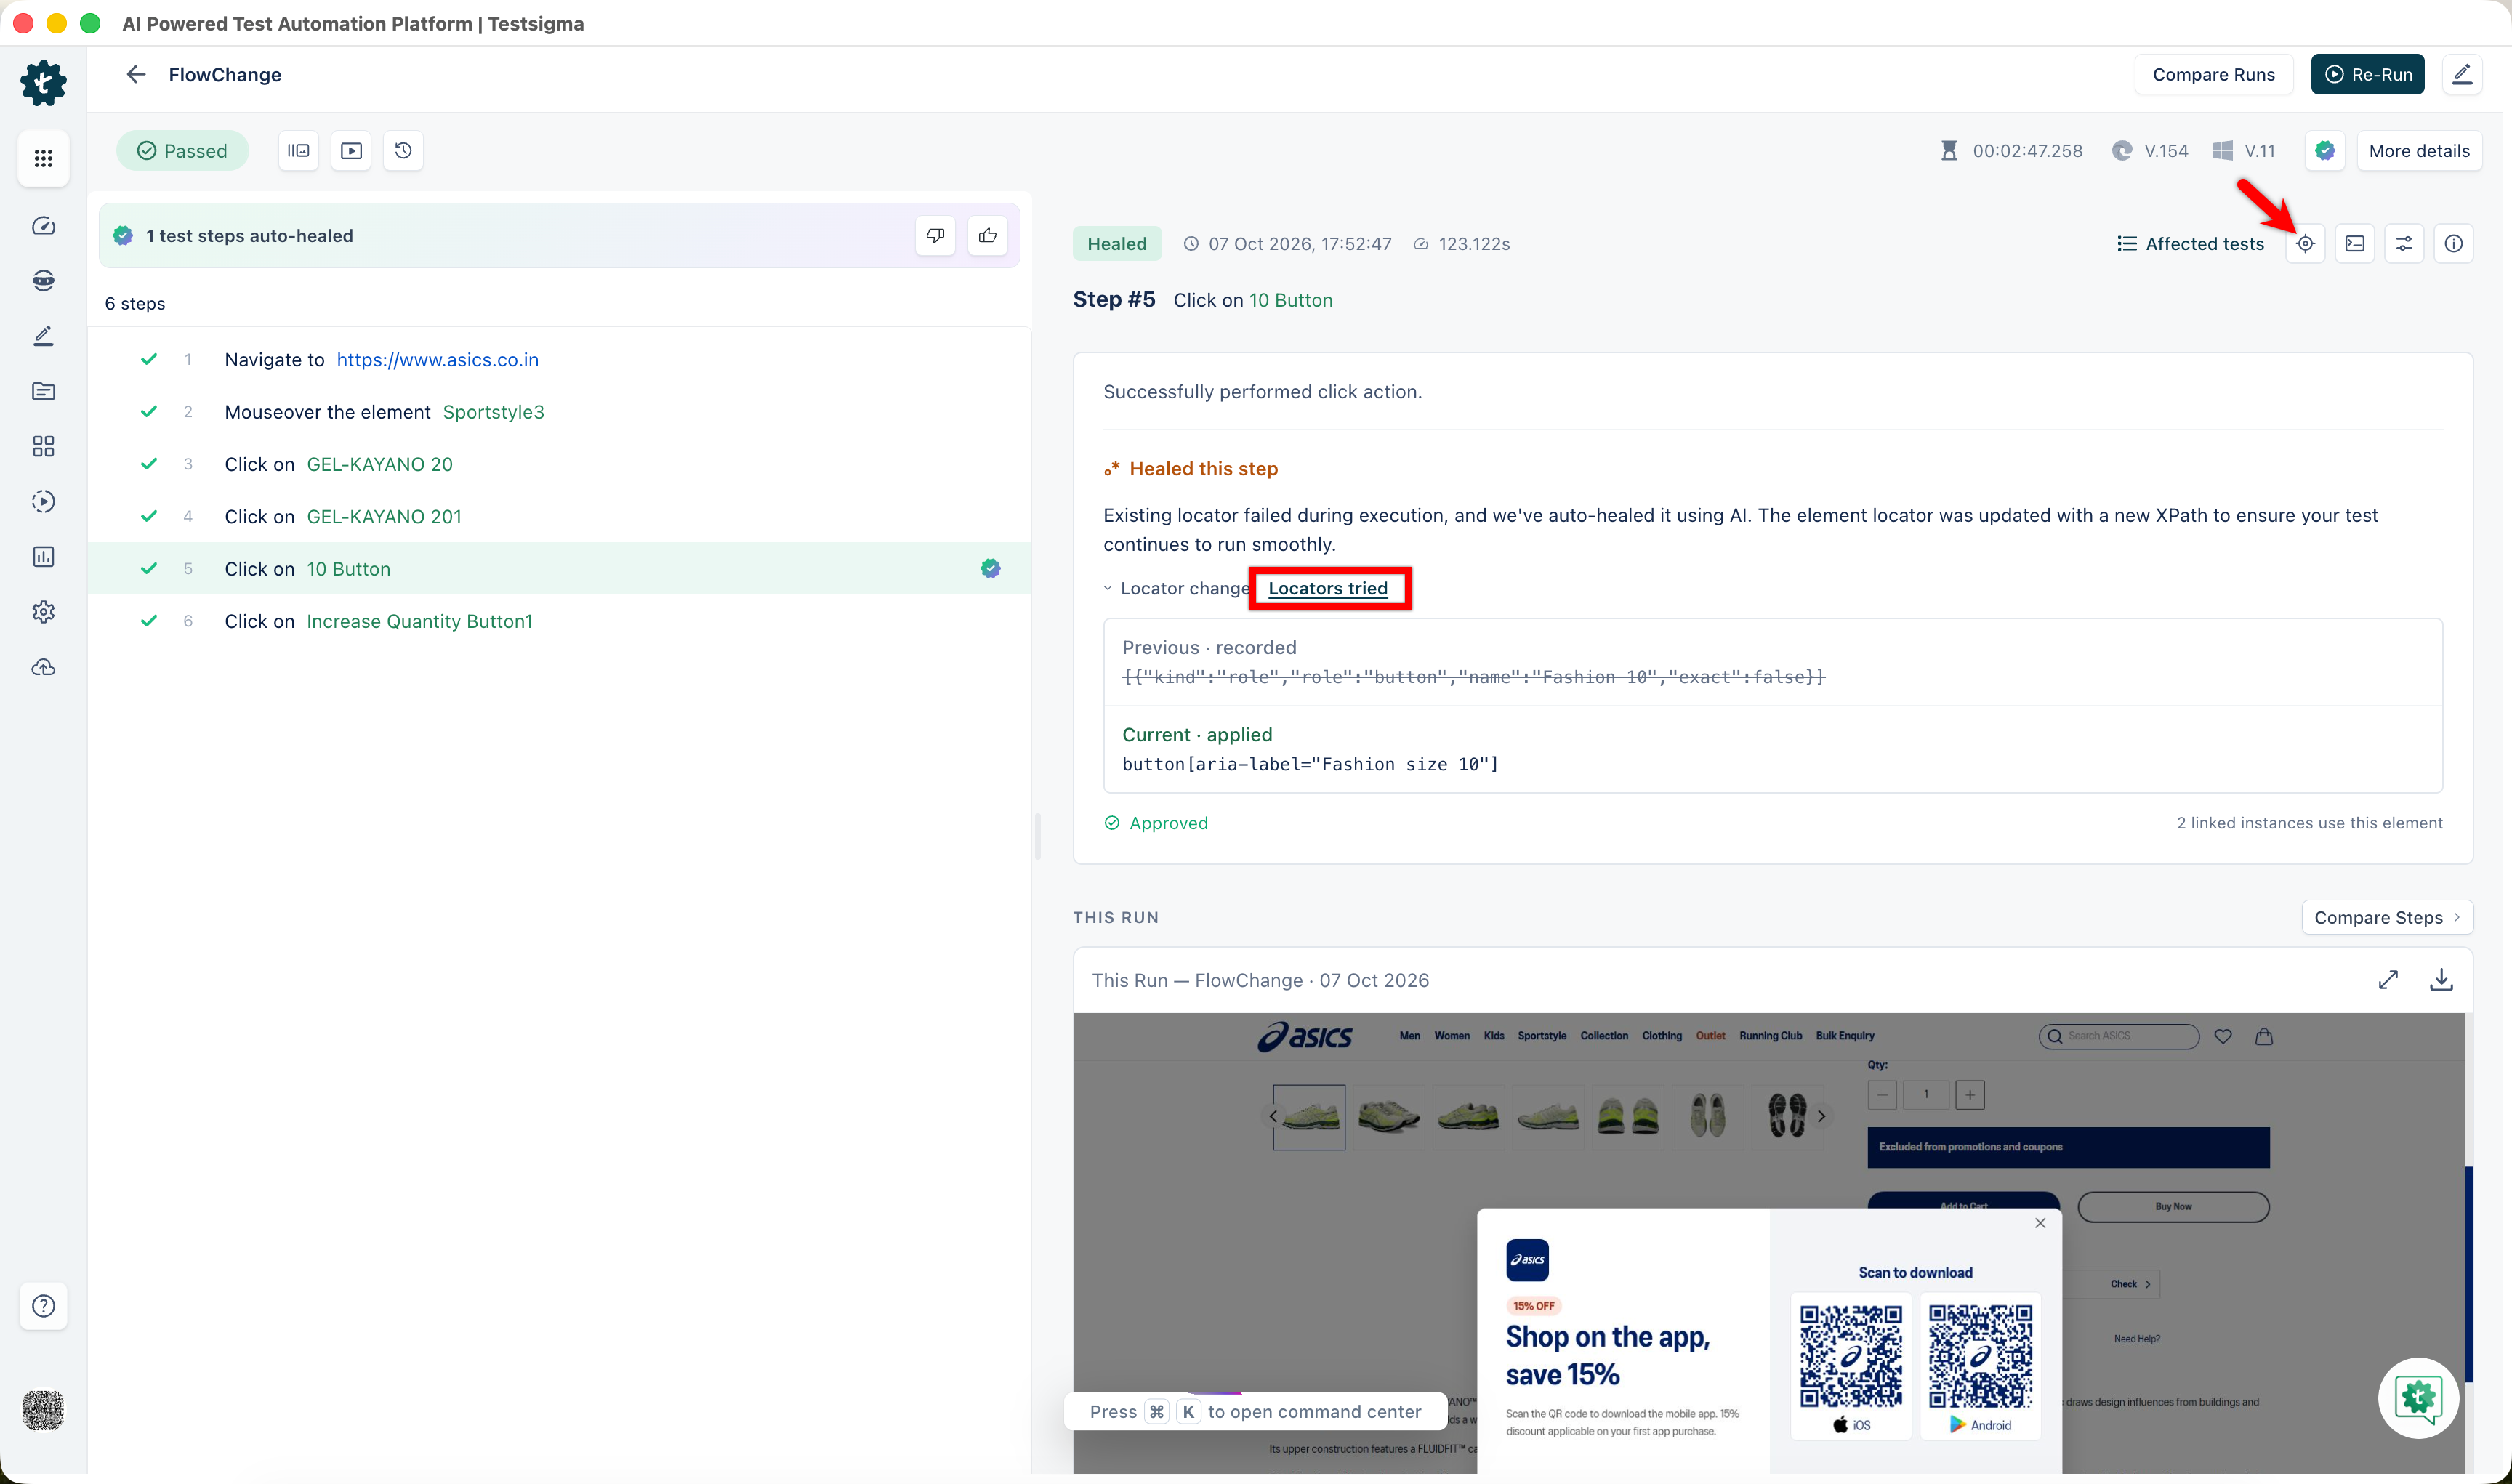
When a saved locator fails during execution, Testsigma searches for the element and continues the run with a new locator. The step's status reads Healed, and the new locator is kept as a pending heal until you approve it.
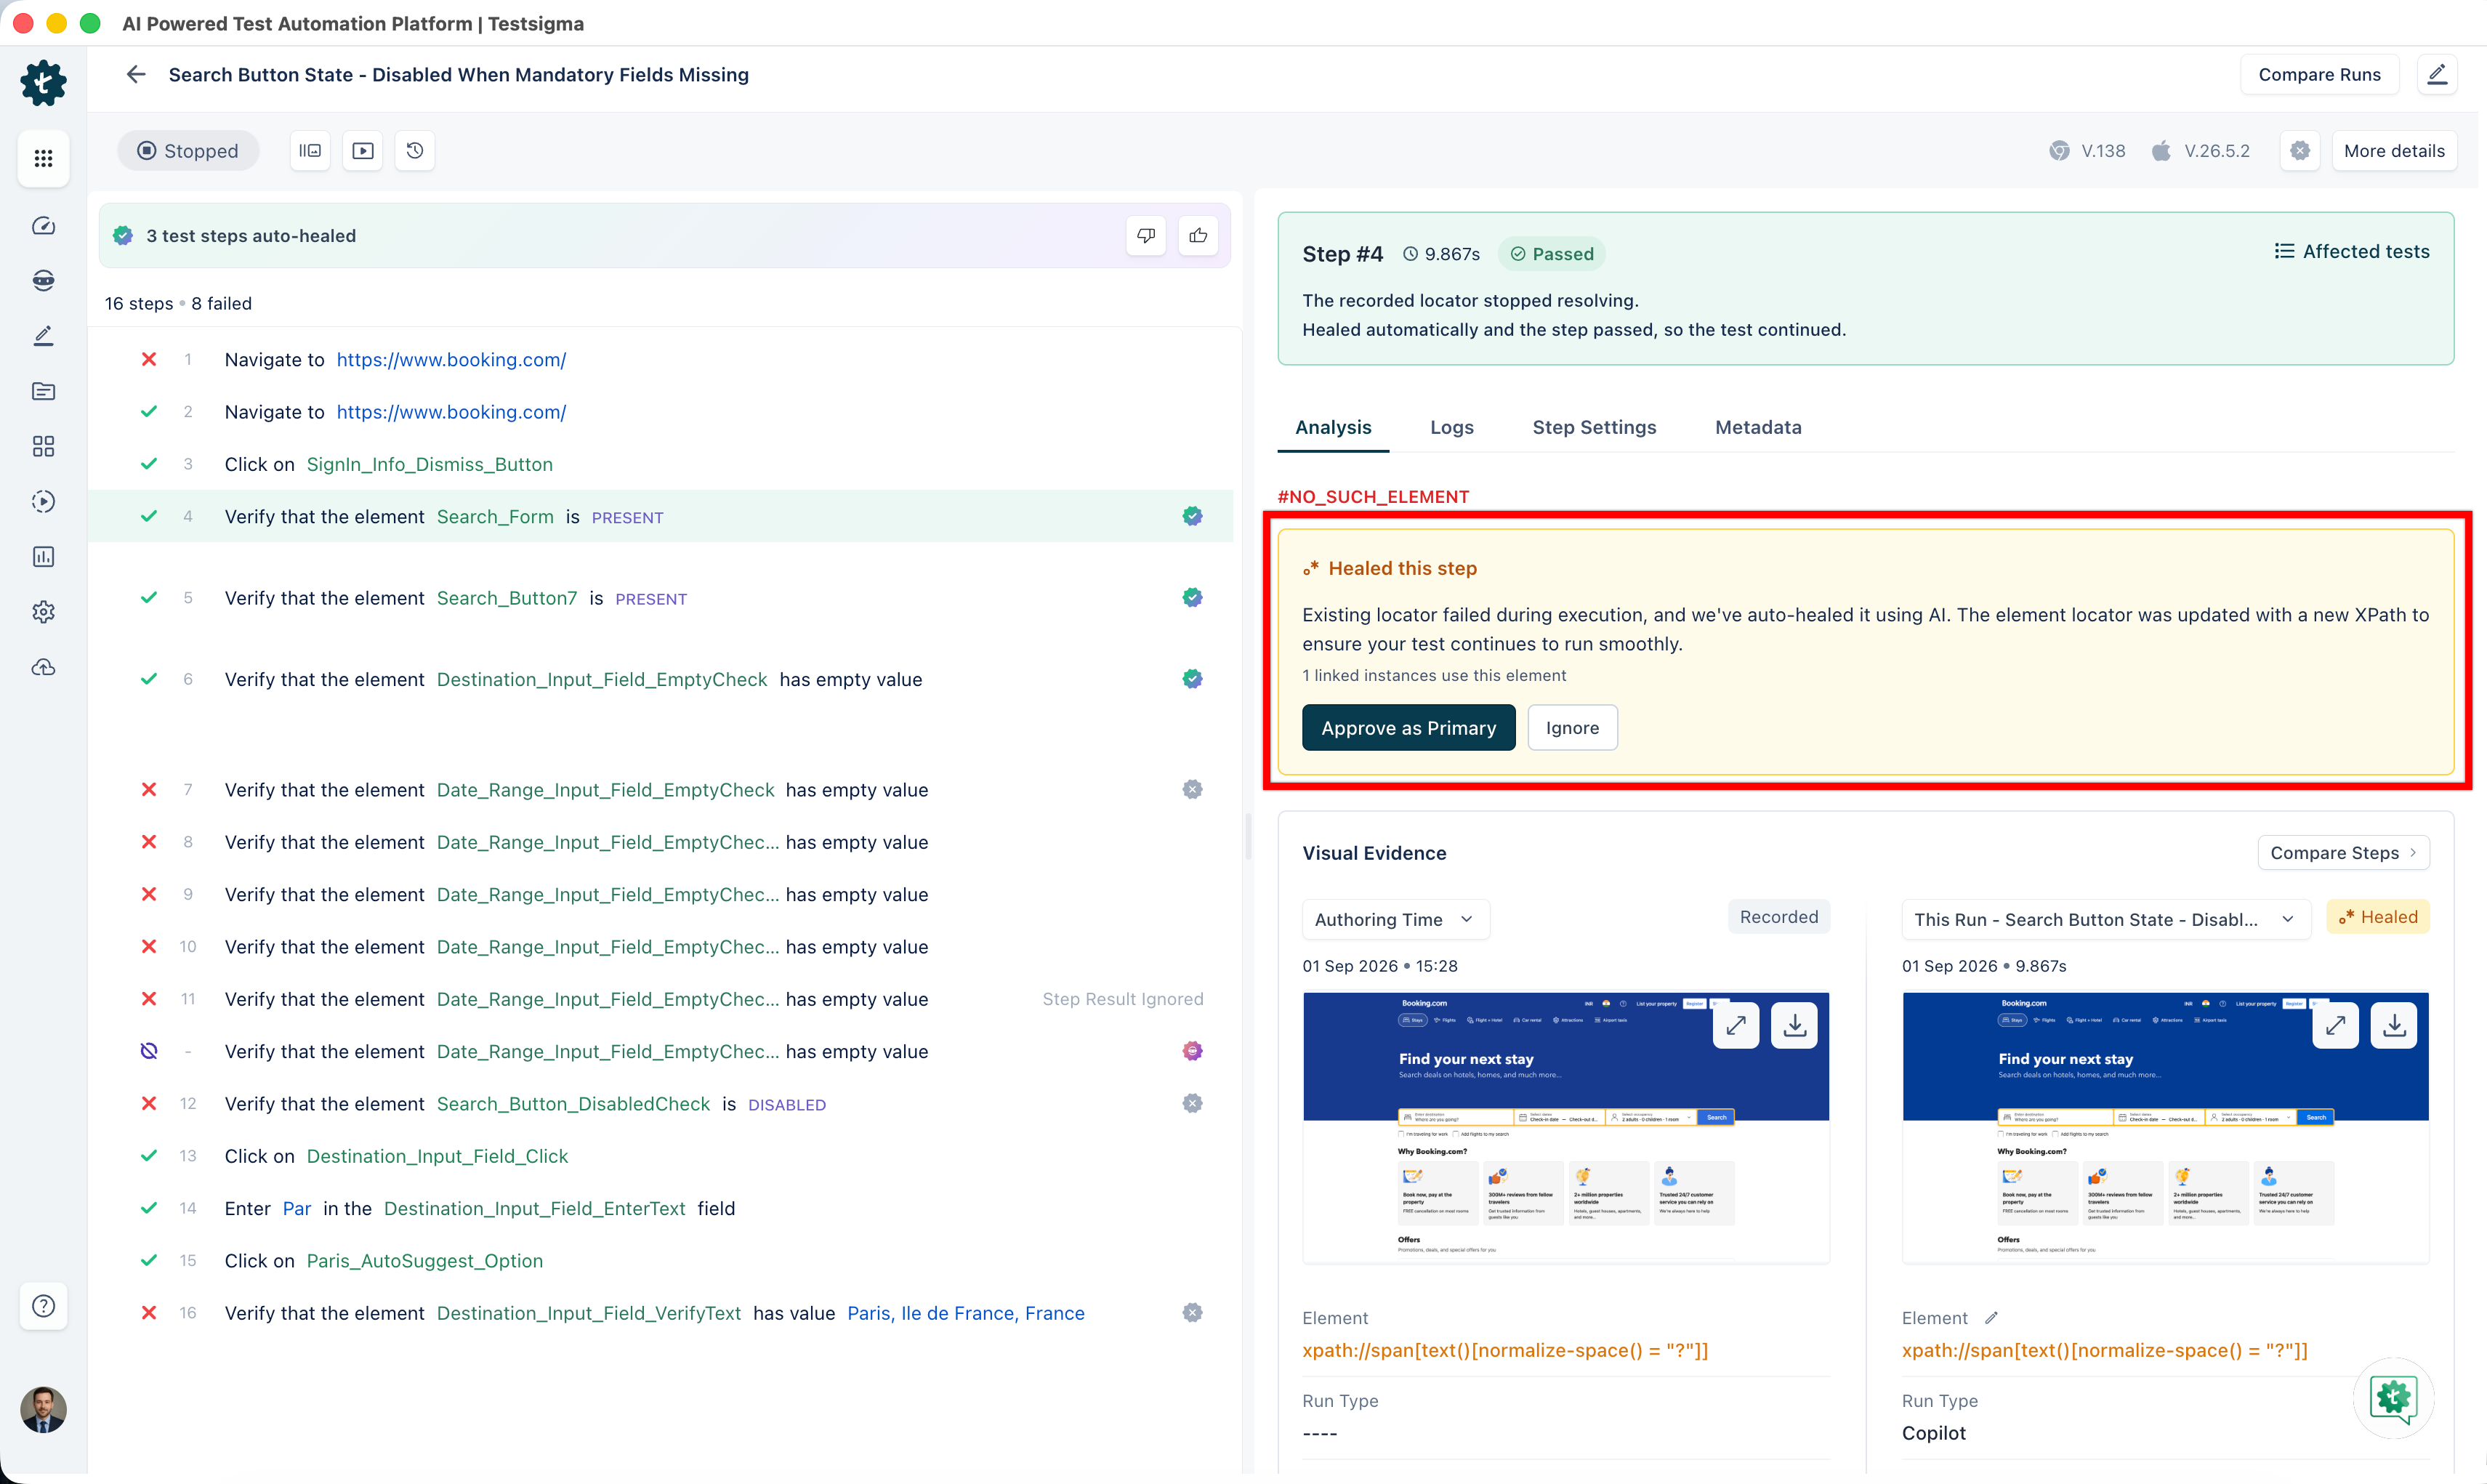
- On the Test Case Results page, select a step that shows the auto-heal icon.
-
Review the Healed this step card below the step header.
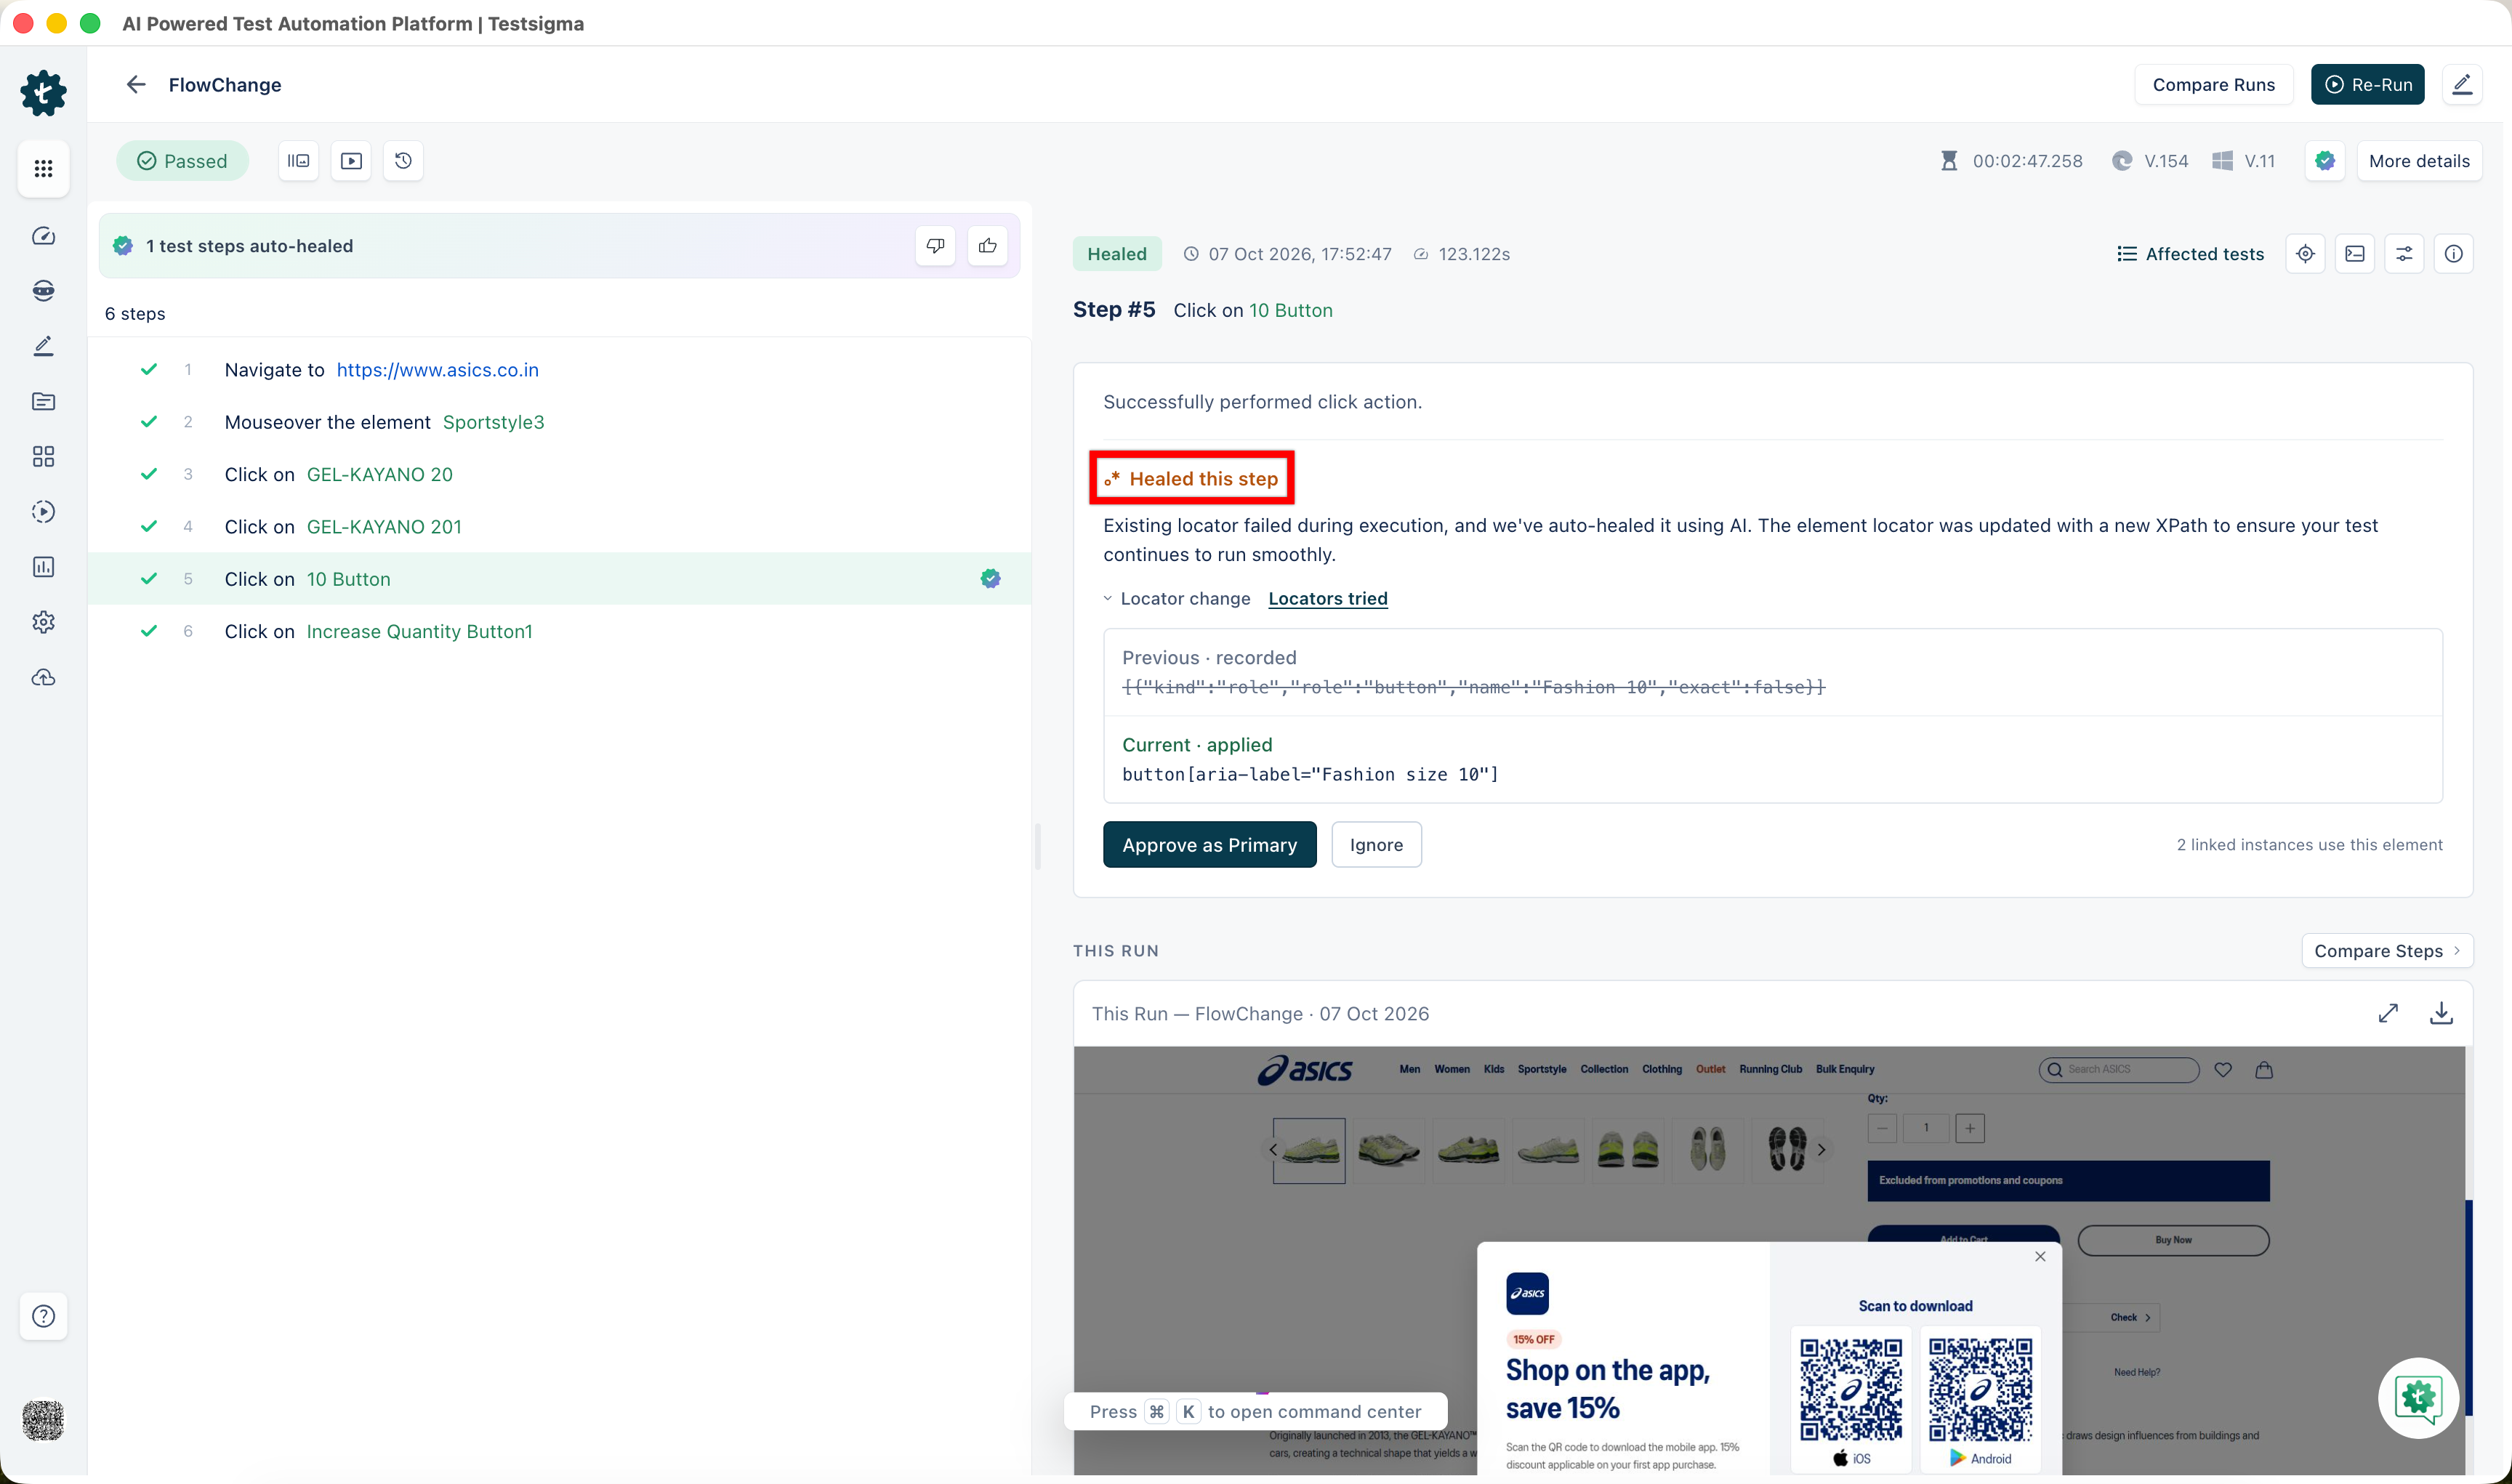
The Locator change section shows two values:
- Previous · recorded: The saved locator that failed, shown struck through.
- Current · applied: The locator Testsigma used to continue the run.
The count at the bottom of the card shows how many linked artifacts use this element.
- Click Locators tried to see how Testsigma found the element. For details, refer to Locators Tried.
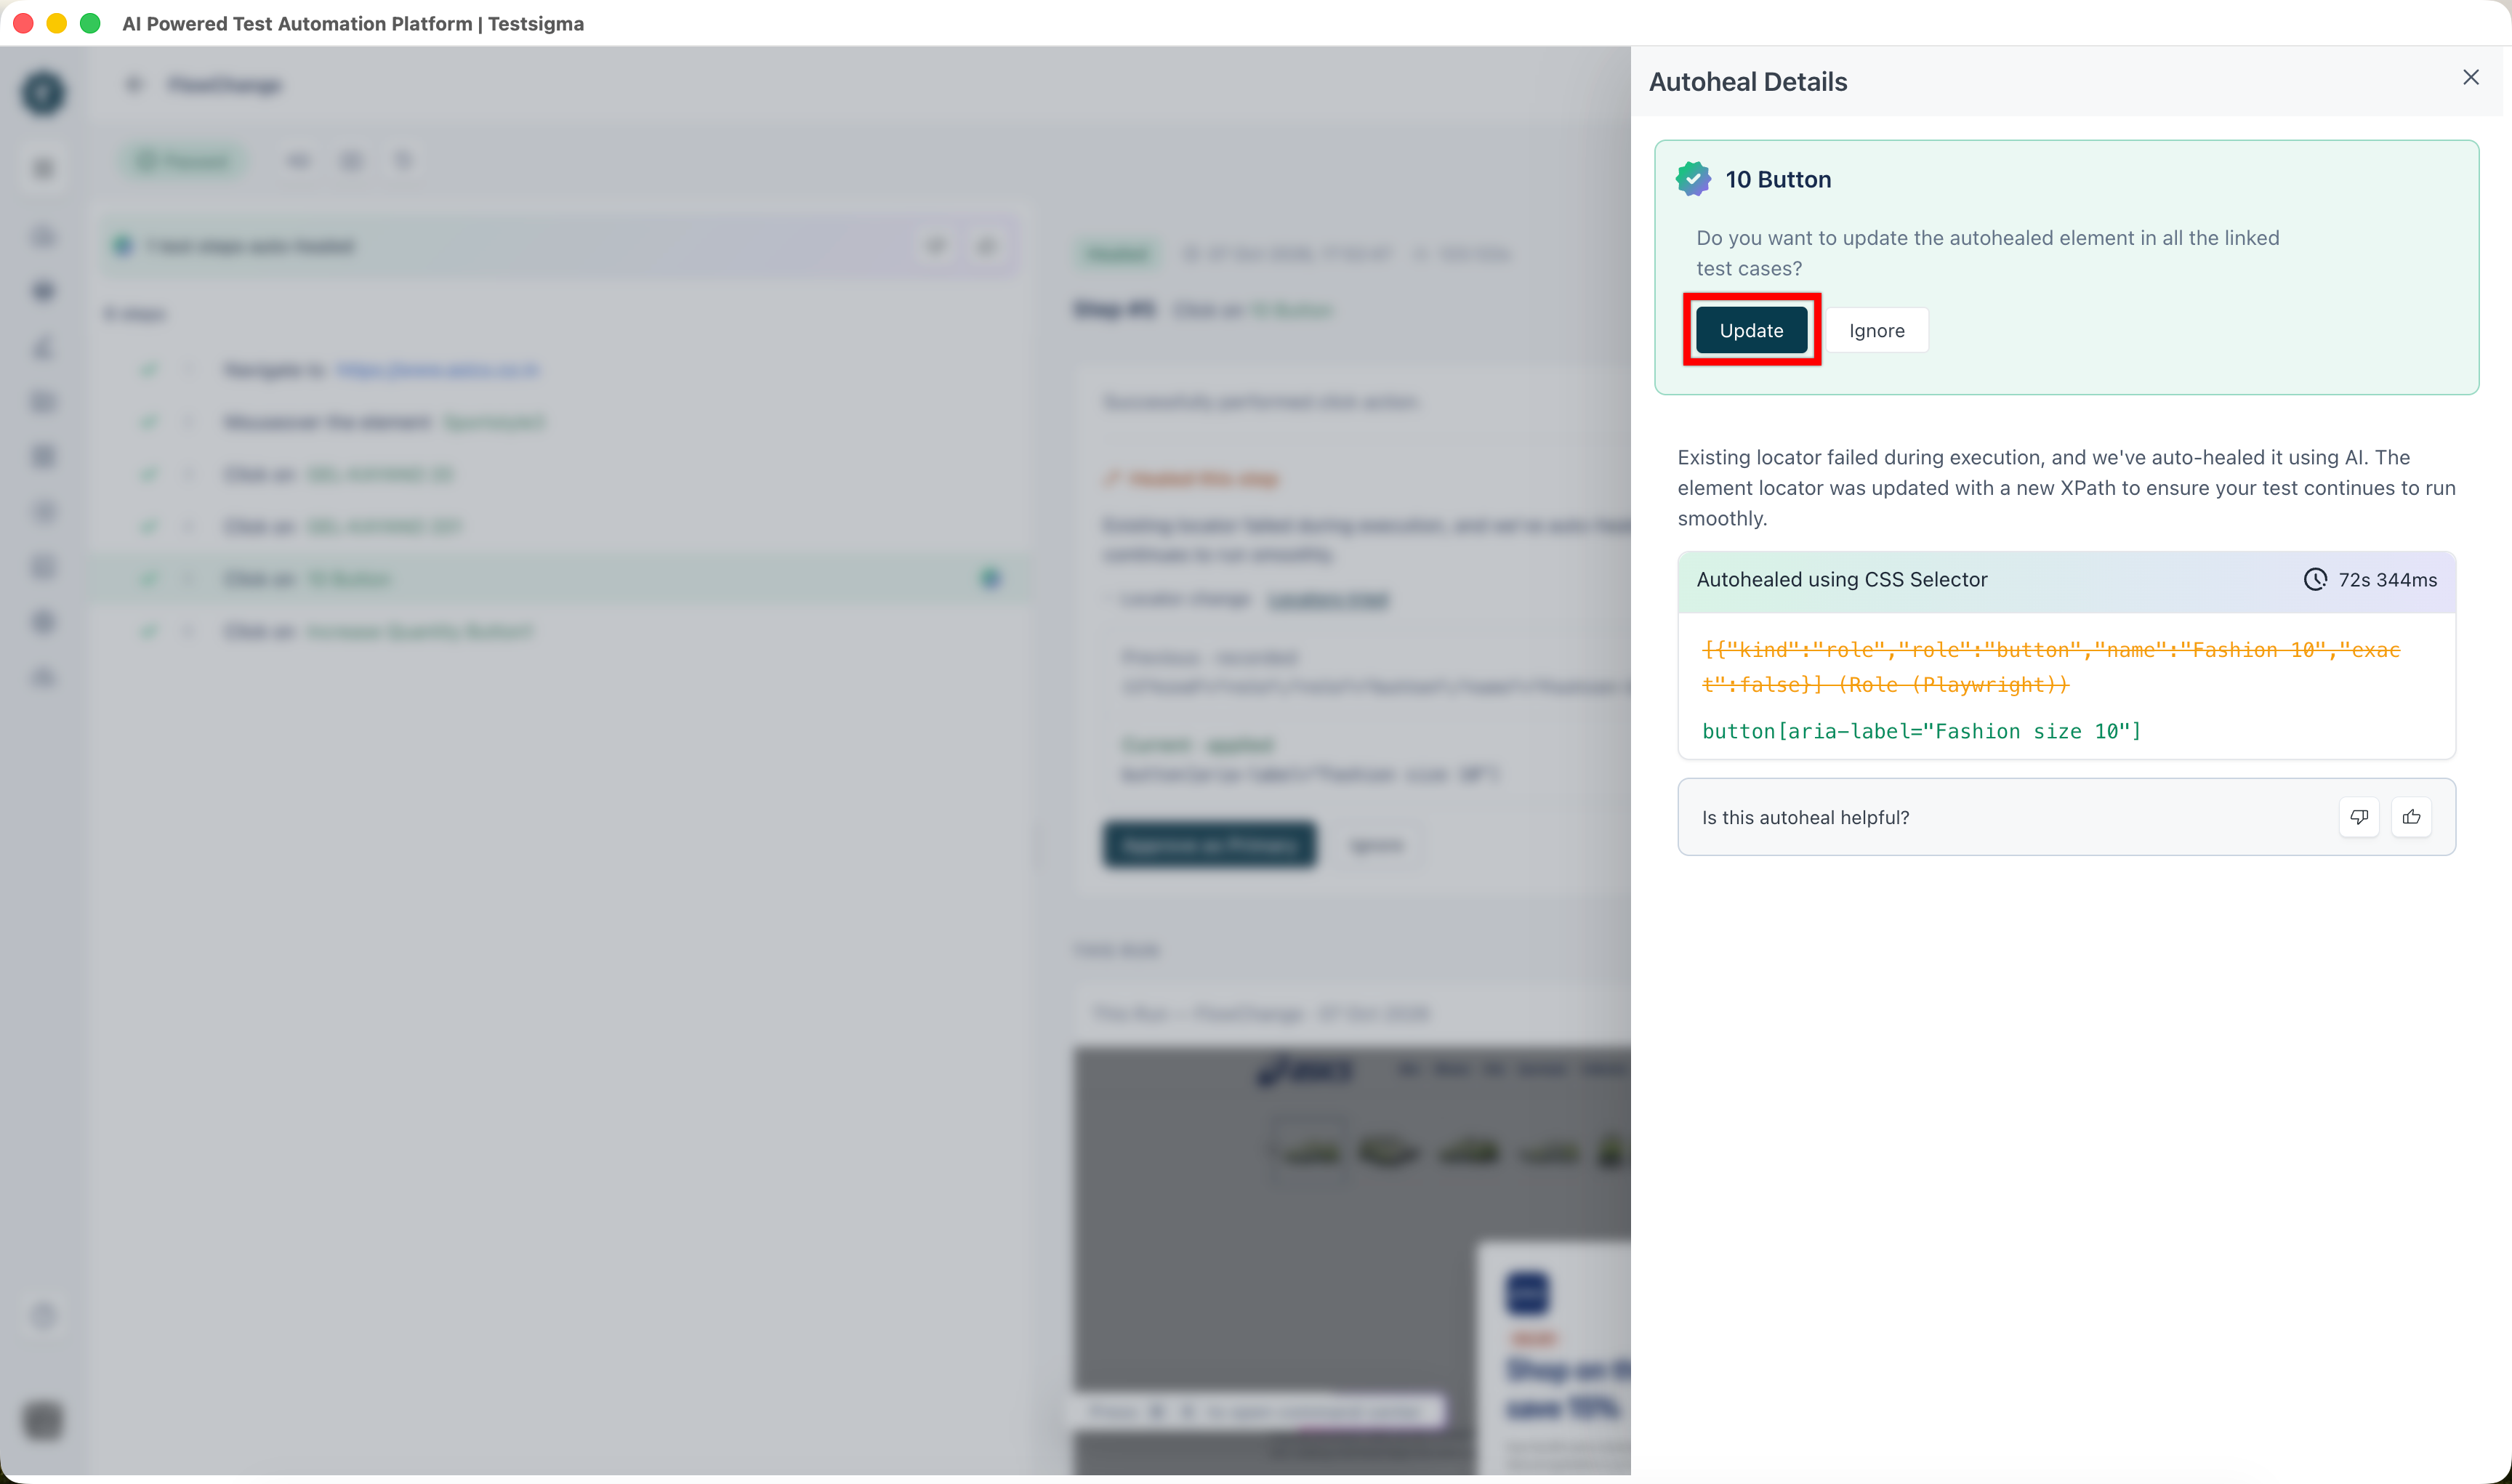
- Click Approve as Primary. This will open Autoheal Details panel, showing the element name and the locator type used for the heal, such as Autohealed using CSS Selector. The failed locator appears struck through above the new one.
- Click Update. The Update Element dialog opens.
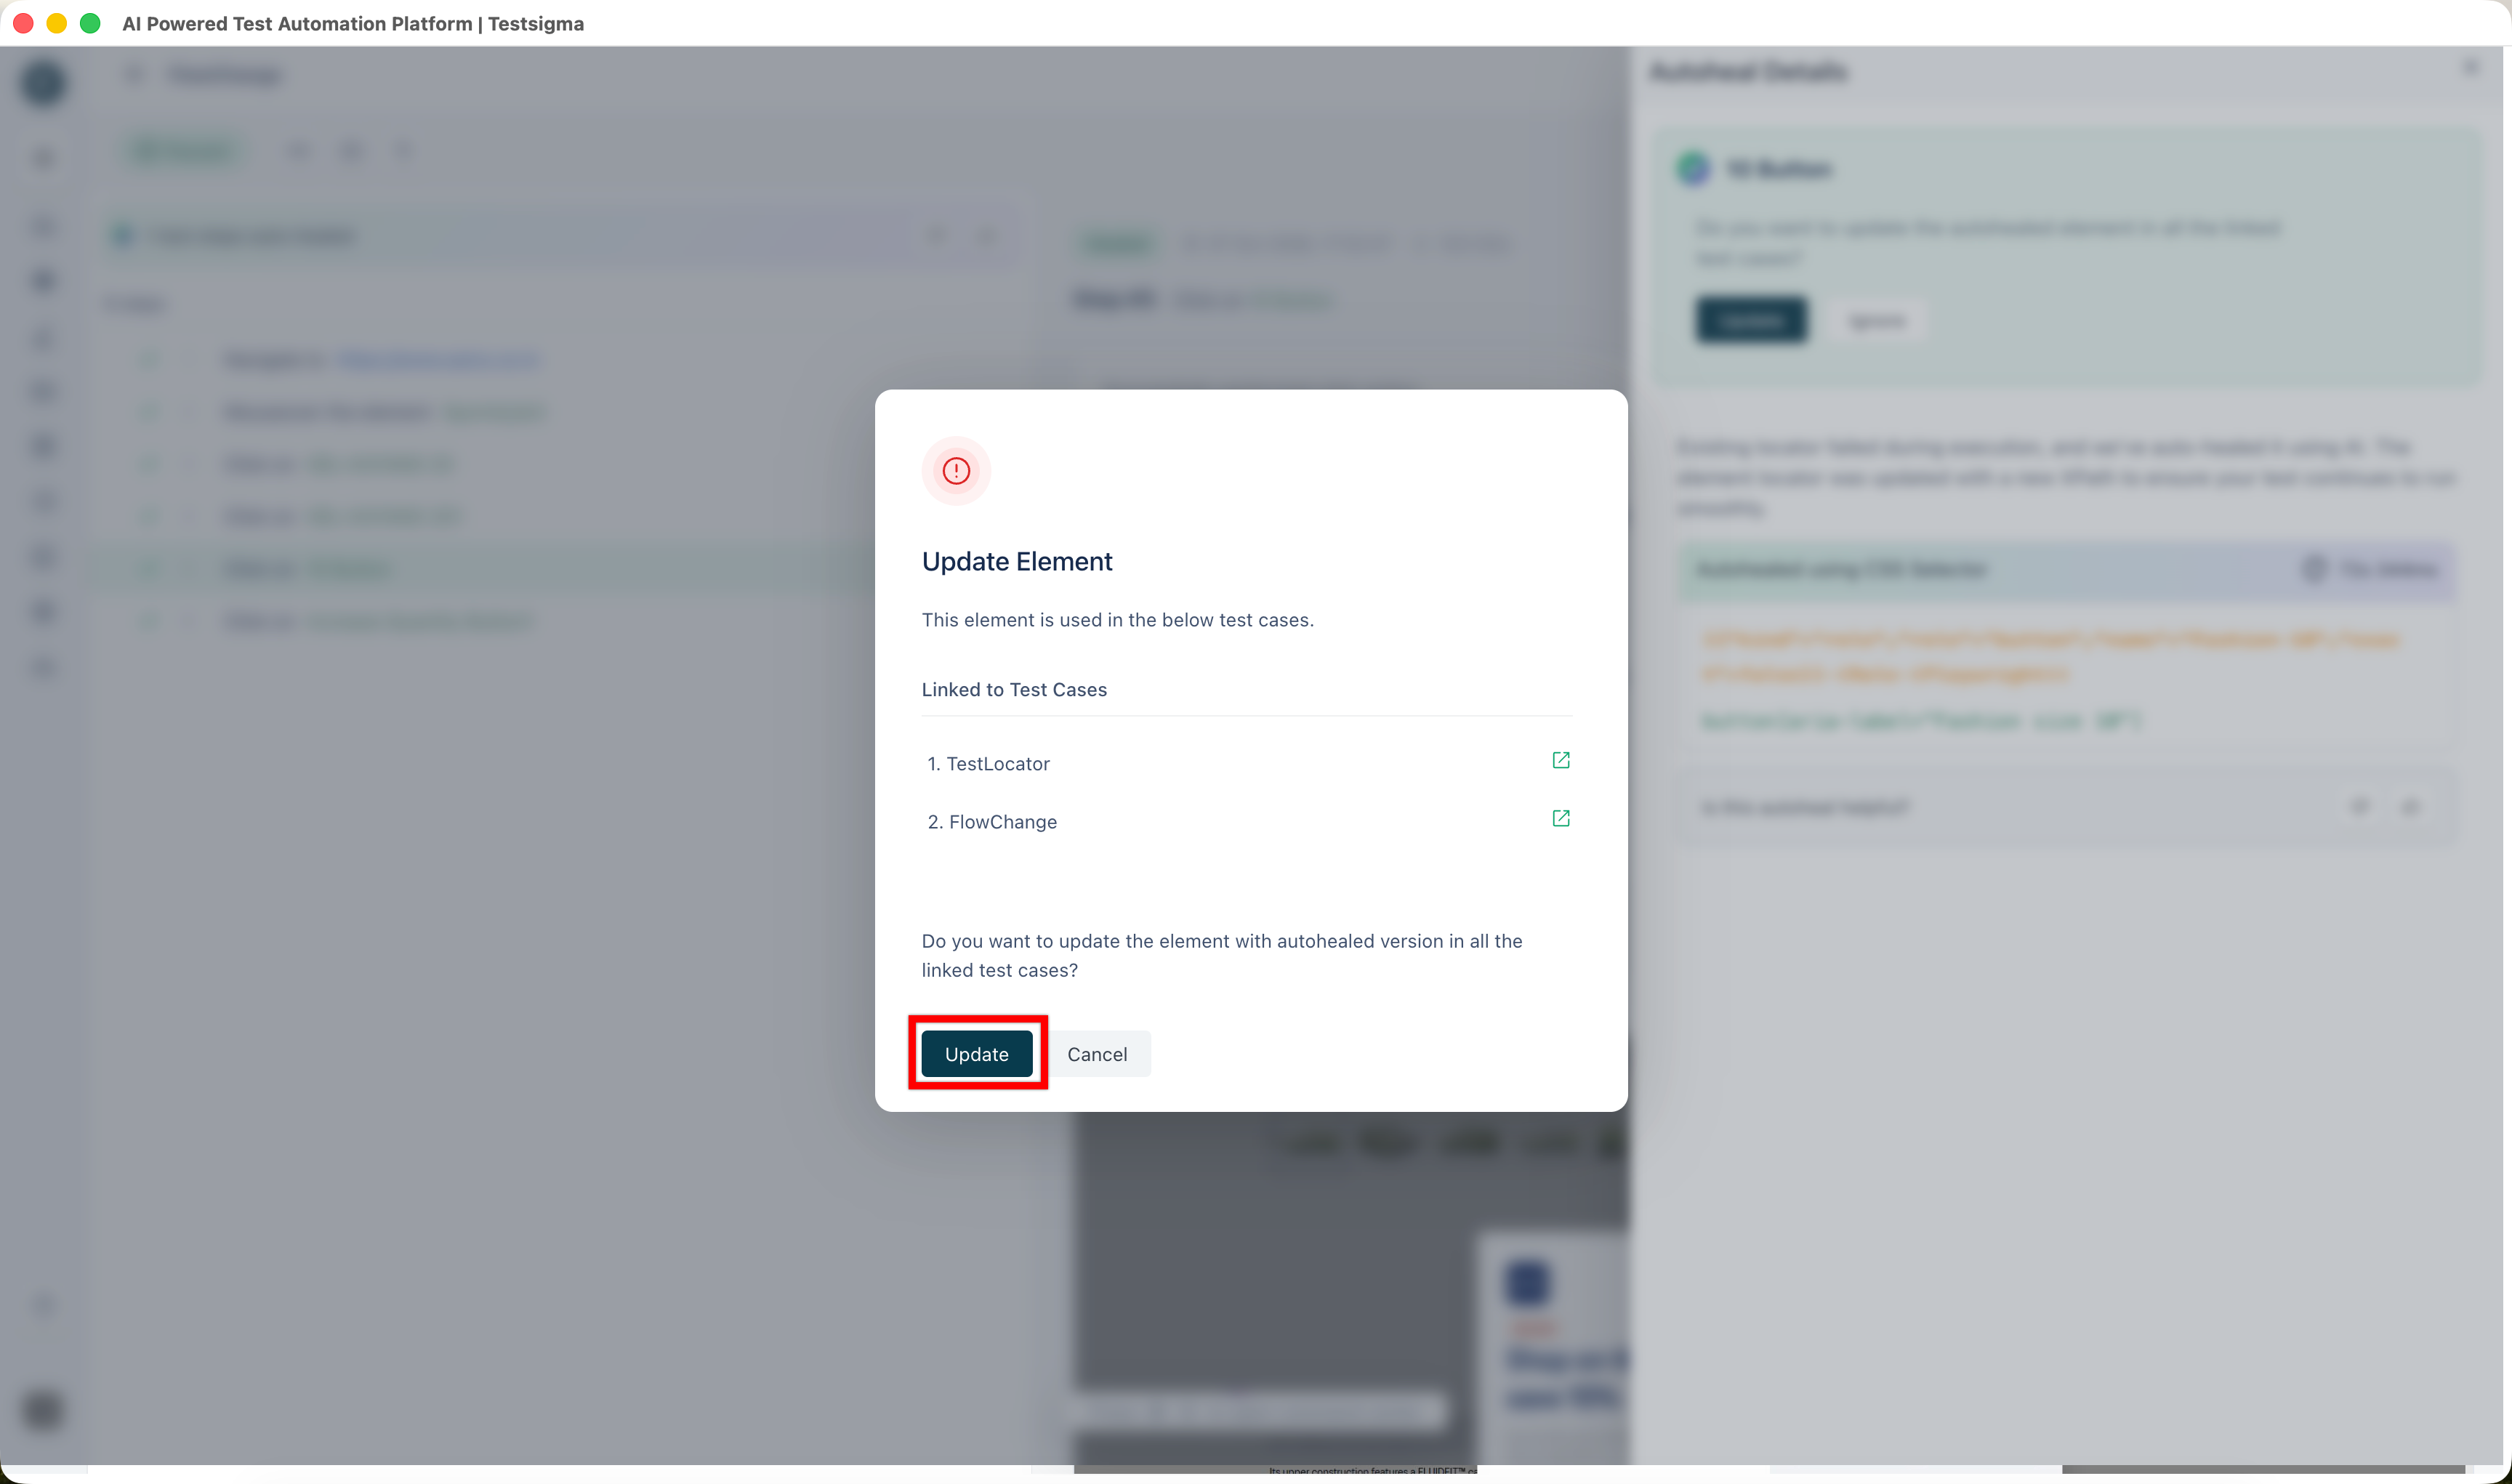
- Review the test cases listed under Linked to Test Cases. Click the open icon next to a test case to view it in a new tab.
- Click Update to update the element in all linked test cases.
 The Healed this step card now shows Approved.
Locators Tried
The Locators tried panel lists each stage of the search in the order it runs. The panel header shows the step number, the number of stages, and how the element was found.
| Stage | What it does |
|---|---|
| Primary | Tries the primary locator saved on the element. Every step starts here. |
| Last Working | Tries the locator that found the element in the previous run. It is kept on the element as a pending heal and is not part of the backup pool. |
| Backup Pool | Makes a single pass over the live screen to see which stored backup locators still resolve. No action is performed on the page at this stage. |
| Relearn Screen | Reads the screen as the app rendered it and writes new locators for the element. The result is kept as a pending heal and is tried first on the next run. |
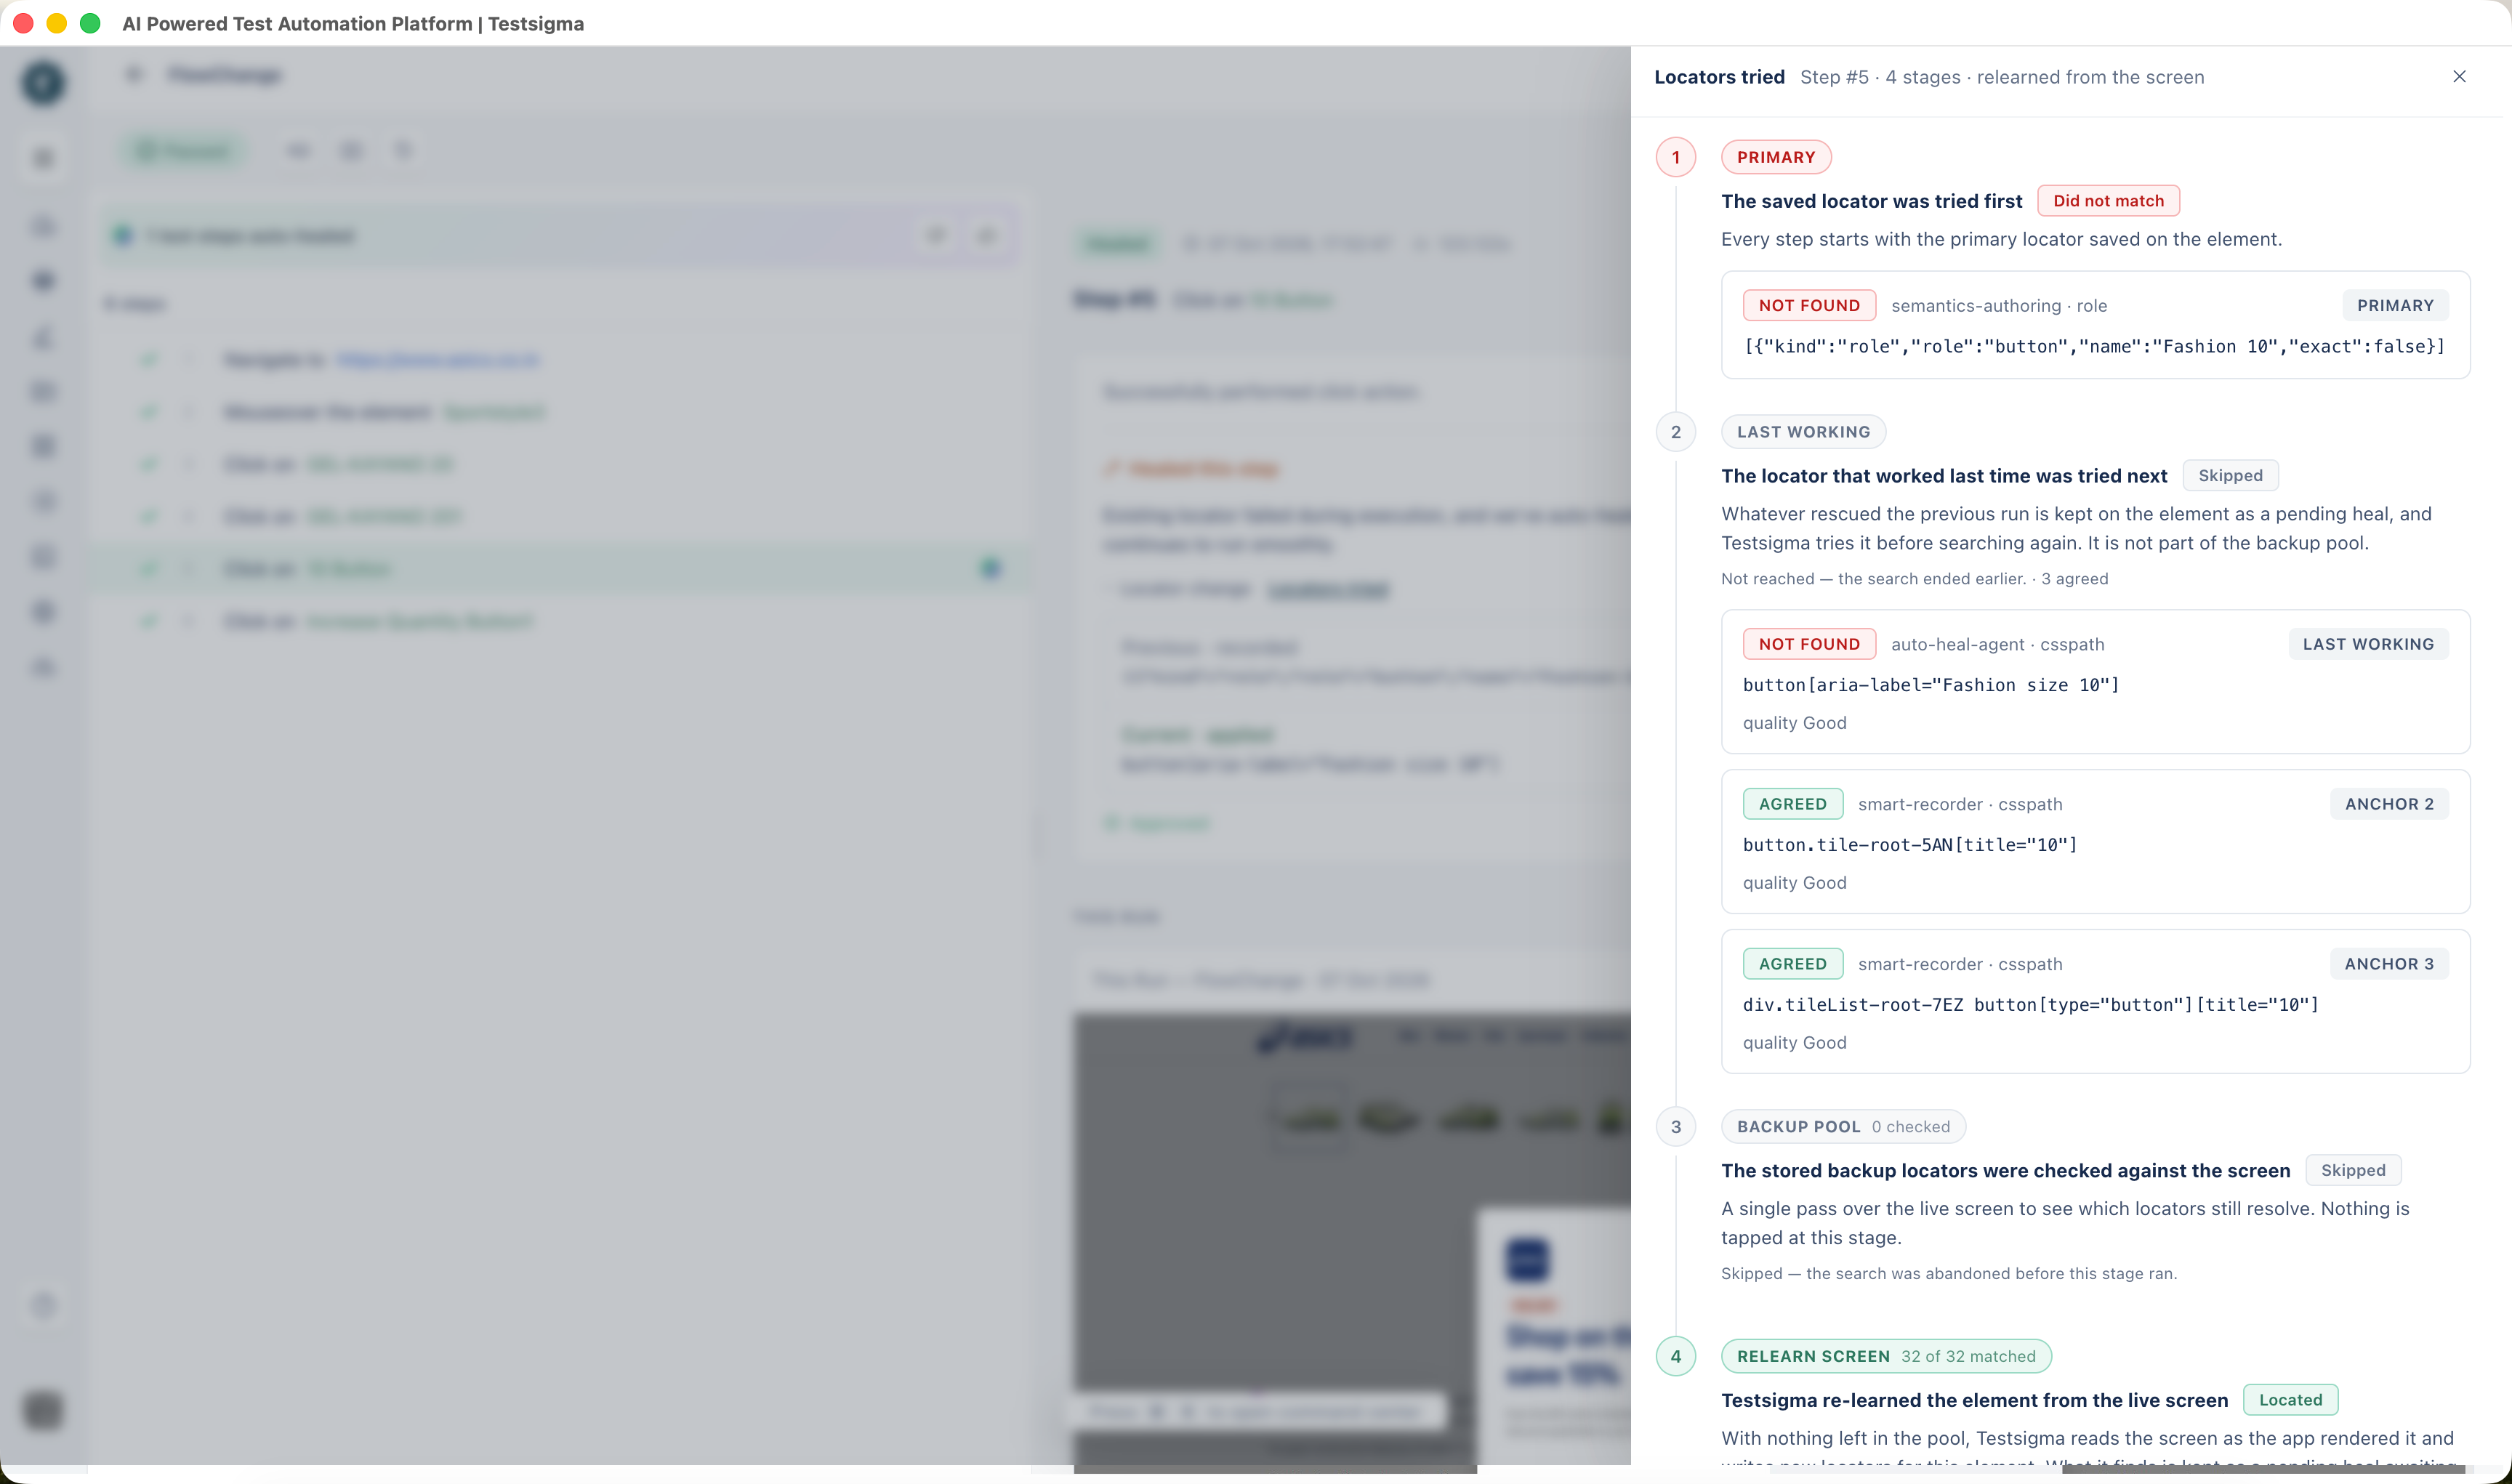
Each stage shows its outcome, such as Did not match, Skipped, or Located. Each locator in a stage shows:
- Its result, such as NOT FOUND, AGREED, or NEW.
- Its source and type, such as smart-recorder · csspath.
- Its role, such as PRIMARY, LAST WORKING, ANCHOR, or CANDIDATE.
- Its quality, Good or Fragile.
Additional Information
A pending heal is not the element's primary locator. Testsigma tries it before searching again on later runs, but the primary locator changes only when you click Approve as Primary.
When a Heal Fails
When auto-healing cannot find the element, the step fails. Select the failed step and review the ERROR and ANALYZER VERDICT sections to see why the element could not be resolved. For details, refer to the documentation on debugging test case failures.
Fix the Locator Yourself
If you would rather not accept the healed locator, you have two alternatives:
- Update element corrects the locator directly.
- Relearn step re-captures the step so a fresh locator is recorded.

Want to contribute or report missing content?