- auto healing
 Introduction: Auto-Healing
- Enable the Auto-Healing Feature
- AI-Enabled Auto-Healing for Web Applications
- AI-Enabled Auto-Healing for Salesforce Applications
- AI-Enabled Auto-Healing for Mobile Applications
- Auto-healing for AI-Generated Test Cases
- Using Auto-Healing in Copilot Test Execution
- Auto-Healing Insights
AI-Enabled Auto-Healing for Salesforce Applications
Testsigma’s AI-Enabled auto-healing automatically detects and fixes broken element locators caused by UI changes during Salesforce test execution. This article discusses how auto-healing identifies and updates element locators during Salesforce test execution.
Prerequisites
Before you begin, ensure that you have referred to:
Use Case for Auto-Healing
Let’s say we are testing lead creation in the Salesforce Sales application using a Salesforce connection in Testsigma.
Here are the steps to reproduce:
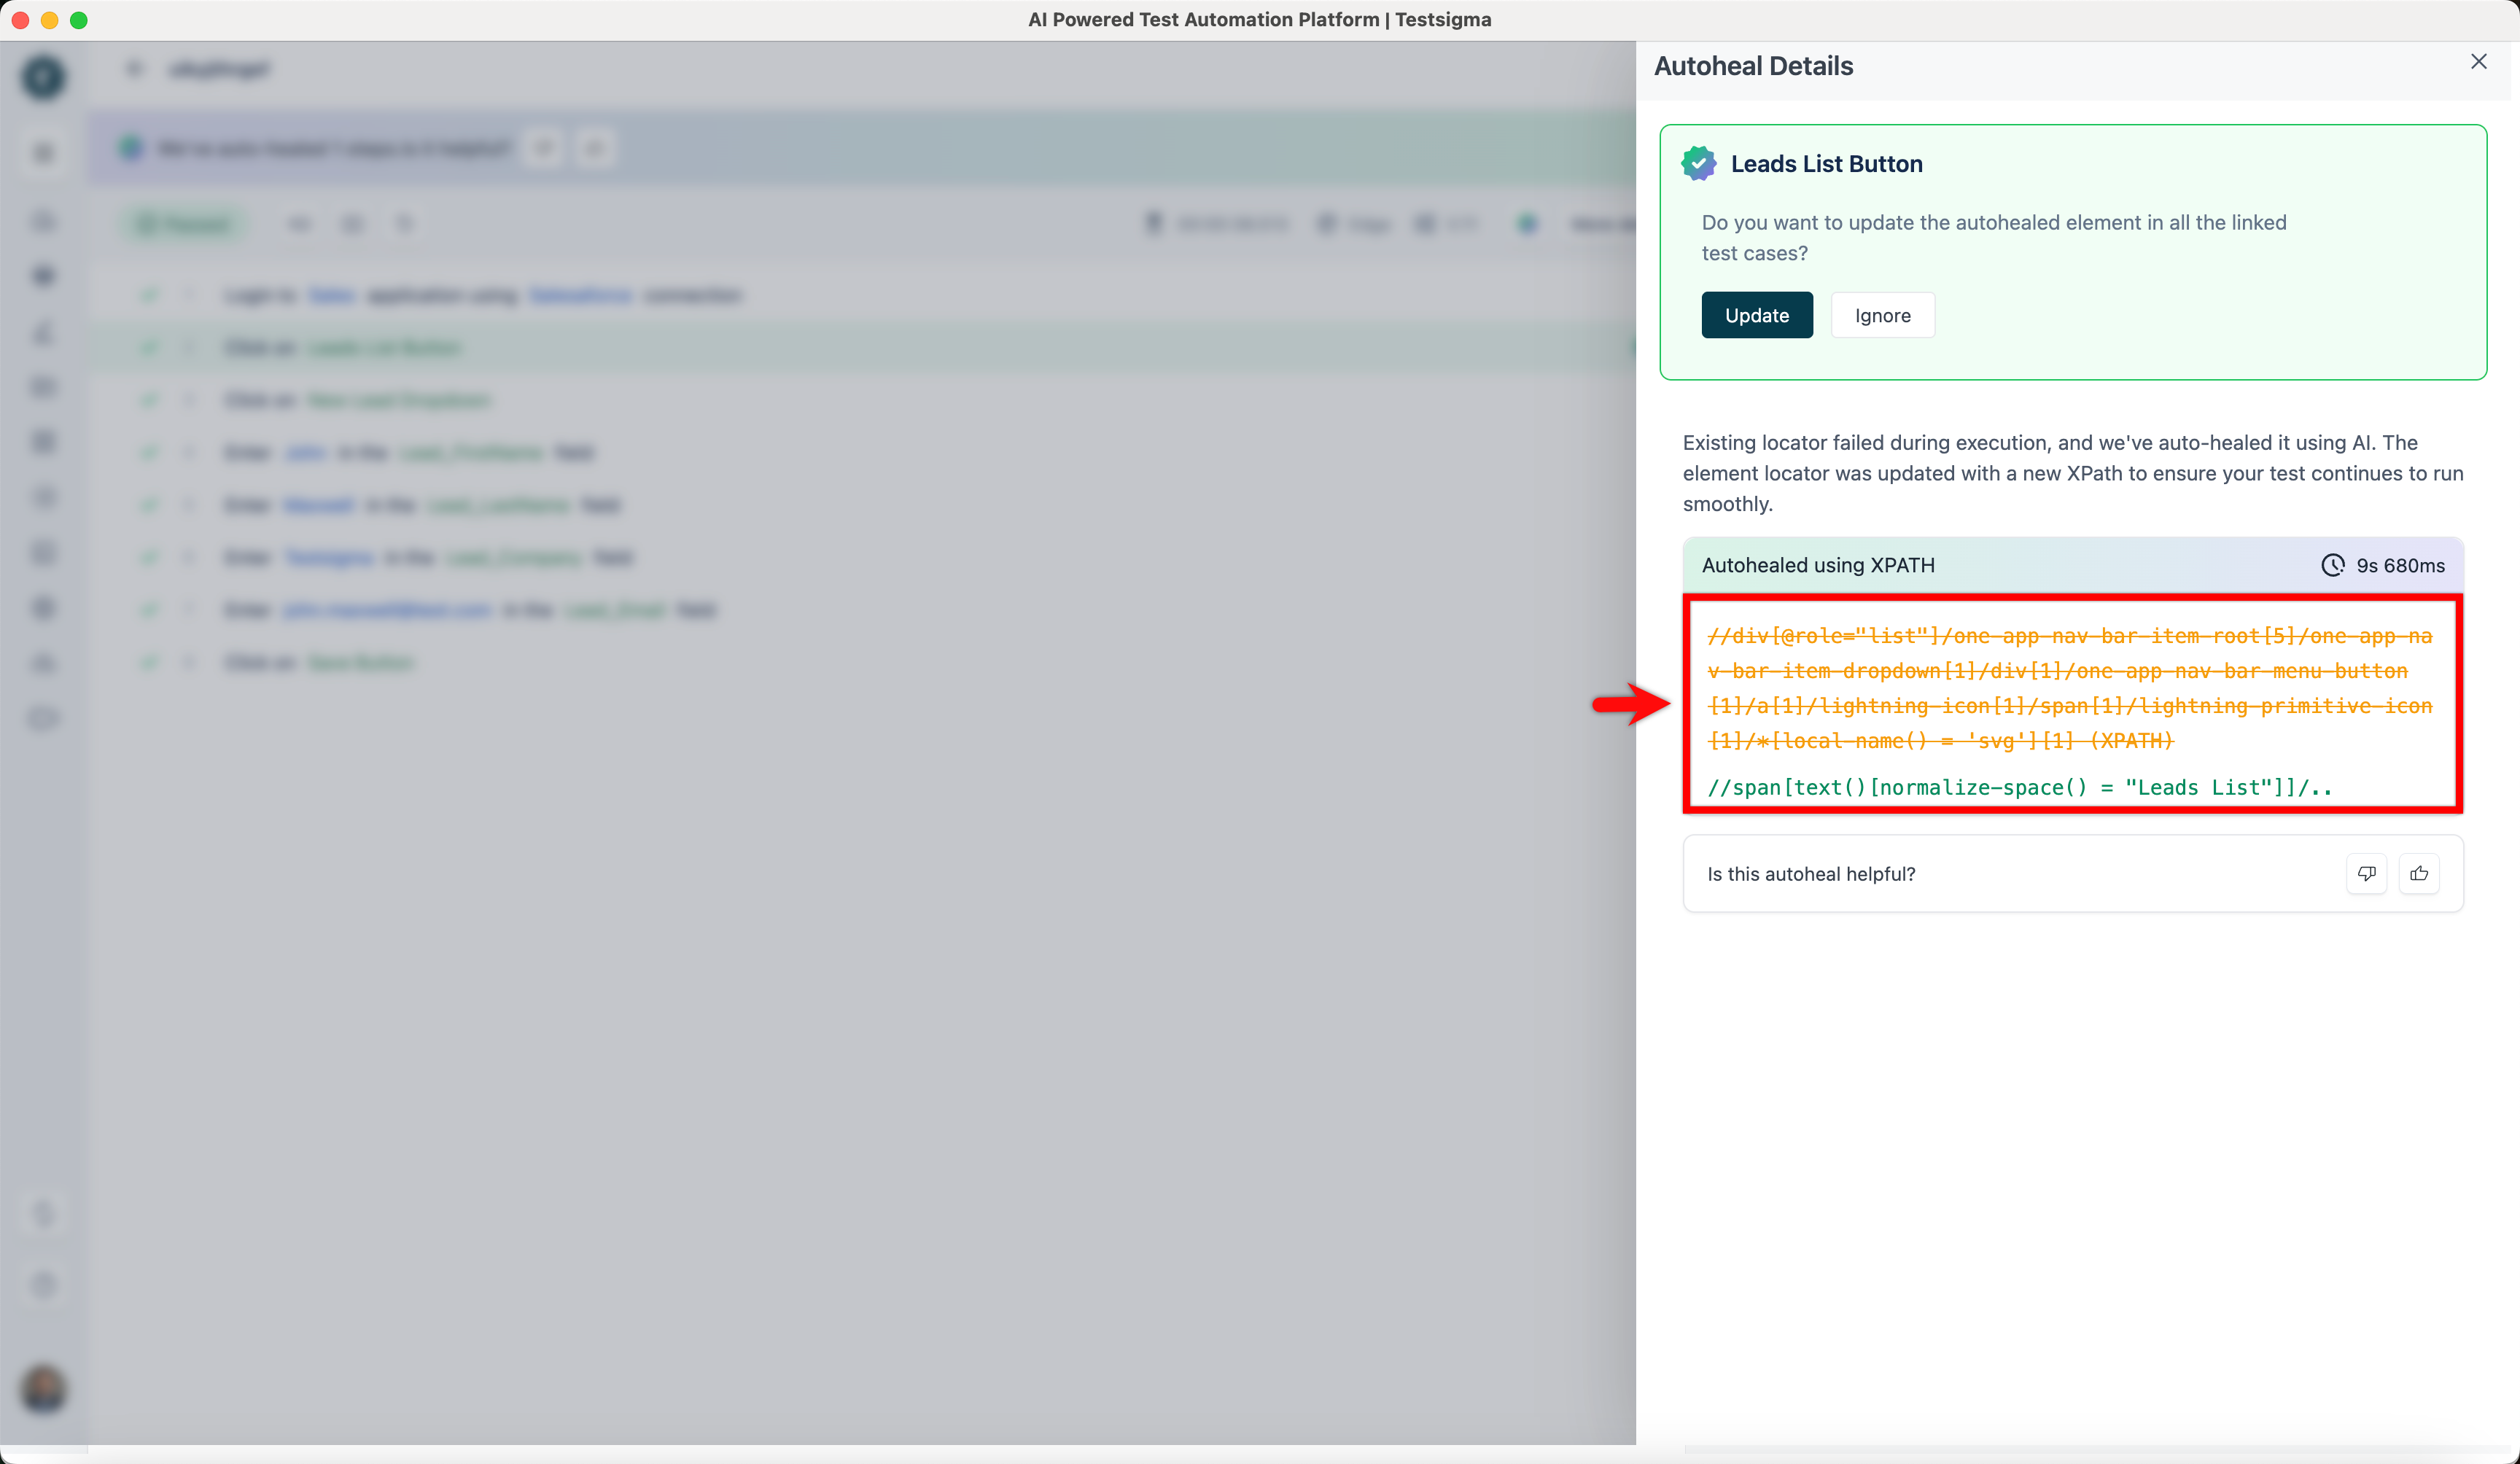
- Login to the Sales application using the Salesforce connection.
- Click on the Leads List button.
- Click on the New Lead dropdown.
- Enter John in the Lead First Name field.
- Enter Maxwell in the Lead Last Name field.
- Enter Testsigma in the Lead Company field.
- Enter john.maxwell@test.com in the Lead Email field.
- Click on the Save button.
Consider that the XPath for the Leads List button on Step 2 changed from //div[@role='list']//one-app-nav-bar-item-root[5] to //span[text()[normalize-space() = 'Leads List']]/...
When executing the test case with the Auto-Healing feature enabled, the test lab will successfully locate the element using the new XPath.
Auto-Healing Insights
Once the test execution is complete, please refer to the documentation on Auto-Healing Insights to view the auto-healing results and learn how to update the element locator.
Want to contribute or report missing content?