How to do cross-platform end-to-end testing with Testsigma
End-to-end testing involves the testing of an application from start to end. The objective of this testing is to simulate a real user scenario and validate the system under test and its components for integration and data integrity.
With cross-platform end-to-end testing, the application is tested from start to end on multiple platforms–mobile and web.
Let us take an example of a flight booking application.
You might want to book a ticket through the desktop application and modify the booking details on an Android mobile application. Meanwhile, choose to cancel the booking on your iPad.
This will include the following steps:
- Book the flight on the desktop web.
- Modify the booking done in step 1 on the Android application.
- Cancel the booking done in step 1 and modified in step 2, on the iPad application.
Today, users have the choice to use the same application across multiple devices,OS, and browsers. Hence, to ensure that your application provides your users similar experiences on multiple platforms, it must be tested on as many platforms as possible. With Testsigma, you can test such cross-platform end-to-end testing scenarios easily.
Prerequisites
To perform a cross-platform end-to-end testing on Testsigma, you should know the following:
Steps to perform cross platform end-to-end testing
Create a test plan
- Click on the Test Development icon on the left and navigate to Test Plans. This will take you to the Test Plans page.
- On the test plans page, click +Test Plan, to create a new test plan.
- Enter a meaningful Name of minimum of 4 characters and a Description(optional) for your test plan, on the text fields provided.
- Click Next.
- To switch the UI to the classic version, click the toggle Switch to Classic UI and jumpt to step 13.
- If you choose the latest version, follow the below steps.
- To add test suites to the test plan, click Add Test Suites.

-
On the Selected Test Suites window:
- Click the toggle Enable End-To-end Testing, to enable end-to-end testing.
- Select Project from the dropdown menu, to see the associated test suites.
- Select the test suites from the Available Test Suites list.
- Click >>Add Selected, to add the selected test suites to the test plan.
- Click Add, to add the test suites to the test plan.
-
To select the environment to run the test suite against, select Add Machine.
- To run individual test suites on multiple environments, click +Add Machine,associated with each test suites.
-
You can either choose to create a new machine or choose to run the test suit on an existing environment.
- Select Create New Machine, to create a new machine.
- Select Add to Existing Machine, to run the test suite on an existing machine.
-
If you have selected Create New Machine, on the Add Machine pane:
-
Provide the following details:
- Name: Name of the test environment should be a minimum of 4 characters.
- Test Lab Type: This option allows you to select the test lab your test suites are executed on. This includes your local device, the test lab plugins installed or the Testsigma cloud infrastructure. The test lab plugins include BrowserStack, Sauce Labs, Lambda Test, and so on.
- Prerequisites: This is a condition or set of conditions to be met for the test suite to be executed.
- Operating System: Select the operating system to run the test suits.
- OS Version: Select the operating system version.
- Browser: Select the browser.
- Browser version: Select the browser version.
- Resolution: Select the resolution of the device.
- Click the toggle Headless Test, to enable headless testing. (This option is available only on Google Chrome). For more information,refer to headless testing.

-
- To add multiple test execution combinations (test suite+ test machine), repeat step 6 to step 10 and jump to step 16.

-
If you choose the classic UI follow the below steps,
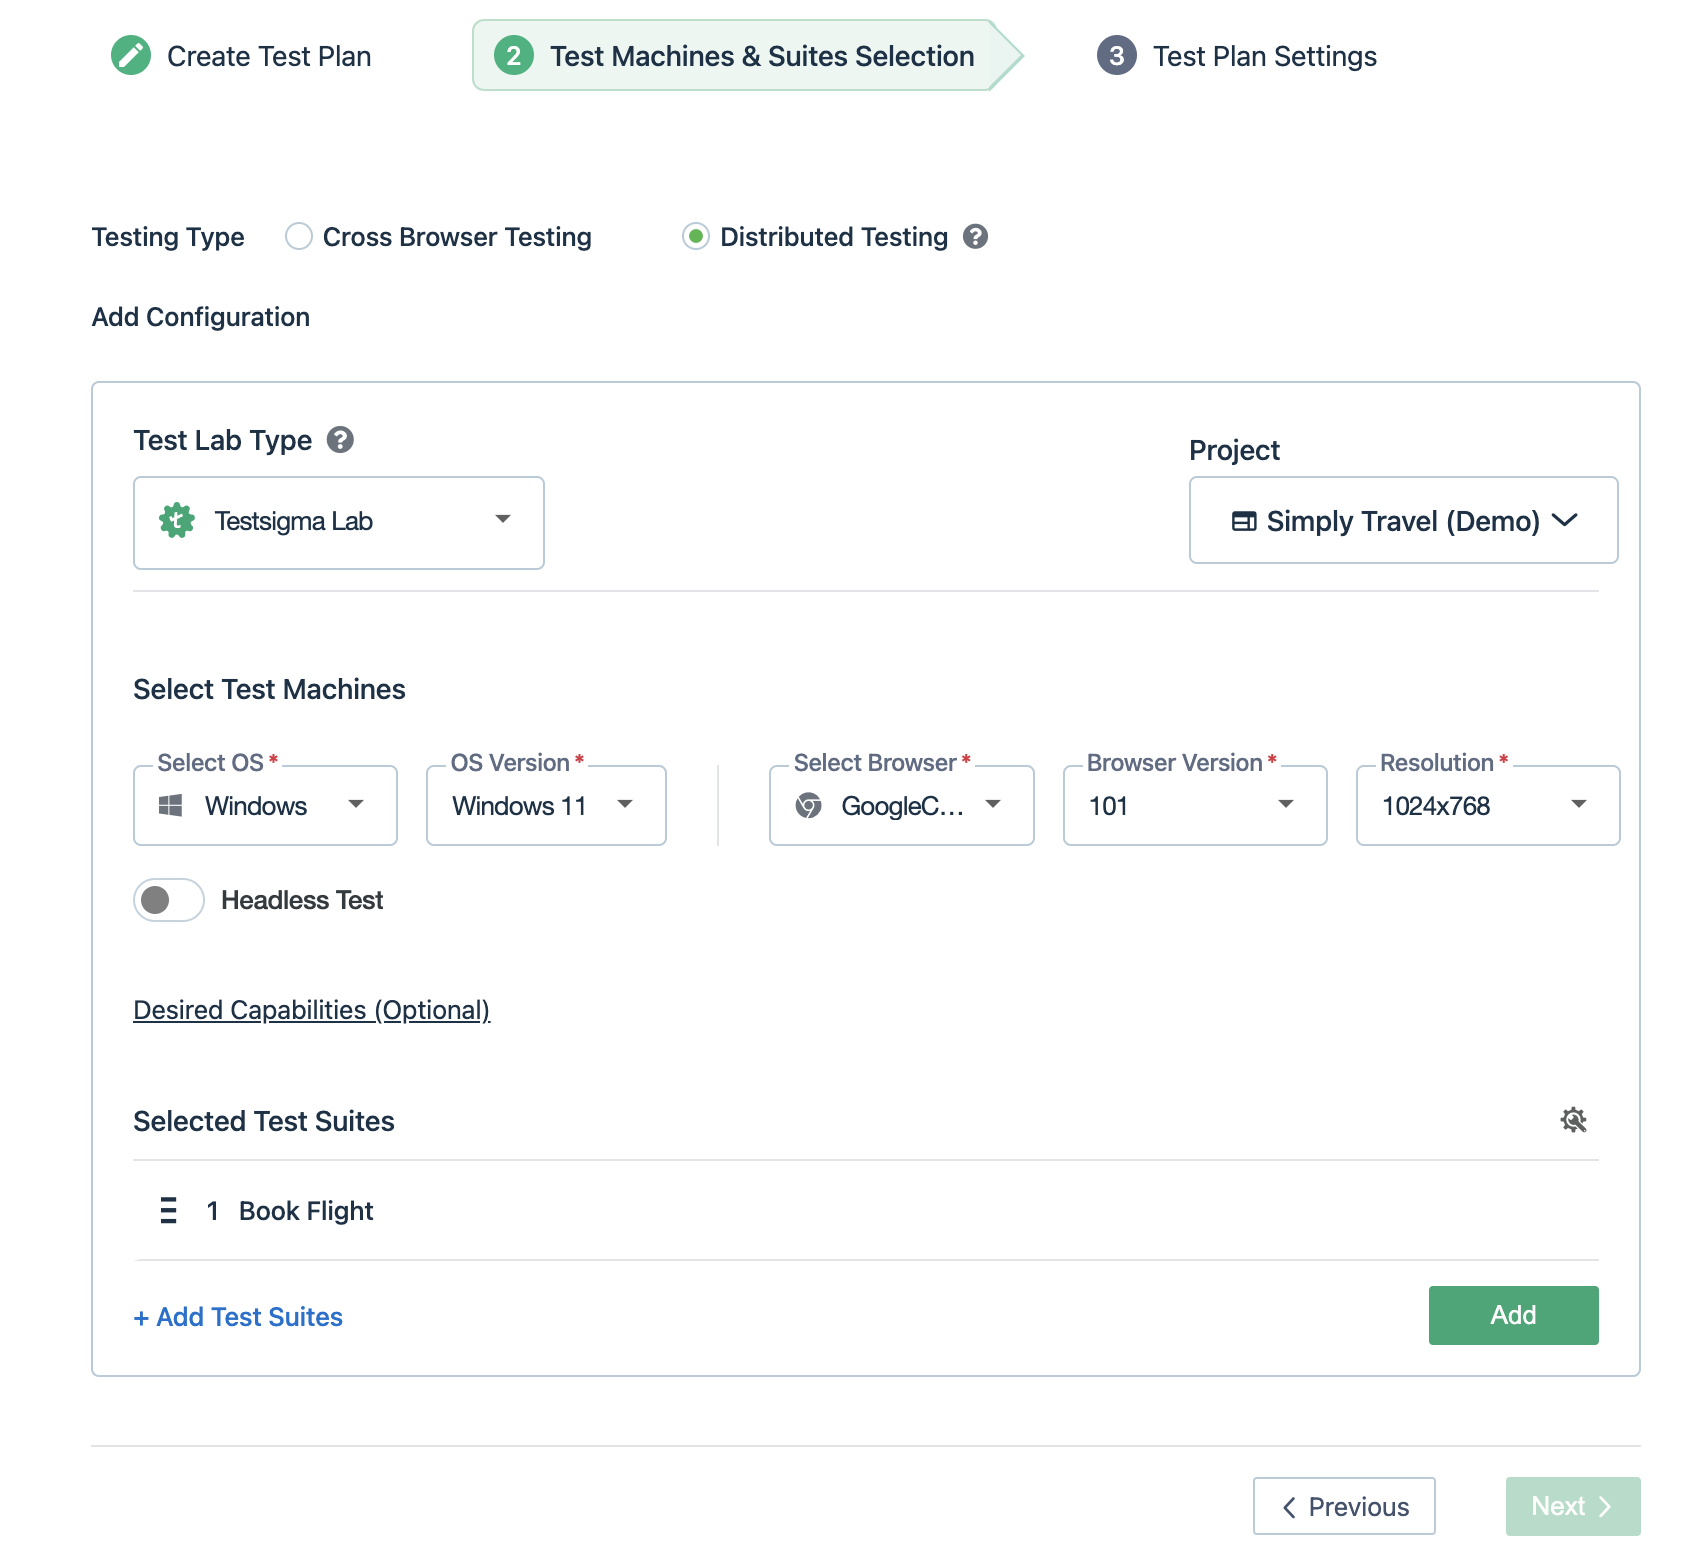
- Select the Testing Type as Distributed Testing, to enable the cross-platform end-to-end testing feature. Distributed testing allows you to split your test suites across multiple test machines. In other words, enabling cross platform end-to-end testing. For more information,refer to distributed testing.
-
Under the Add configuration section, select the following:
- Test Lab Type: This option allows you to select the test lab your test suites are executed on. This includes your local device, the test lab plugins installed, or the Testsigma cloud infrastructure.The test lab plugins include BrowserStack, Sauce Labs, Lambda Test, and so on.
- Project: Select the project from the dropdown menu, to see the associated test suites.
- Operating System(OS): Select the operating system to run the test suits.
- OS Version: Select the operating system version.
- Browser: Select the browser.
- Browser Version: Select the browser version.
- Resolution: Select the resolution of the device.
- Click the toggle Headless Test, to enable headless testing.(This option is available only on Google Chrome).
- Click +Add Test Suites, to add the test suites associated with the project.
- Select the Testing Type as Distributed Testing, to enable the cross-platform end-to-end testing feature. Distributed testing allows you to split your test suites across multiple test machines. In other words, enabling cross platform end-to-end testing. For more information,refer to distributed testing.
- To add test suites, repeat step 7.
- To add multiple test execution combinations (test suite+ test machine), click +Add.
- Repeat steps 12-14.
- Click Next.
-
Under Test Plan Settings,
- Select the instances when the notifications are to be sent. For example, when the test suites executions have been Passed, Aborted, Queued, Stopped and so on.
- Specify the email to which the notifications have to be sent. If the collaboration plugins such as Google Chat, Slack, or MS Teams have been enabled the notifications will be sent to the associated accounts.
-
Specify additional settings: Click Additional Settings, to expand the additional settings section.
Under Additional Settings section,- Specify the Page Load Timeout in the text field provided.
- Specify the Element Timeout in the text field provided.
- Select the Environment.
- Specify the instances to record the screen shots. For example, you can either choose to capture screen shots for All Tests, or capture screen shots only for Failed Steps.
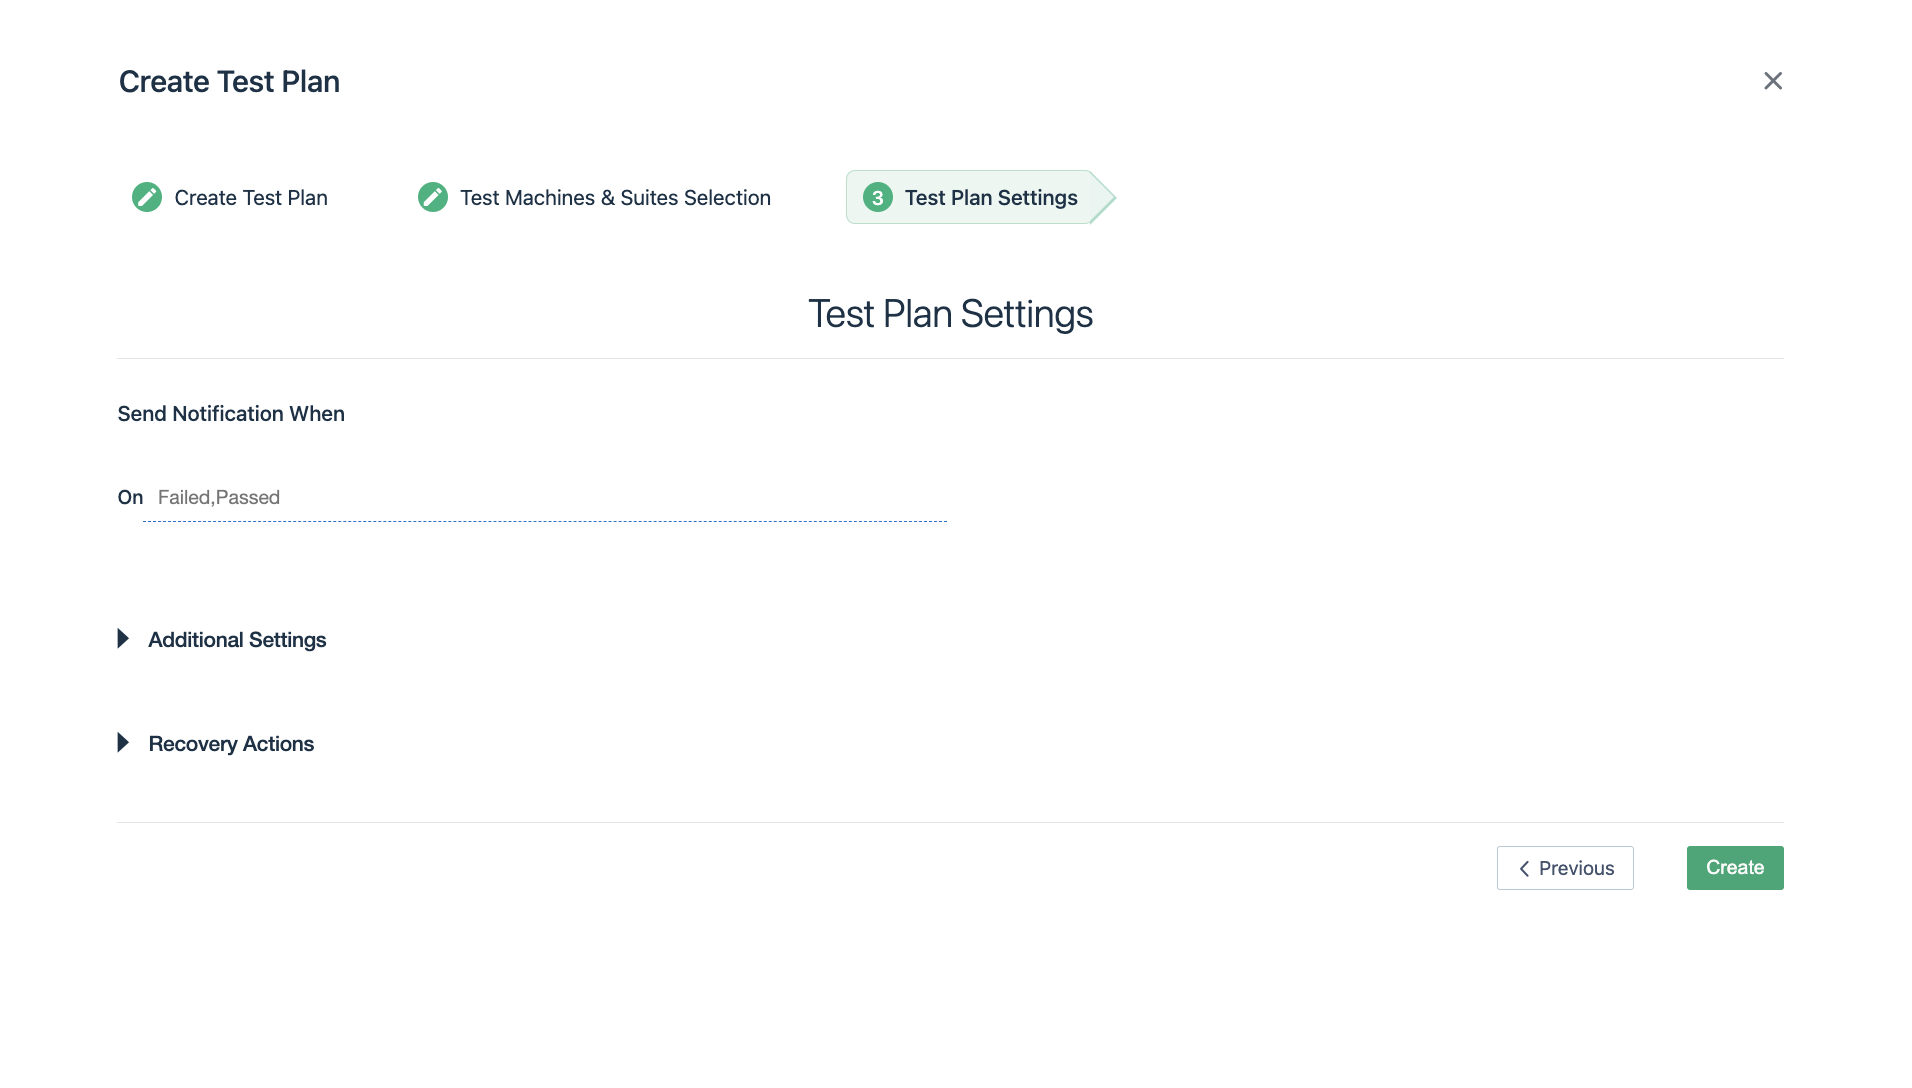
- Specify recovery actions: Click Recovery Actions, to expand the recovery actions section and specify the recovery actions to be performed.

- Click Create. You have now successfully created a test plan for cross platform end-to-end testing.
- Once the test plan is created, you will be taken to the test plan page.
-
On the Test Plan Page,
- Click Run Now to see the test plan in execution.
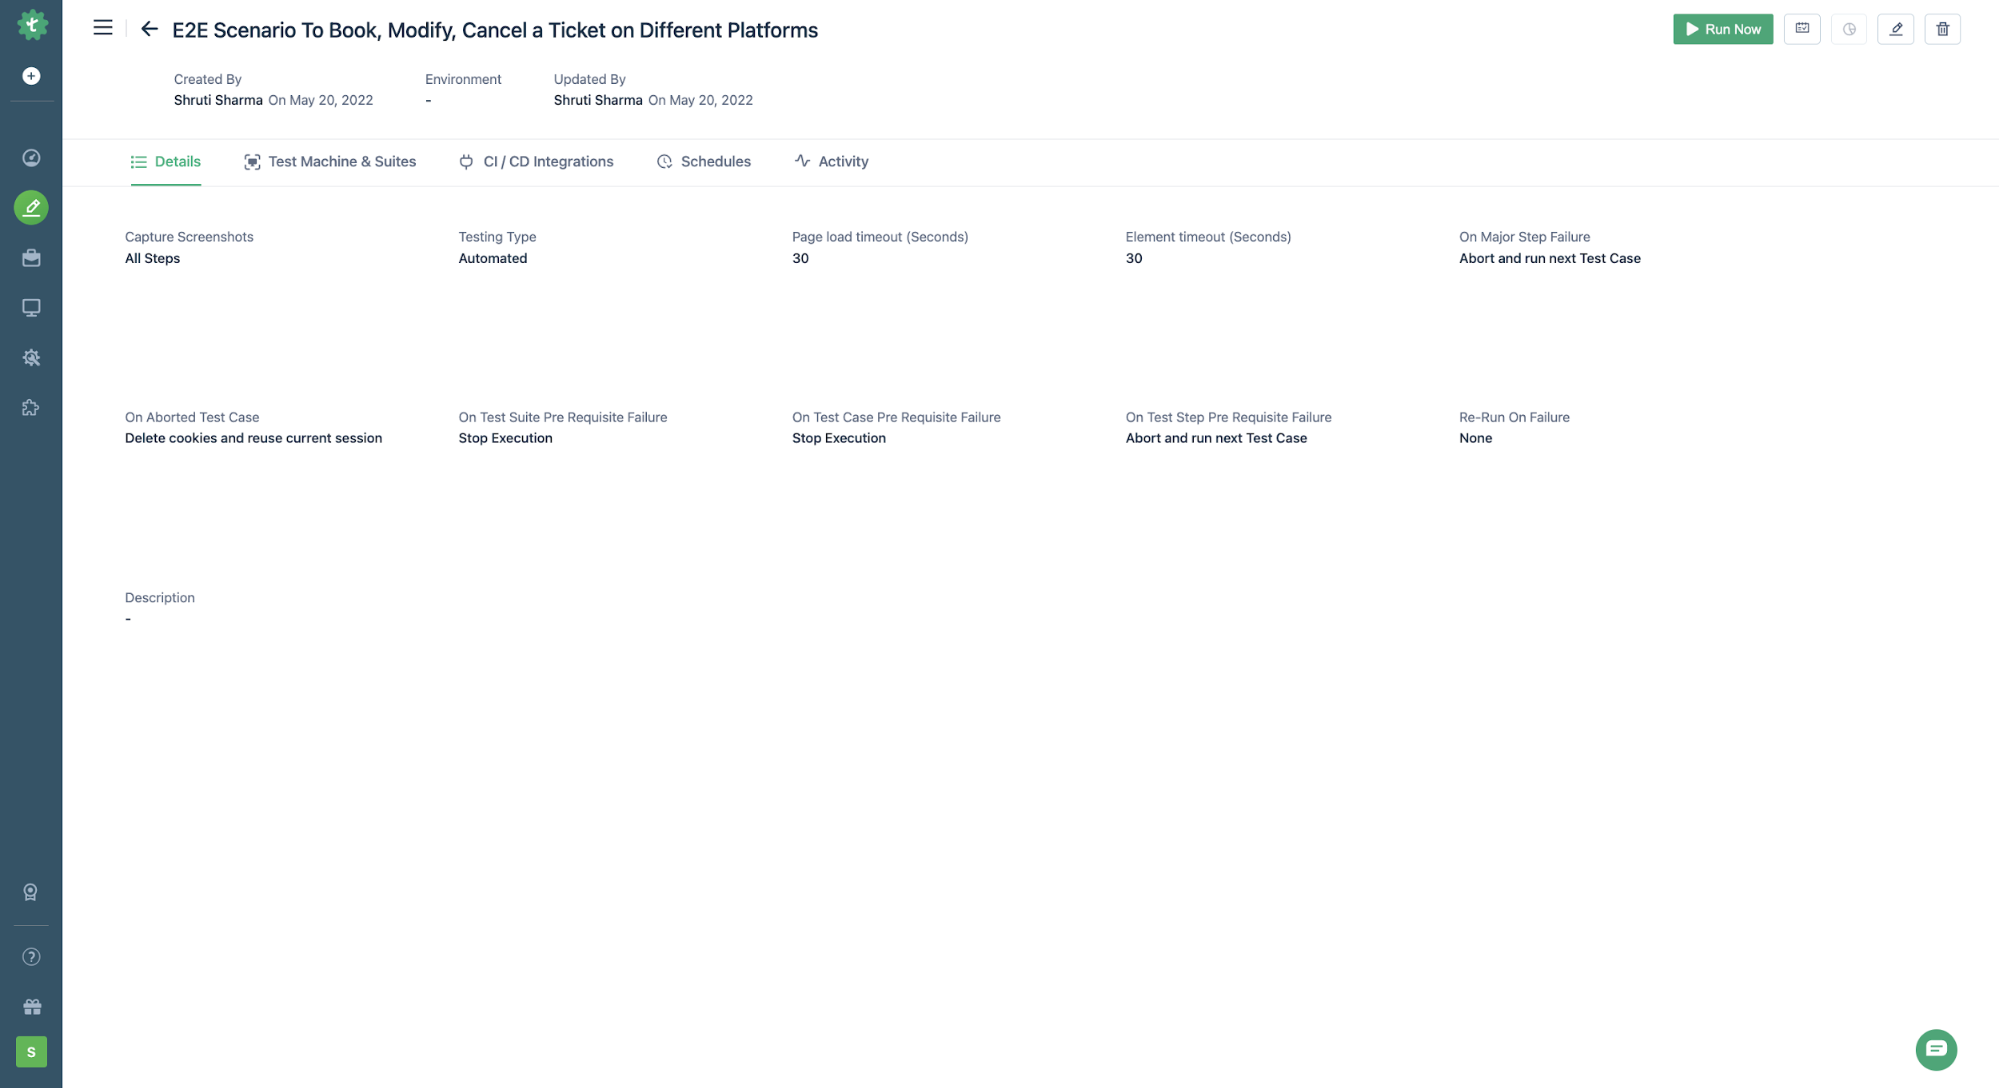
- Click View Reports to view reports of the executed test plan.
- Click Run Now to see the test plan in execution.
Refer to the below GIF for a demonstration of the above steps for a flight booking application Simply Travel. The test plan includes the testing of the application on web (Linux, Windows and MacOS), mobile (Android and iOS):
