Get Started with Automating iOS Apps
This tutorial helps you create basic tests for an iOS application using Testsigma’s own Mobile Test Recorder.
We cover :
- Prerequisites needed for getting started.
- Introduction to Testsigma’s very own mobile test recorder + inspector.
- How to use Testsigma mobile test recorder to capture all the element details efficiently.
- How to write tests for an iOS app and run it in the cloud.
- A sample scenario tested using Testsigma.
- How to view the comprehensive test results.
Prerequisites
You have a Testsigma account, that’s it! If you don’t have one, sign up for a free trial. The trial includes all product features and free support (always!). Reach out via the in-app chat or email to support@testsigma.com
Setting the stage to write your first test
Workflow: Create a Project > Add a Test Case > Add Test Steps
Let’s understand these in detail.
- Project - Can be your iOS application name for instance.
- Test Case - specific scenario that has to be tested, say, login functionality.
- Test Steps - the actual set of instructions/steps required to test the functionality.
By default, 4 Projects will be readily available on your account. These projects (here, iOS application) will also have a few sample Test Cases and Test Steps ready for your reference.
- Start by creating a Project first. For a detailed overview, check here
- Create a Test Case. For a detailed overview, check here
- Add Test Steps. Once you create a Test Case, you will be redirected to the page where you can add all your Test Steps.
Here’s a video that explains all the steps discussed so far.
The next section explains how you can add steps to test a sample scenario.
Sample Test Scenario: In this tutorial we will test create an account feature in Twitter iOS App.
There are two ways you can add Test Steps to your Test Case:
- Add/Record Test Steps using the Test Recorder.
- Writing your tests step by step in simple English language.
Before you start make sure you’ve referred to the ‘Setting the stage to write your first test’ ‘section in this tutorial and your are currently in the ‘Test Case Details’ Page
Method 1 : Add/Record Test Steps using the Test Recorder
The Testsigma test recorder (web and mobile) is in-built and sits directly on your app, acting as both test recorder and object spy/element inspector, letting you create the most stable tests in a matter of time. No extra setup is required for the same.
Launch Test Recorder
Step1: To do this, simply click the Record option at the top of the test case details page.
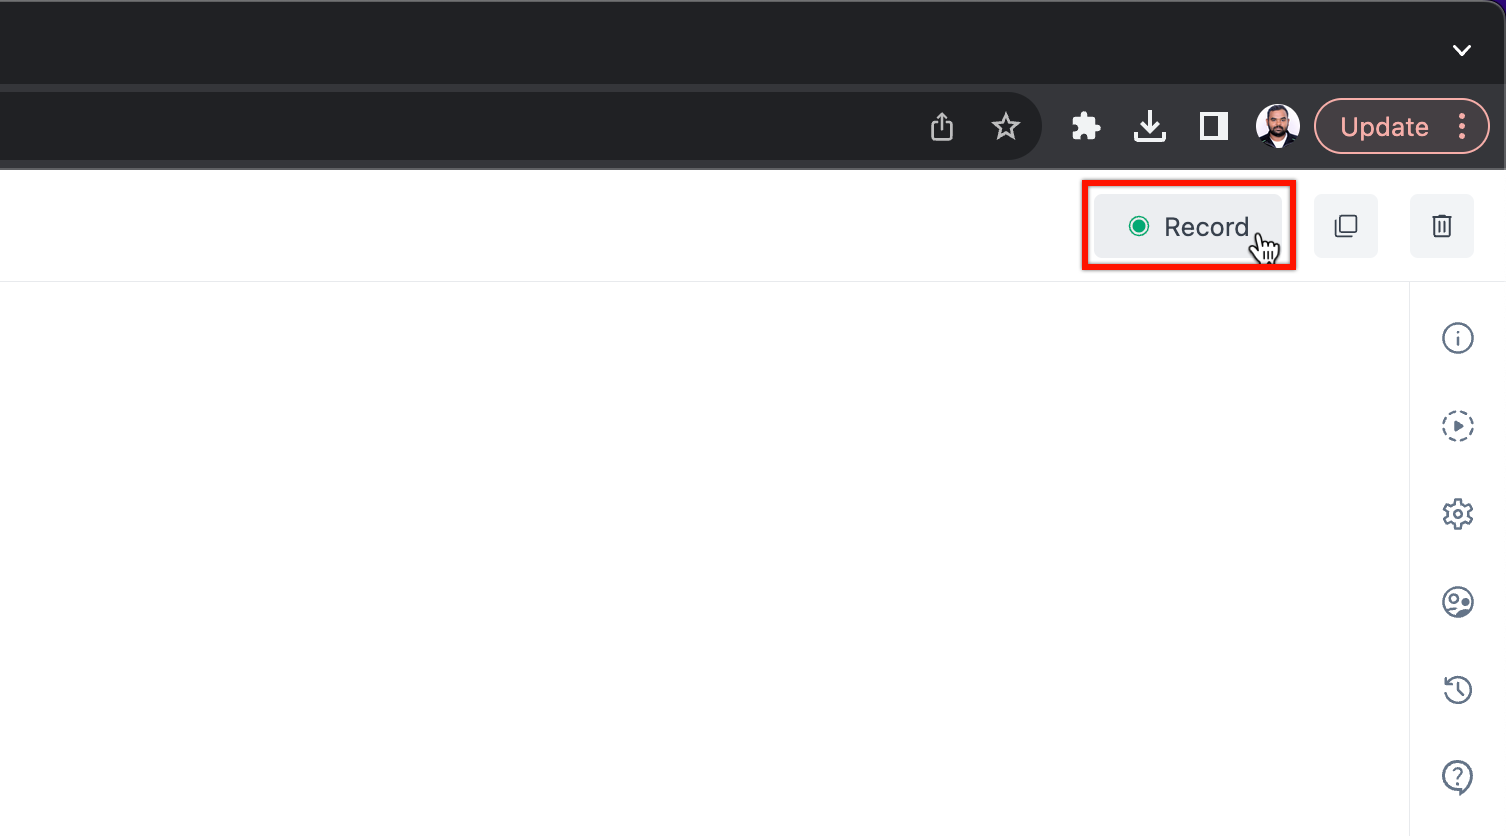
Step 2: A new window will appear that has a few options in rows.
Let’s break down each row.
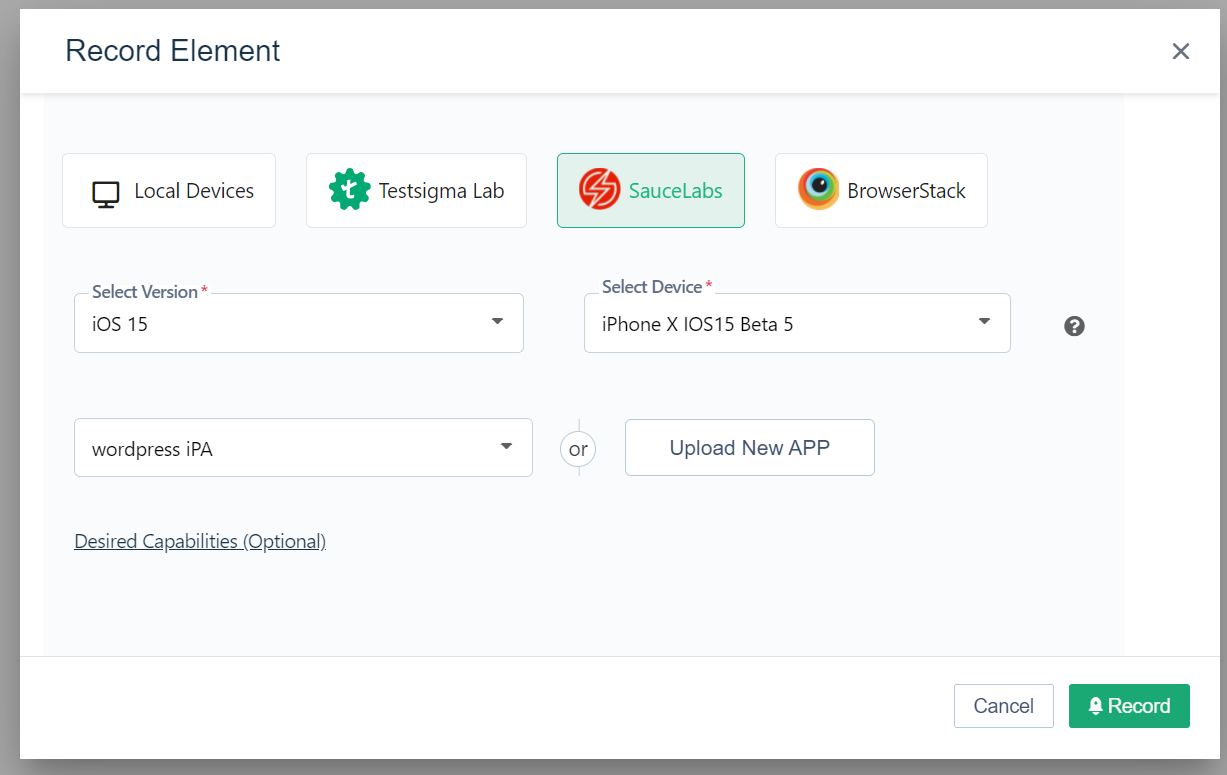
Test Lab Type: The first row displays the list of test labs supported to select the mobile devices to use from.
Testsigma Lab lets you run your tests on a wide range of real devices on the cloud(that you may not necessarily own). You need not worry about the maintenance of these devices as they are managed by Testsigma.
In addition to Testsigma Lab, Testsigma offers integrations with Sauce Labs, BrowserStack and more. The complete list can be found under the Plugins option on your account.
Local devices as the name indicates means you can run the tests you are about to create on your own current/local device. In this case, you need to install Testsigma Agent on your device. Learn how to install Testsigma Agent here.
Select Version and Select Device that you wish to run your tests on (in case you choose cloud option i.e. Testsigma Lab).
Select iOS Version : Select the version of the application of the iOS device you wish to run your tests on.
Select Device : Opt and run your tests on any iOS device.
Choose/Upload App : Upload the iOS application you wish to test.
You can upload a new application by uploading its IPA file.
To familiarize with Testsigma, you may choose any application that is already available on your Testsigma account via the dropdown menu. In this tutorial, a sample app is uploaded to demo how the steps can be recorded.
Uploading a sample app (Twitter): In this tutorial, the app under test is Twitter.
For this, the Twitter app’s ipa file needs to be uploaded as discussed earlier. Click on Upload. Wait for the app to be uploaded.
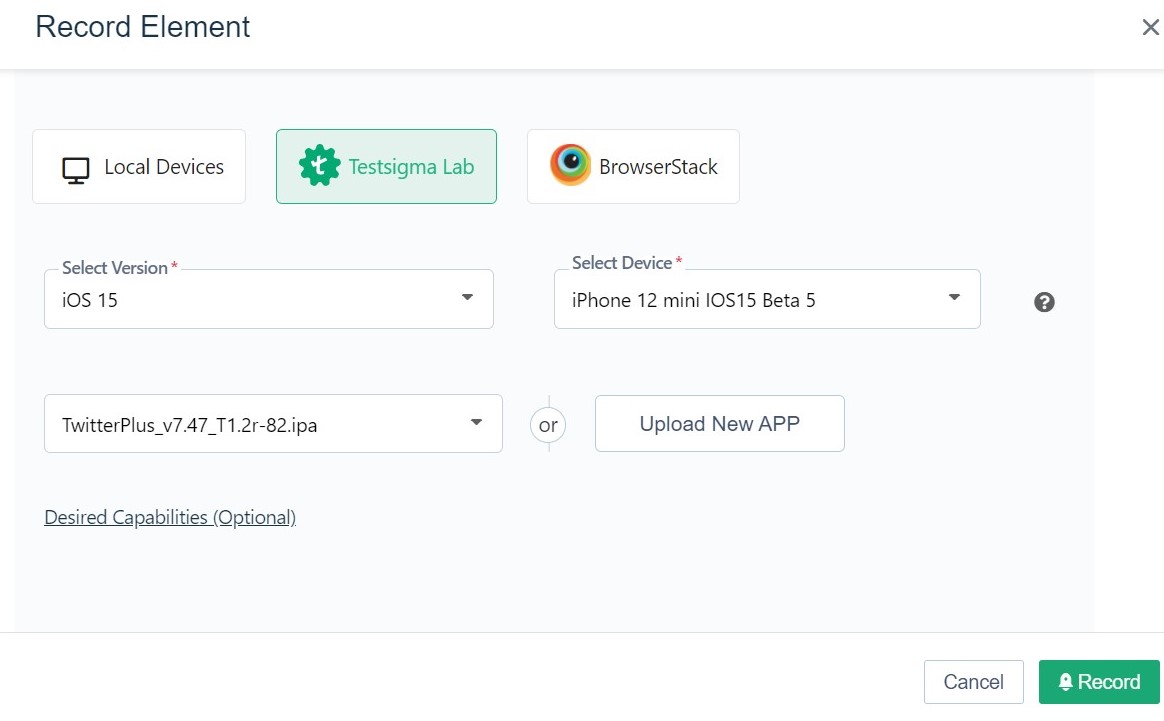
Once done, click Record. Upon clicking Record, the Testsigma Mobile Recorder will be launched.
New to Testsigma Mobile Recorder? Here is a detailed walkthrough.
Let’s record!
By default, the recorder will be in inspection mode (highlighted in yellow when you hover over any element).
Let’s try interacting with the Twitter app we just uploaded.
Test Step 1. Perform a Tap action.
To tap on “Create Account” that is displayed on the Twitter app screen, click on the button to keep focus.
You’d see a new pane appear in the centre.
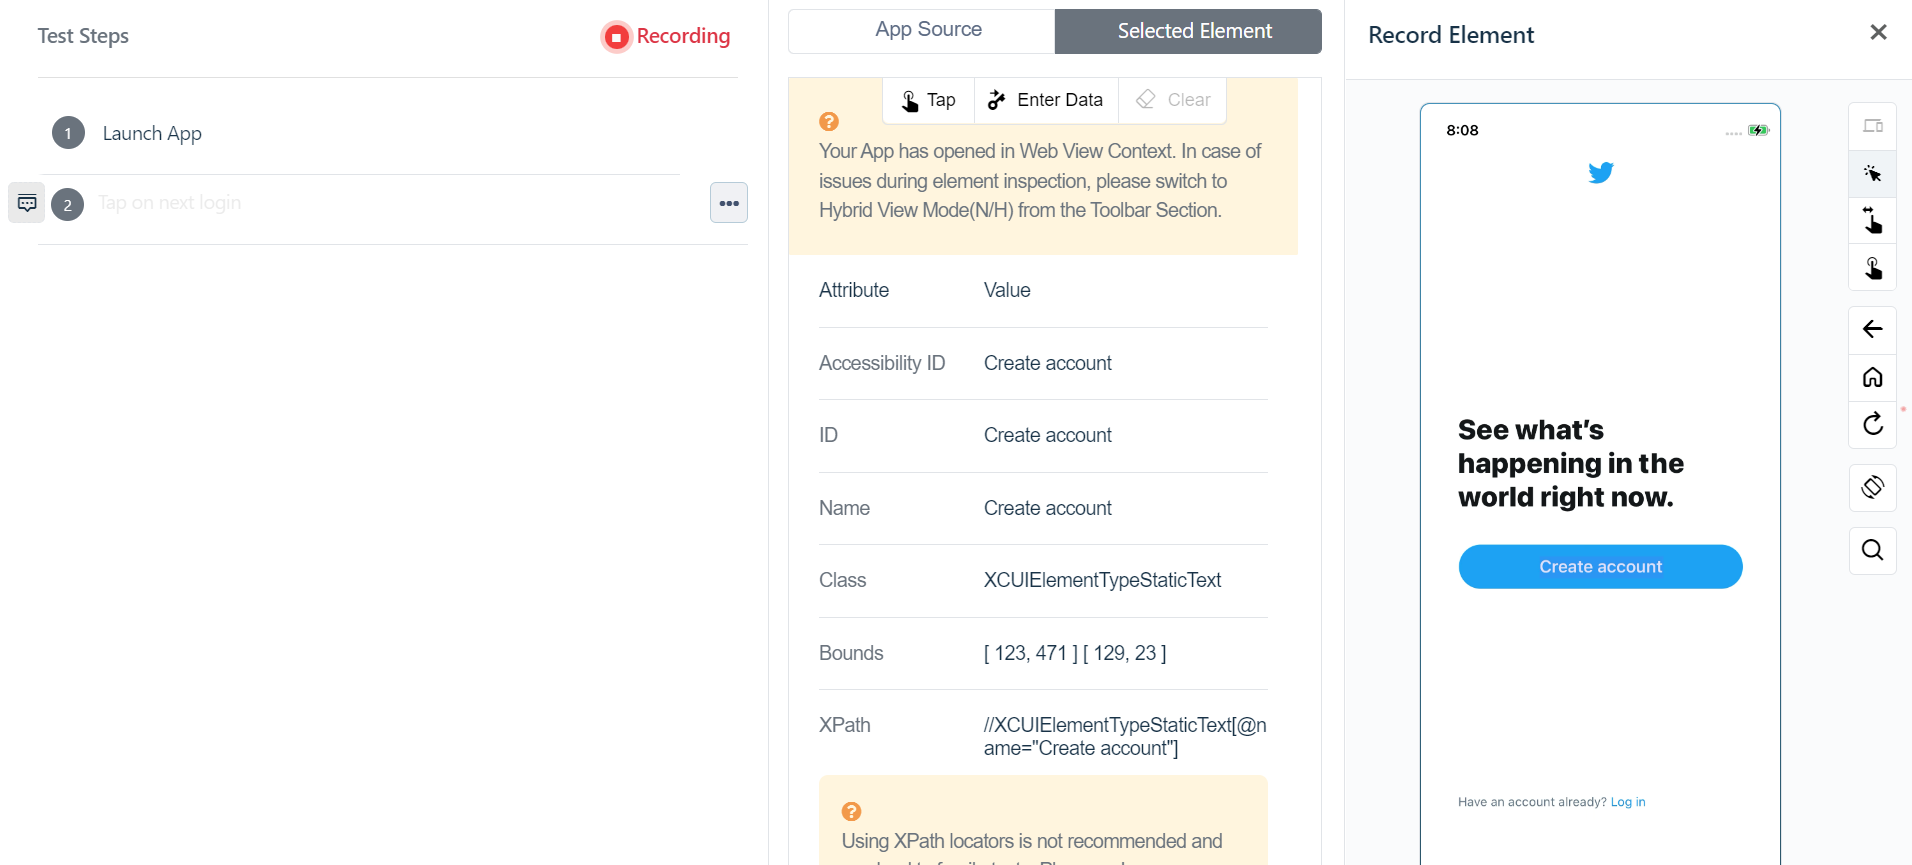
At the top, you will find these options : Tap, Enter Data and Clear.
Click on Tap.
This will perform a click/tap action and will take you to the next screen on the Twitter app. Consecutively, you will notice that this will also generate a test step in natural language automatically.
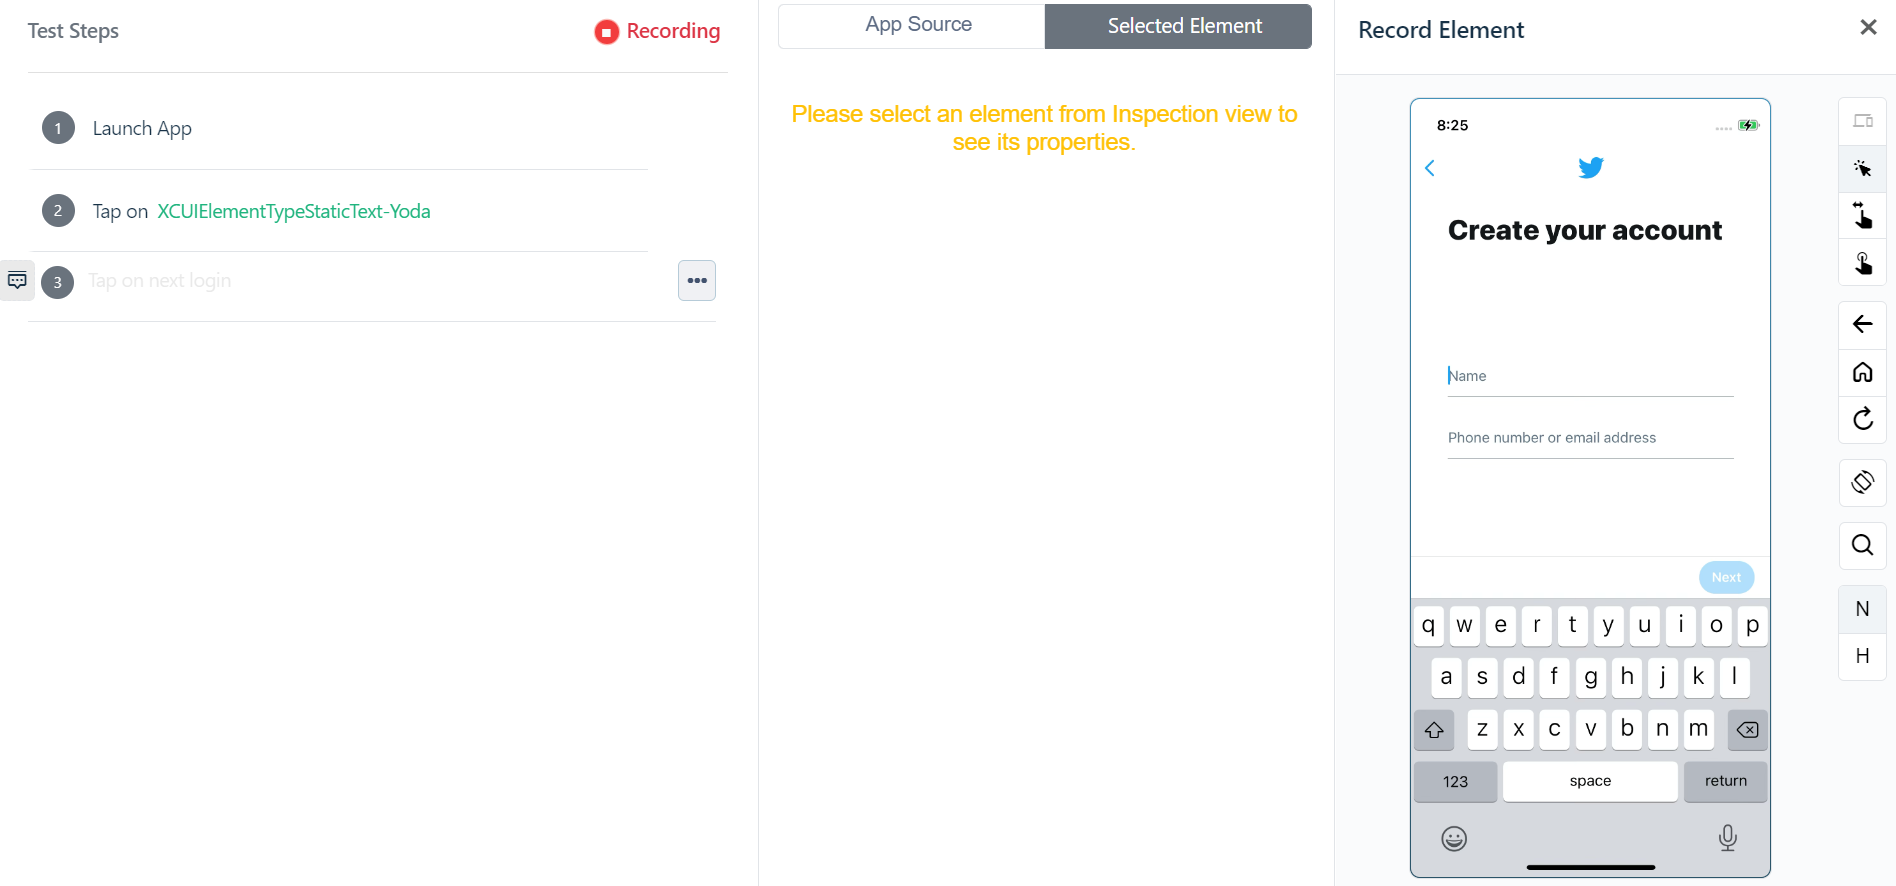
Test Step 2. Enter some data.
As you see, the next screen on the Twitter app has 2 fields, Name and Phone.
In order to enter a name, click to focus the Name field.
Choose Enter Data from the actions at the top of the centre pane.
Now all you need to do is type in the Name (here, John Doe) you wish to enter in the Enter data form that appears.
Test Step 3. Clear data
Let’s say you wish to clear some text. Click to focus on the field you wish to clear values from.
Click on Clear. This will wipe clean the entered value on this field.
Test Step 4. Enter data
This step is the same as Test Step 2.
To enter a phone number, repeat the same process. Click to keep focus and press the “Enter Data” button at the top of the centre pane. Now enter the phone number you wish to enter and click Enter Data to save.
Test Step 5. Tap button
This is similar to Test Step 1. Simply click on the field/button you wish to tap on. In this case the Login button. Simply click the Tap option at the top of the pane in the centre.
Test Step 6. Add a verify statement (assertion) manually.
Now, let’s verify some text on the app screen.
To verify, start typing Verify on the test step editor (on the left pane).
Since we are verifying a text, choose the “Verify that the current page displays text test data” action from the list of actions.
You only need to replace the test data part with the actual text you copied, let’s say, “Customize your experience” from the inspector.
Paste this in place of test data. Click Create and you are done!
Here’s a summary of the steps we discussed so far.
To learn all other options available in the test recorder click here.
Method 2 : Write automated test steps in plain English (manually)
Not all steps can be recorded automatically. For advanced cases, you may need to incorporate Testsigma’s manual simple english based test authoring approach to reuse elements and perform verify actions.
In this section you will learn:
- How to add steps and create a new element on the go.
Learn more about how to add steps manually from the test case details page here. - How to add steps using existing elements.
You can reuse them at any time by choosing the element you want to use/reuse in the Test Case. Simply pick the name of the Element. - How to add a simple verification steps.
Use the Verify action as used in Test Step 5 in the previous section. - Testsigma lets you capture all elements on the go. To create multiple elements at once, check this out. You can use any of these elements by picking the name and reuse them anywhere in your Test Steps.
Run your test case
You can run your tests locally on your own machine or on the devices on the cloud (that you may not necessarily own!).
At the top right of your Test Steps page, click on Run.
Choose the device you wish to run your tests on, the device configurations, or how you’d like the screenshots captured, etc. You can choose these options based on your preference.
Click Run Now.
Here’s a video that shows you a sample test run done for the test case we created.
Debugging Results
From the video, you’d see that the one step failed.
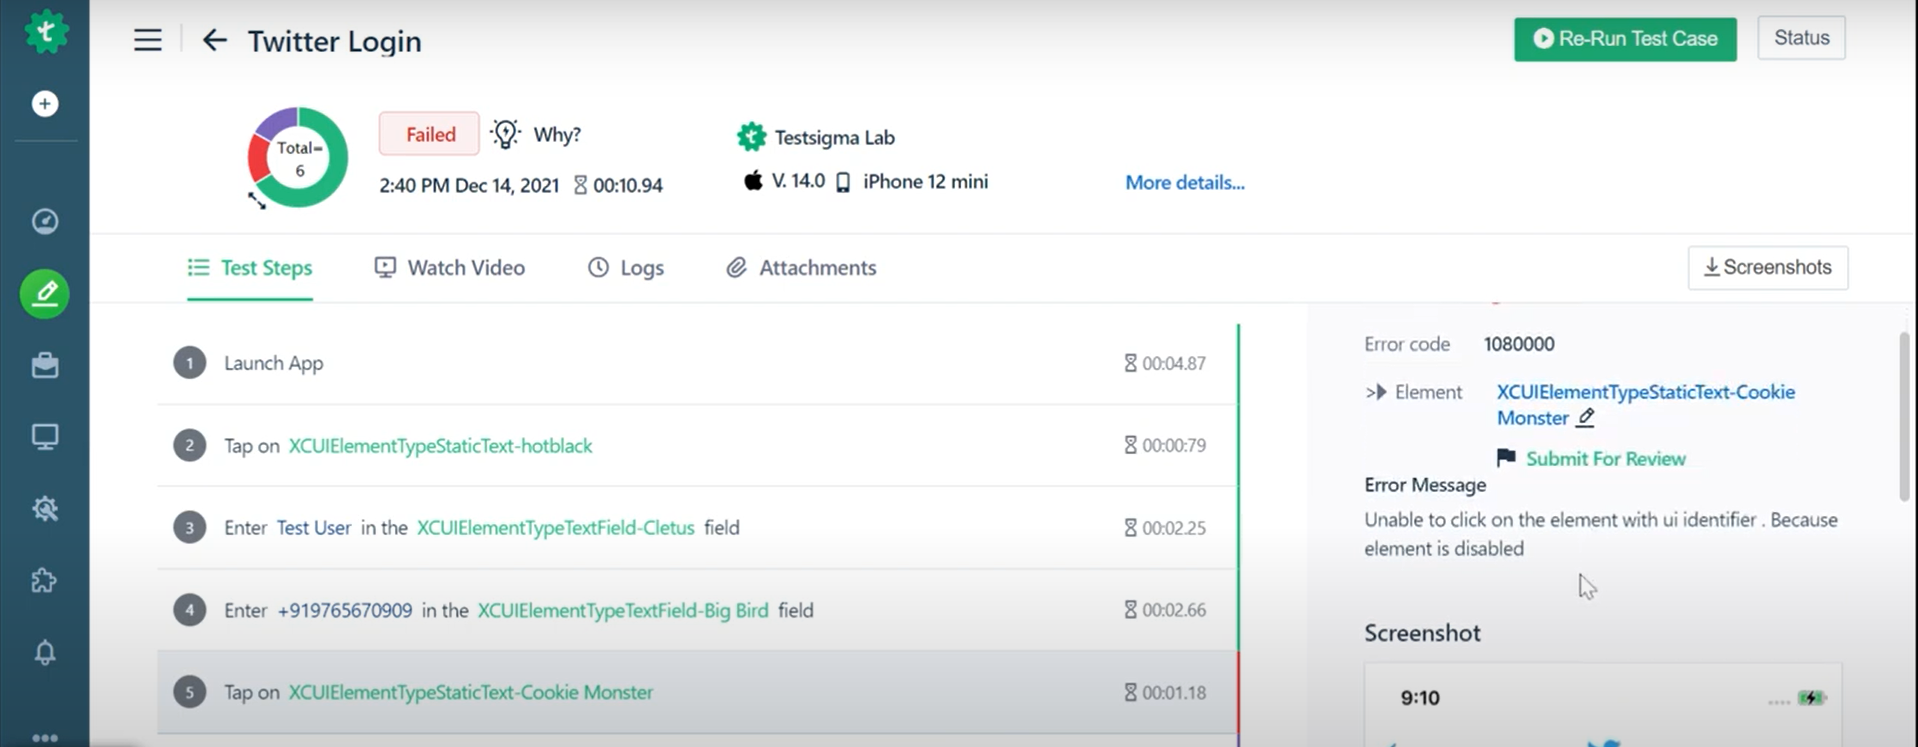
Let’s debug this and try to understand the reason for failure with the help of the suggestion engine.
To know why a test step failed, click on the failed test (marked in red) and view the error message. In this case, the error message is, “Unable to click on the element with ui identifier”.
From the screenshot, you will see that the button to submit the form is disabled at the time of performing the Tap action.
Now that the reason for failure is clear, let’s try and fix this.
Add wait time after the mobile number is entered so that there is time for the button to be enabled.
Type “Wait for test data seconds". Replace the test data part with, say, 10 seconds.
Let’s try re-running this test case now.
The test has now passed.
Viewing Results
Testsigma provides simple, accessible and easy to analyze test execution reports.
You would also find all previous run results in the Dry Runs tab. You can also share the results of your test run with your teammates as shown in the screenshot.
Refer to this tutorial to learn how to create test plans and run them.
This is a basic test that can be recorded by interacting with your app. Also, ping us for awesome support!
Next Steps
- Practice in your account. Try it out!
- Start creating tests. Explore Recorder.
- Automate iOS Apps using your local devices. Learn more!
- Create Test Plans and Schedule. Head over to this link!
- Try out more advanced capabilities. Check out our detailed documentation.
Reach out to us through in app chat for a walkthrough or if you have any questions!
Join Discord Server to learn more about Testsigma.