- addons

Create & Update an Addon for Classic Engine
Testsigma enables you to extend its functionality by creating addons. You can use addons to perform specific tasks that the default features of Testsigma do not cover. This document guides you through creating and updating a Classic (Java) addon in Testsigma. For a Modern (TypeScript) addon, see Modern addons in Testsigma.
Prerequisites
Before you start creating an addon, ensure you have:
- Basic understanding of Java and Maven.
- Ensure you have JUnit or TestNG configured as the Test Runner in your IDE.
- Set up a development environment with an IDE for Java (e.g., IntelliJ IDEA, Eclipse).
Purpose of Addons
Addons in Testsigma enhance your testing capabilities by enabling you to create custom functionalities tailored to your specific needs: Custom Actions, Test Data Generators, Conditional If Actions, While Loops, and Post-Plan Hooks. See Types of Addons for what each type covers, and the documentation on creating a post-plan hook addon for that specific flow.
Create an Addon
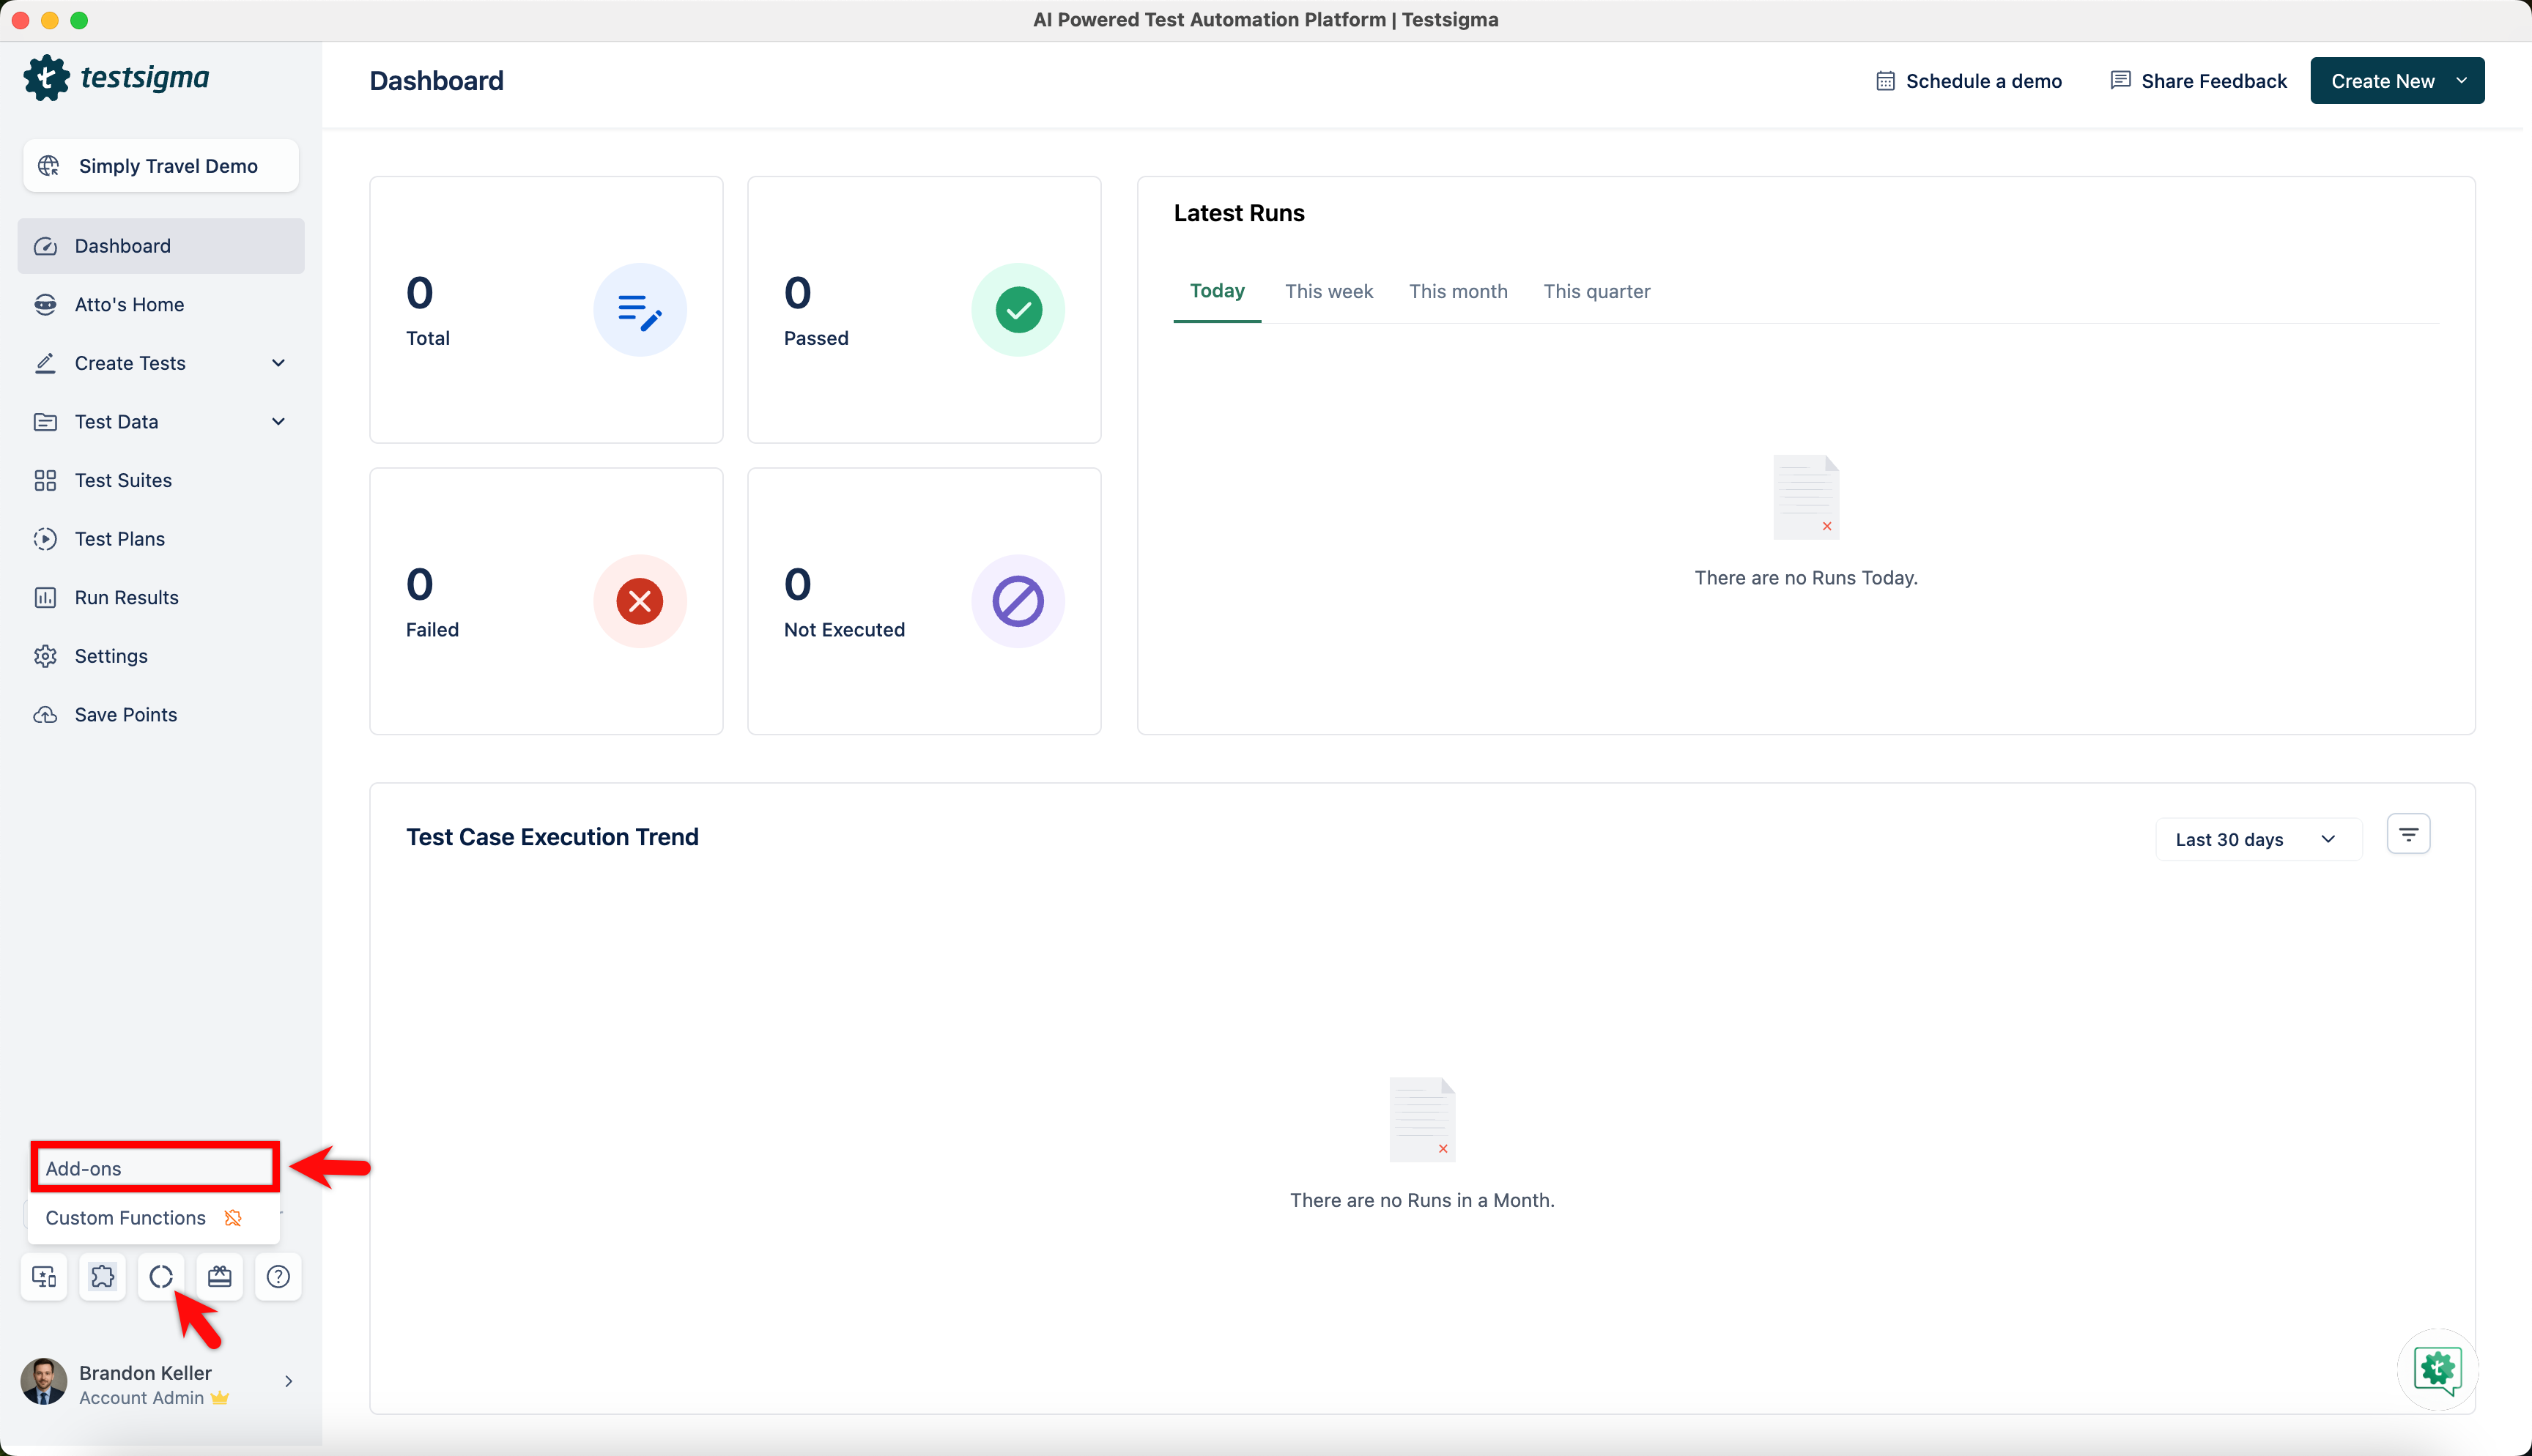
- Click on the Addons icon from the left navigation bar and click Addons from the dropdown.
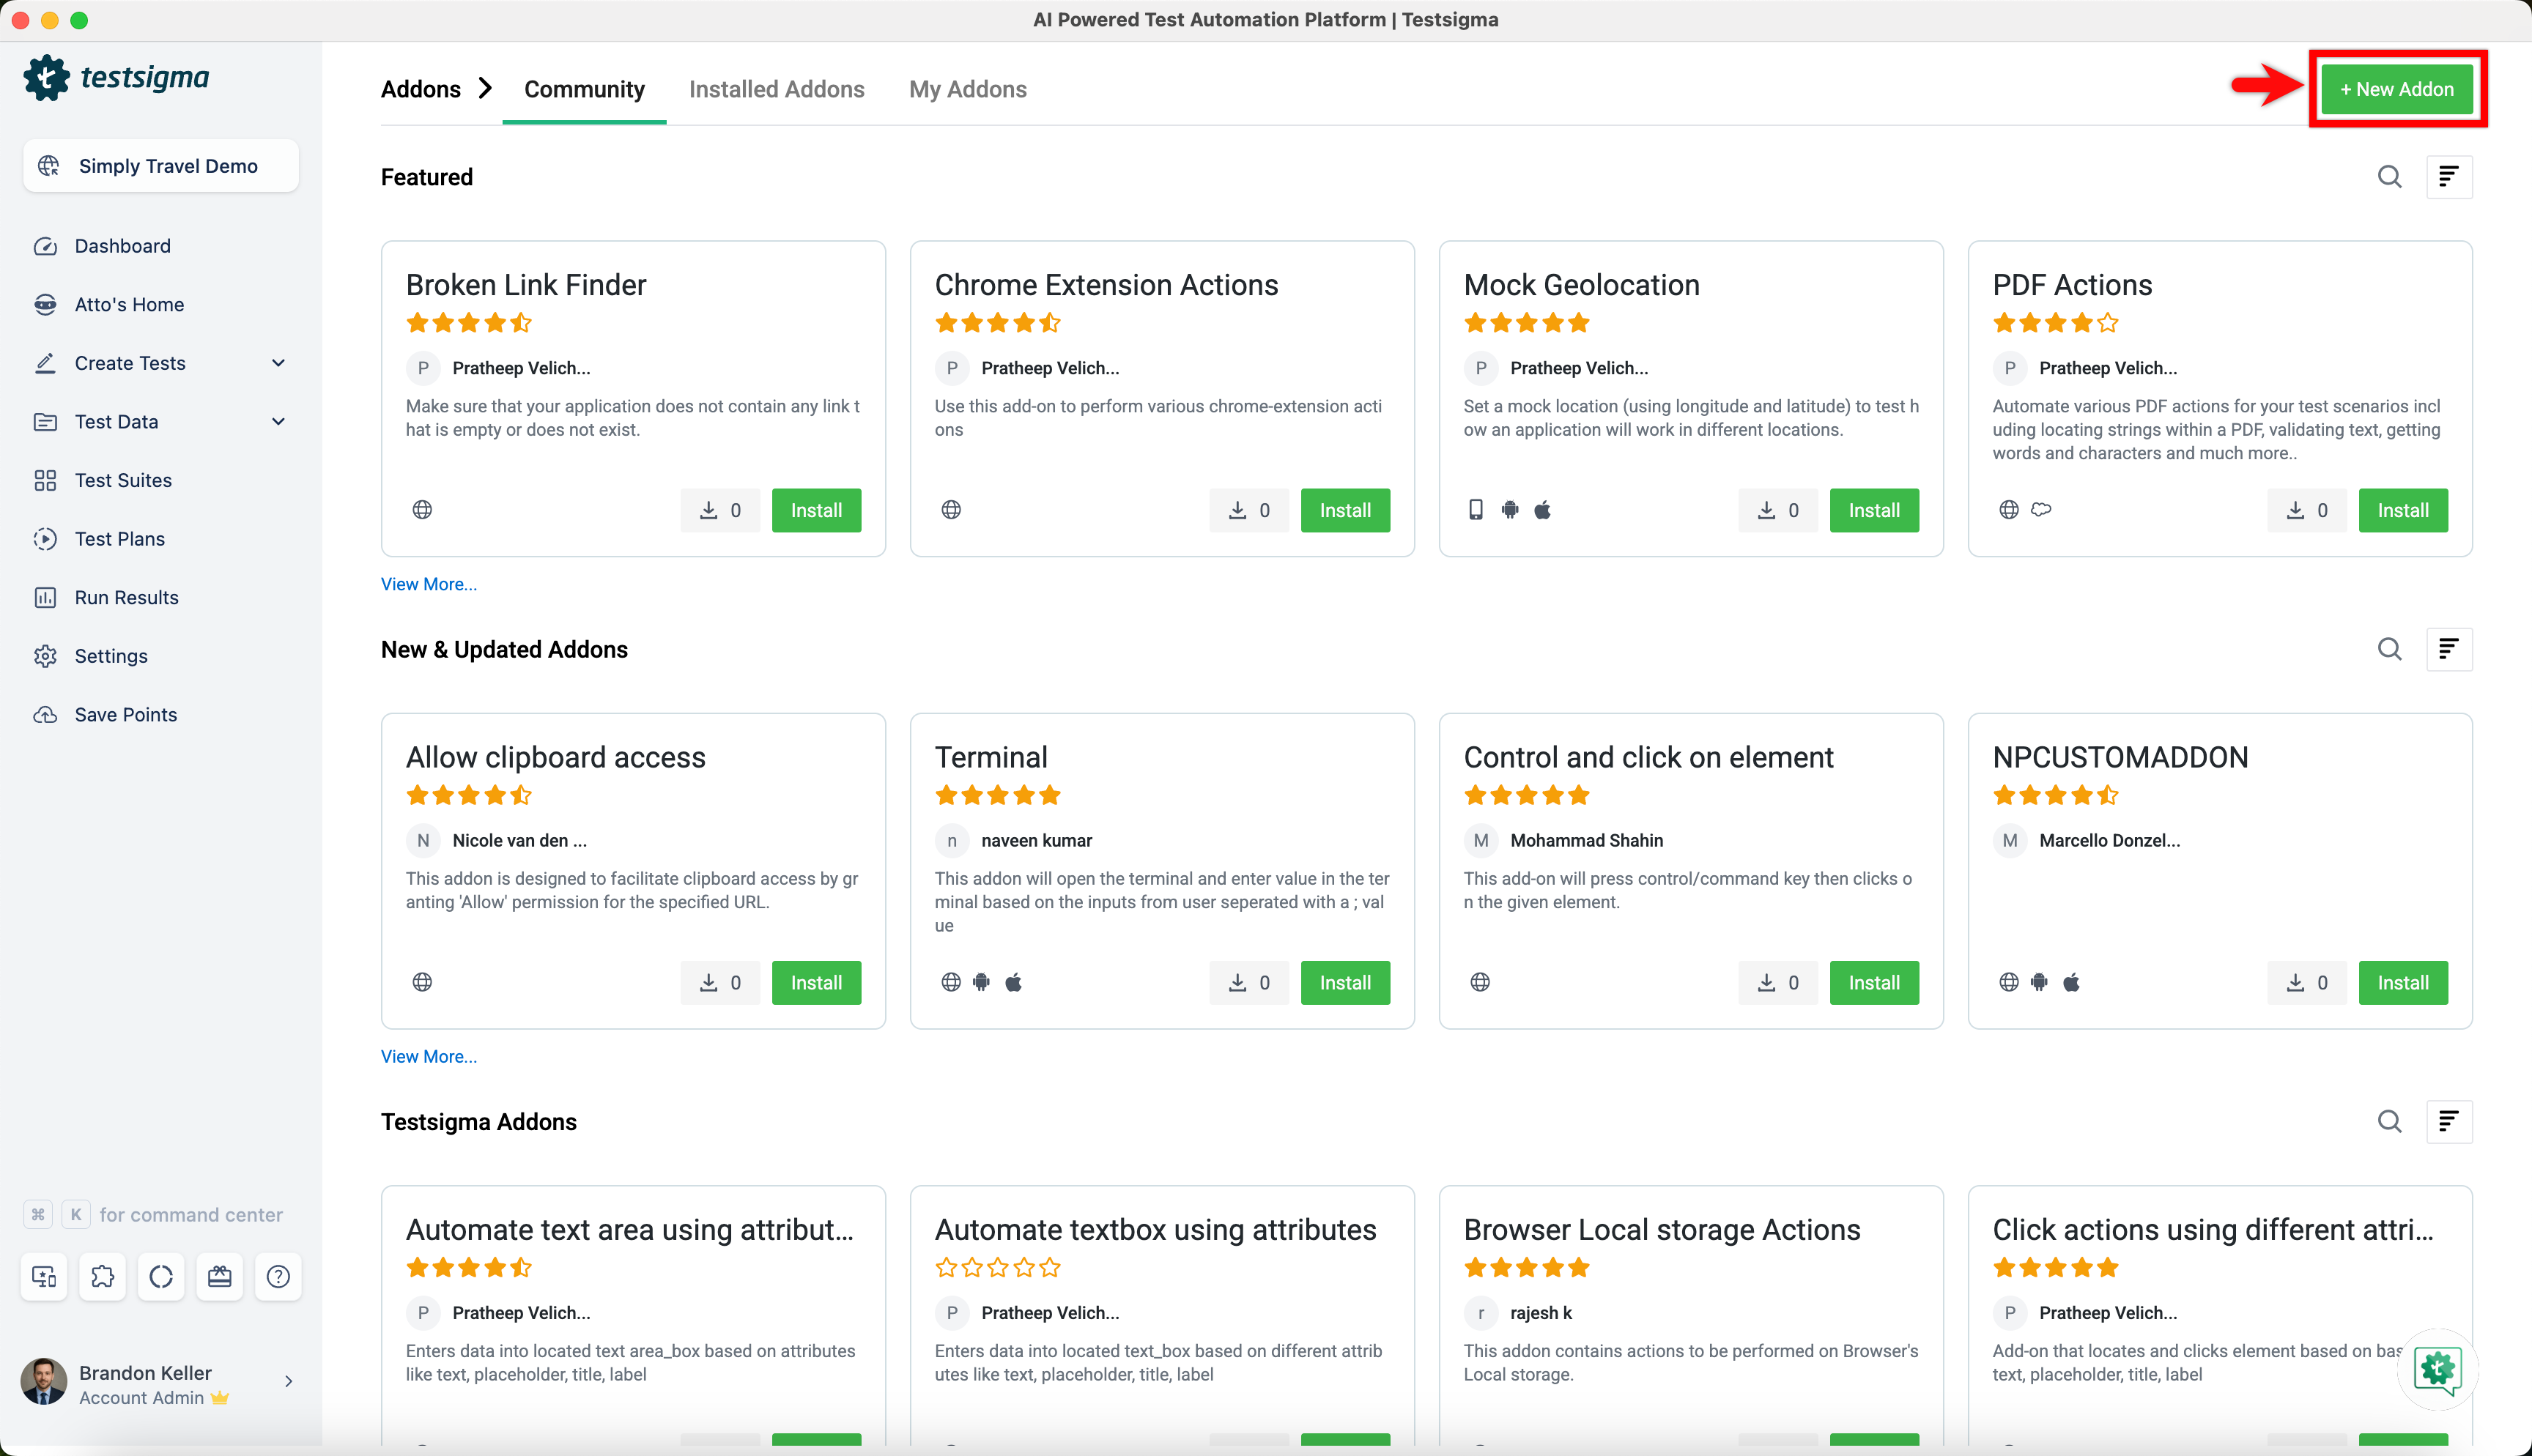
- Click on the + New Addon button at the top right of the Addons page.
-
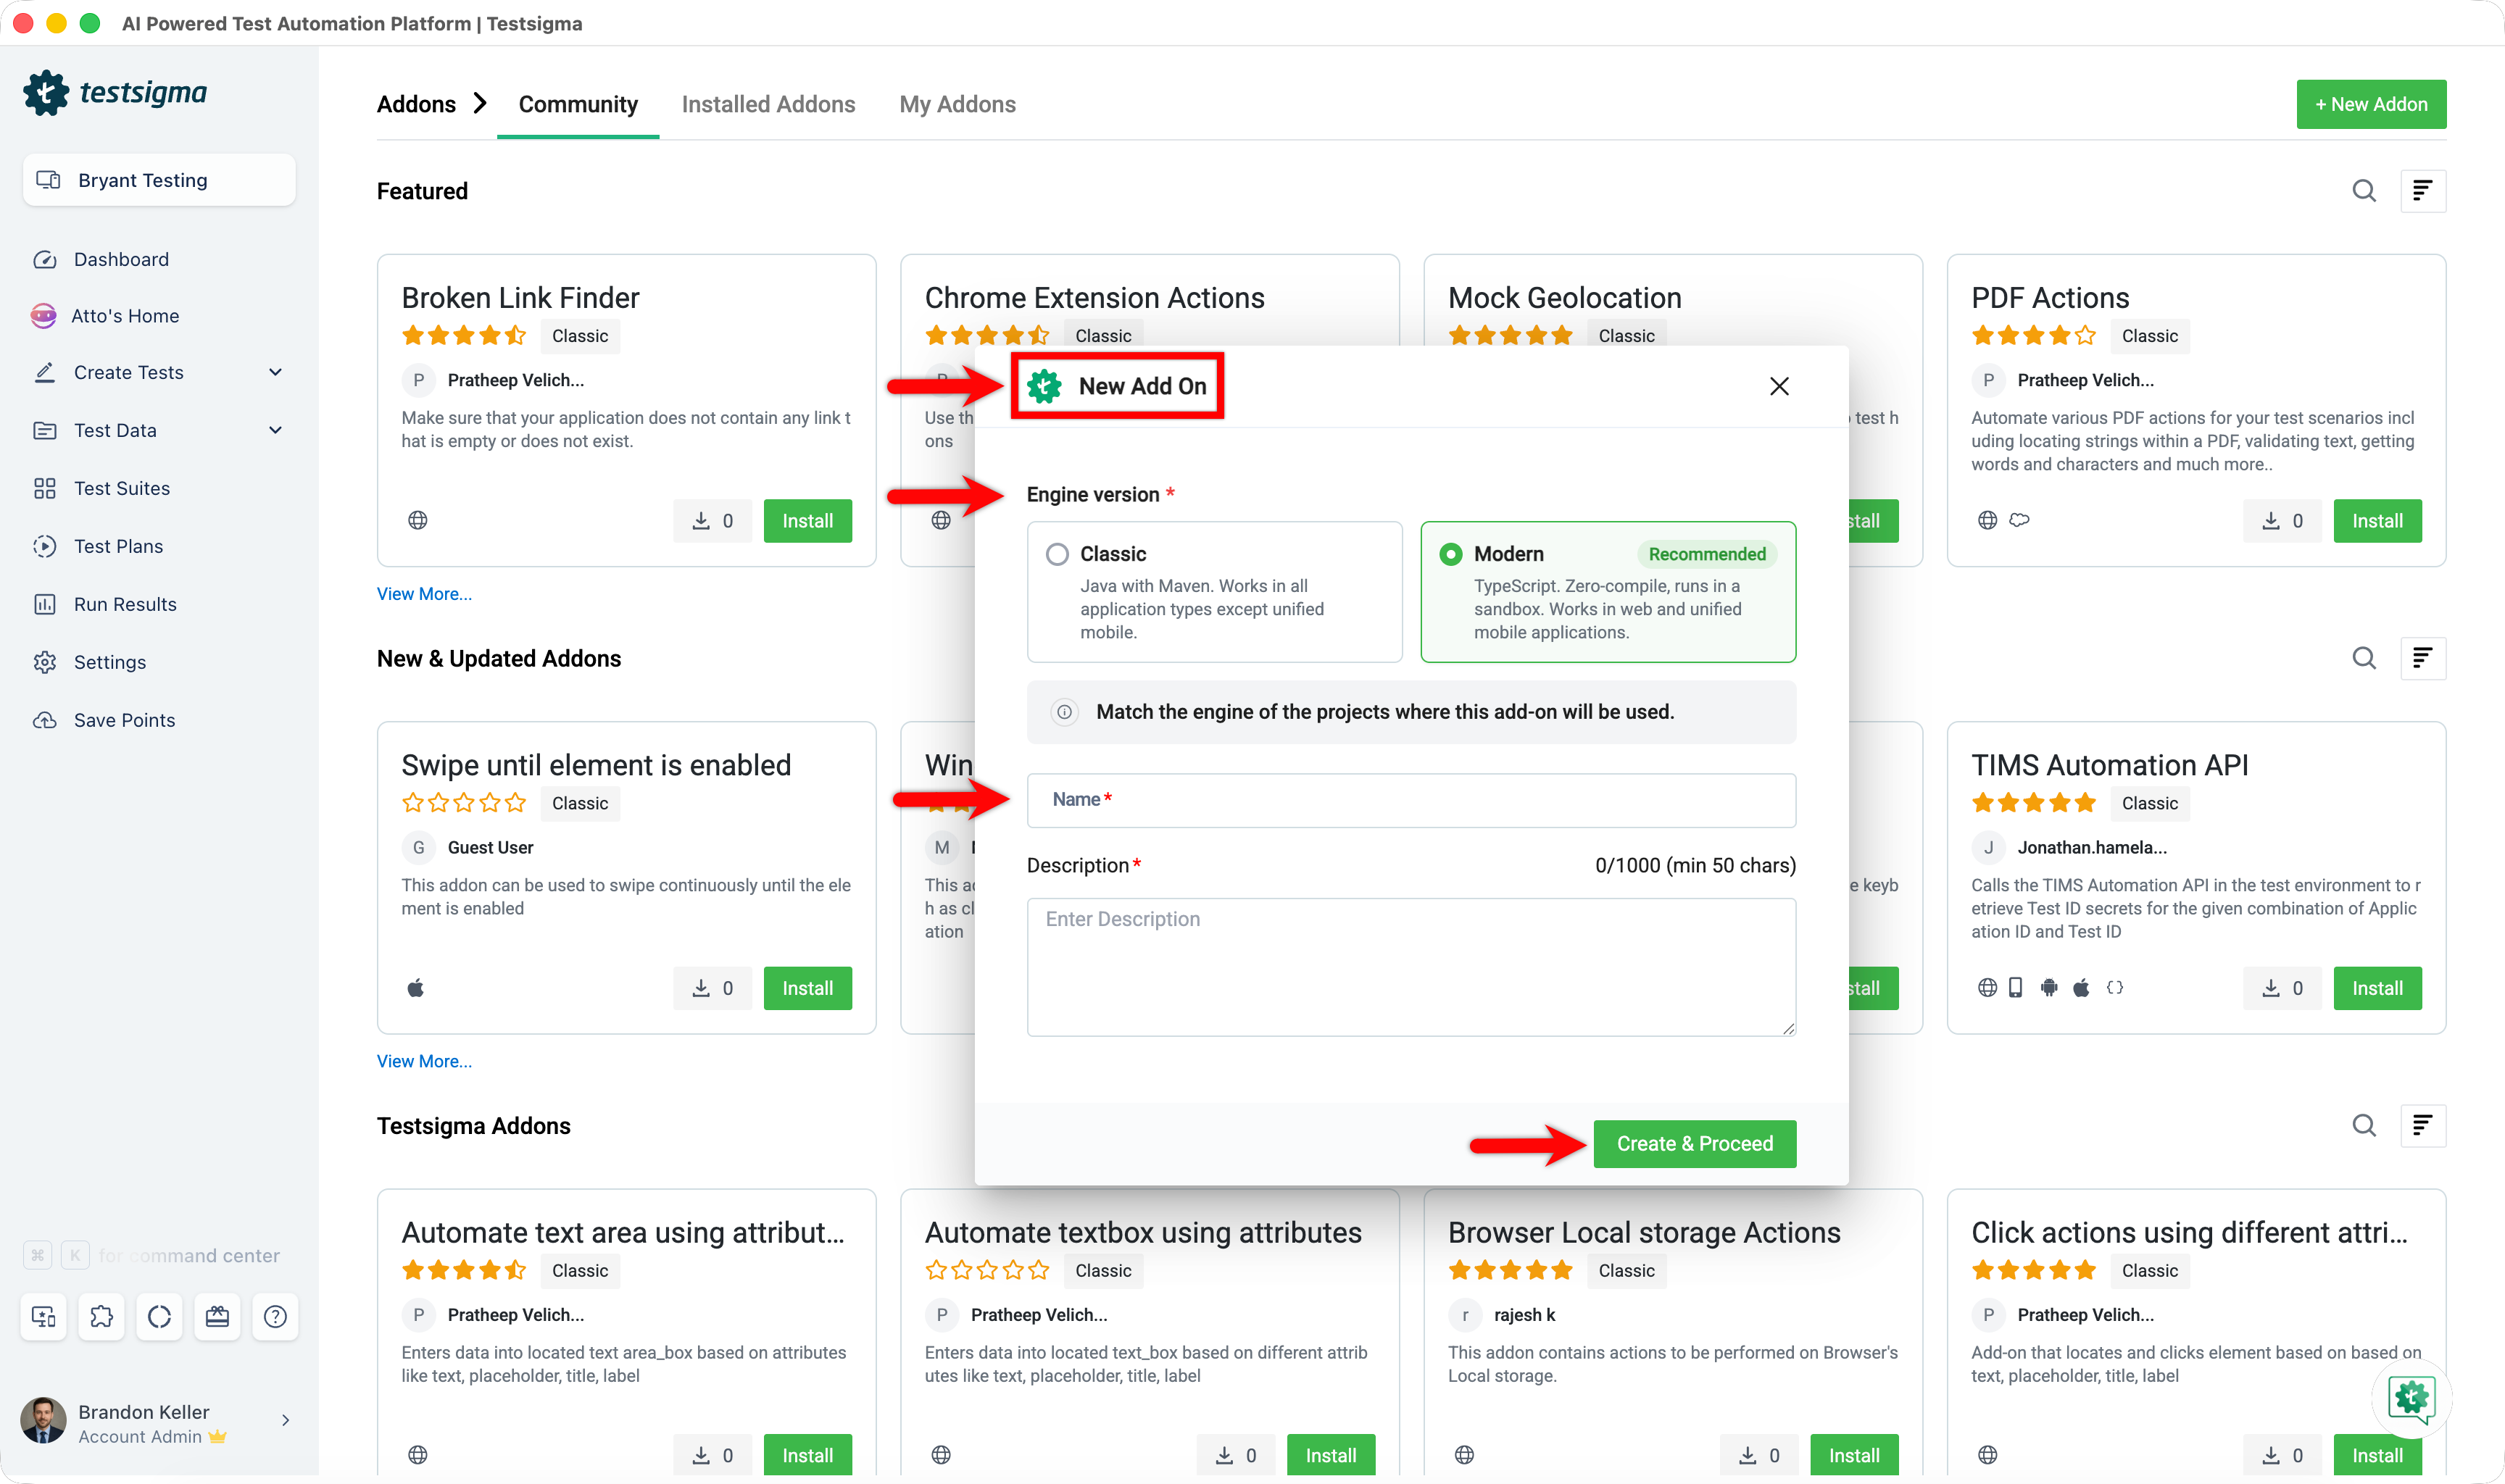
In the New Addon dialog,
- Select Classic as the Engine version.
- Enter a Name and a Description
- Click Create & Proceed.
Alternatively, open the addon and click the Download icon to get the source code. This action will download a zip file containing the sample template code, which you can use to add your code.
Update the Action Code
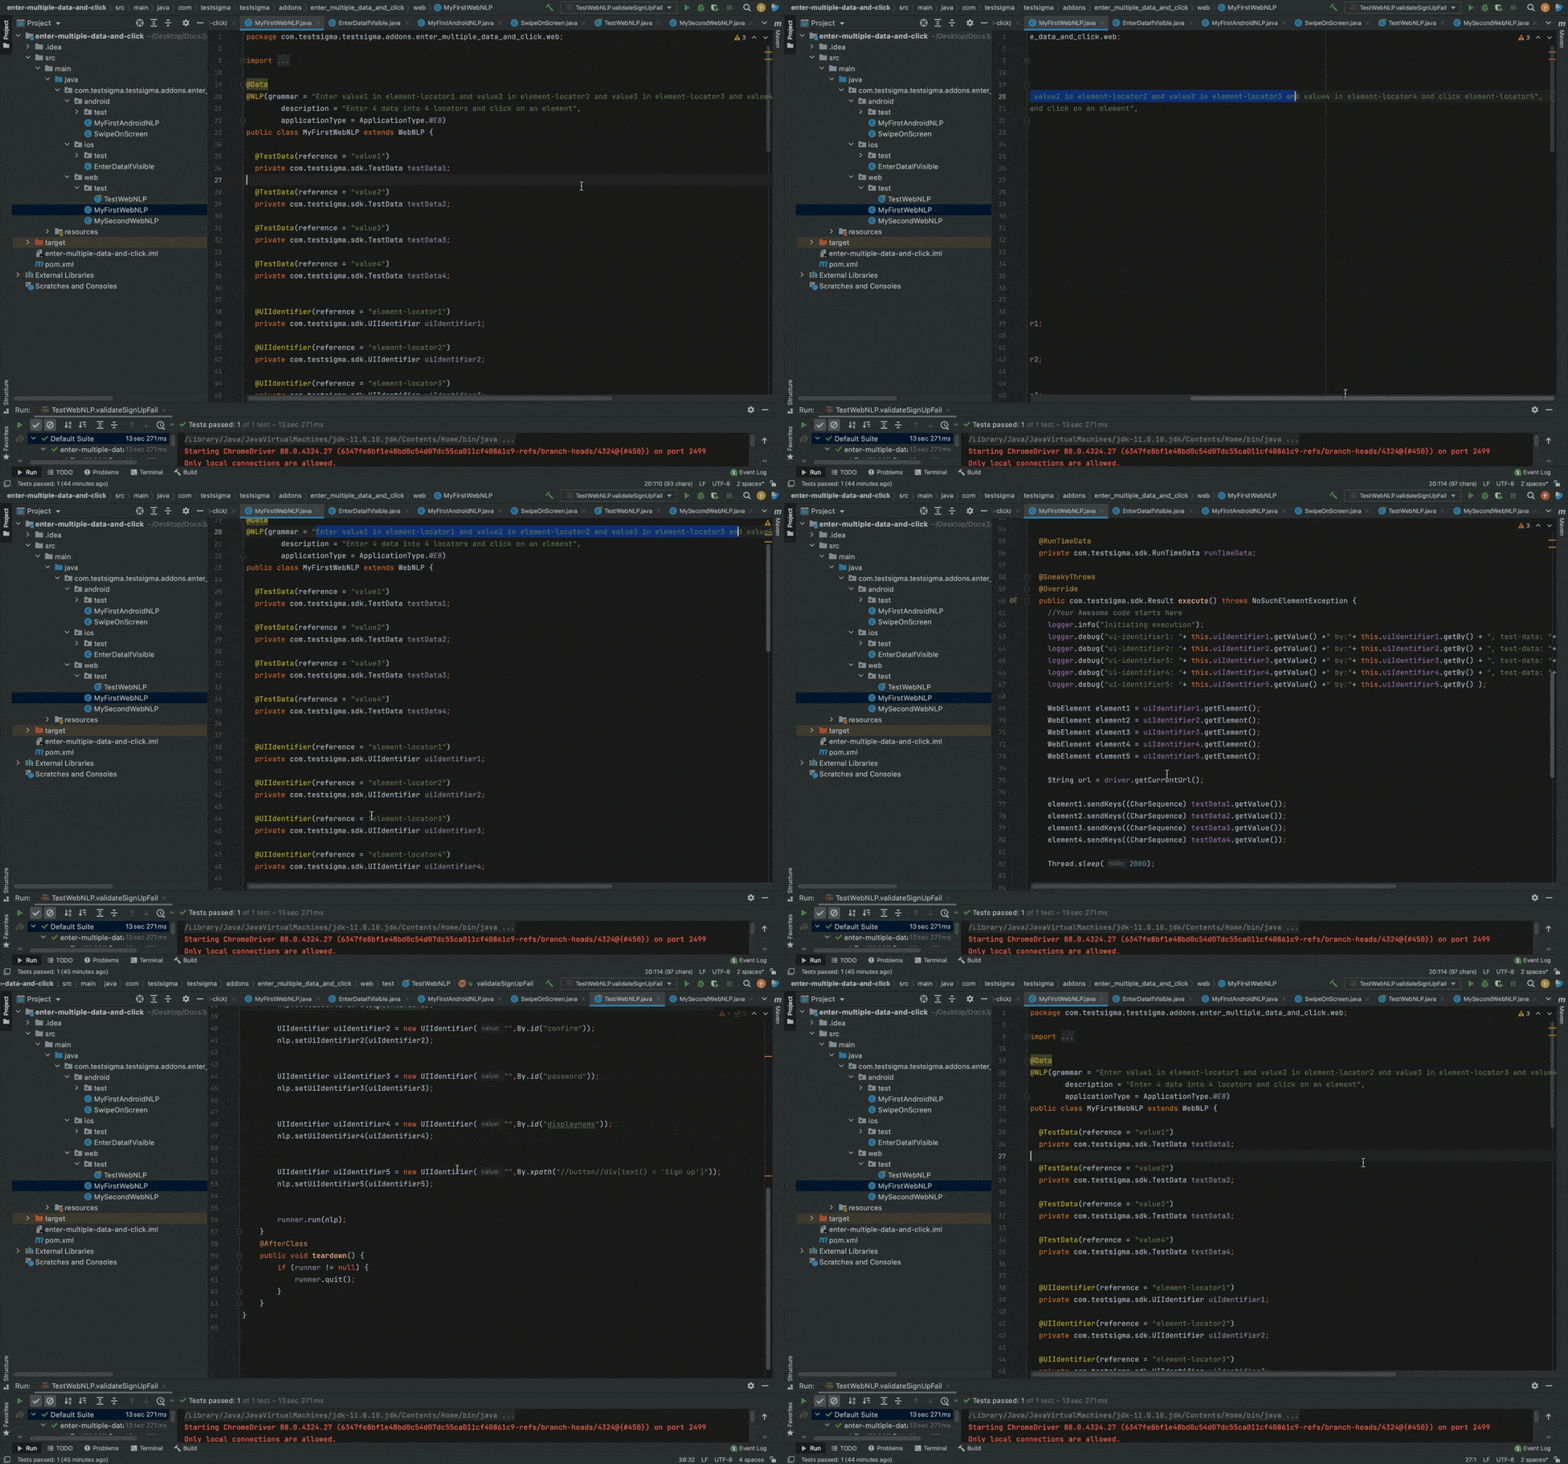
- Unzip the downloaded file and open the extracted folder in your IDE as a Java project. Ensure that Maven is set as the build tool.
- The downloaded folder contains a Java Maven project with a pom.xml file and sample templates for Web, Mobile Web, Android, and iOS Application.
-
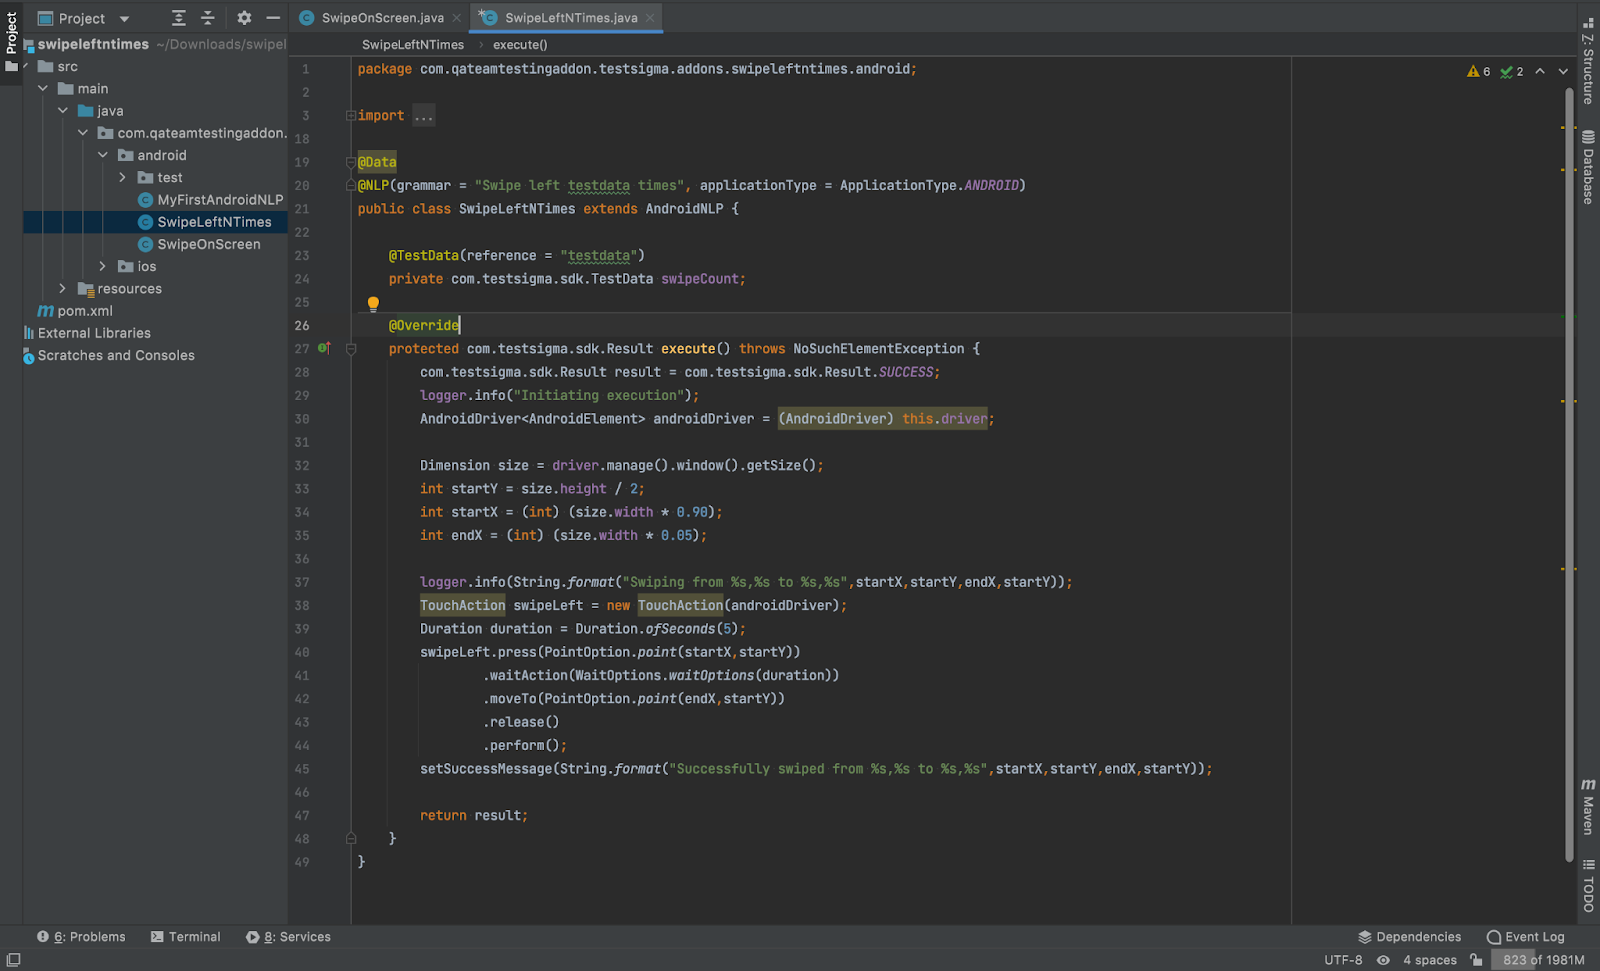
Refactor the sample code based on your requirements:
- Action Text: Customize the action text.
- Selenium or Java Code: Add Selenium or Java code to define the action.
- Elements/Locators: Modify elements or locators as needed.
- Test Data: Update the test data in the test class according to your requirements.
Here’s how you can change the code for an Android addon to swipe left a specific number of times.
Validate the Addon Code
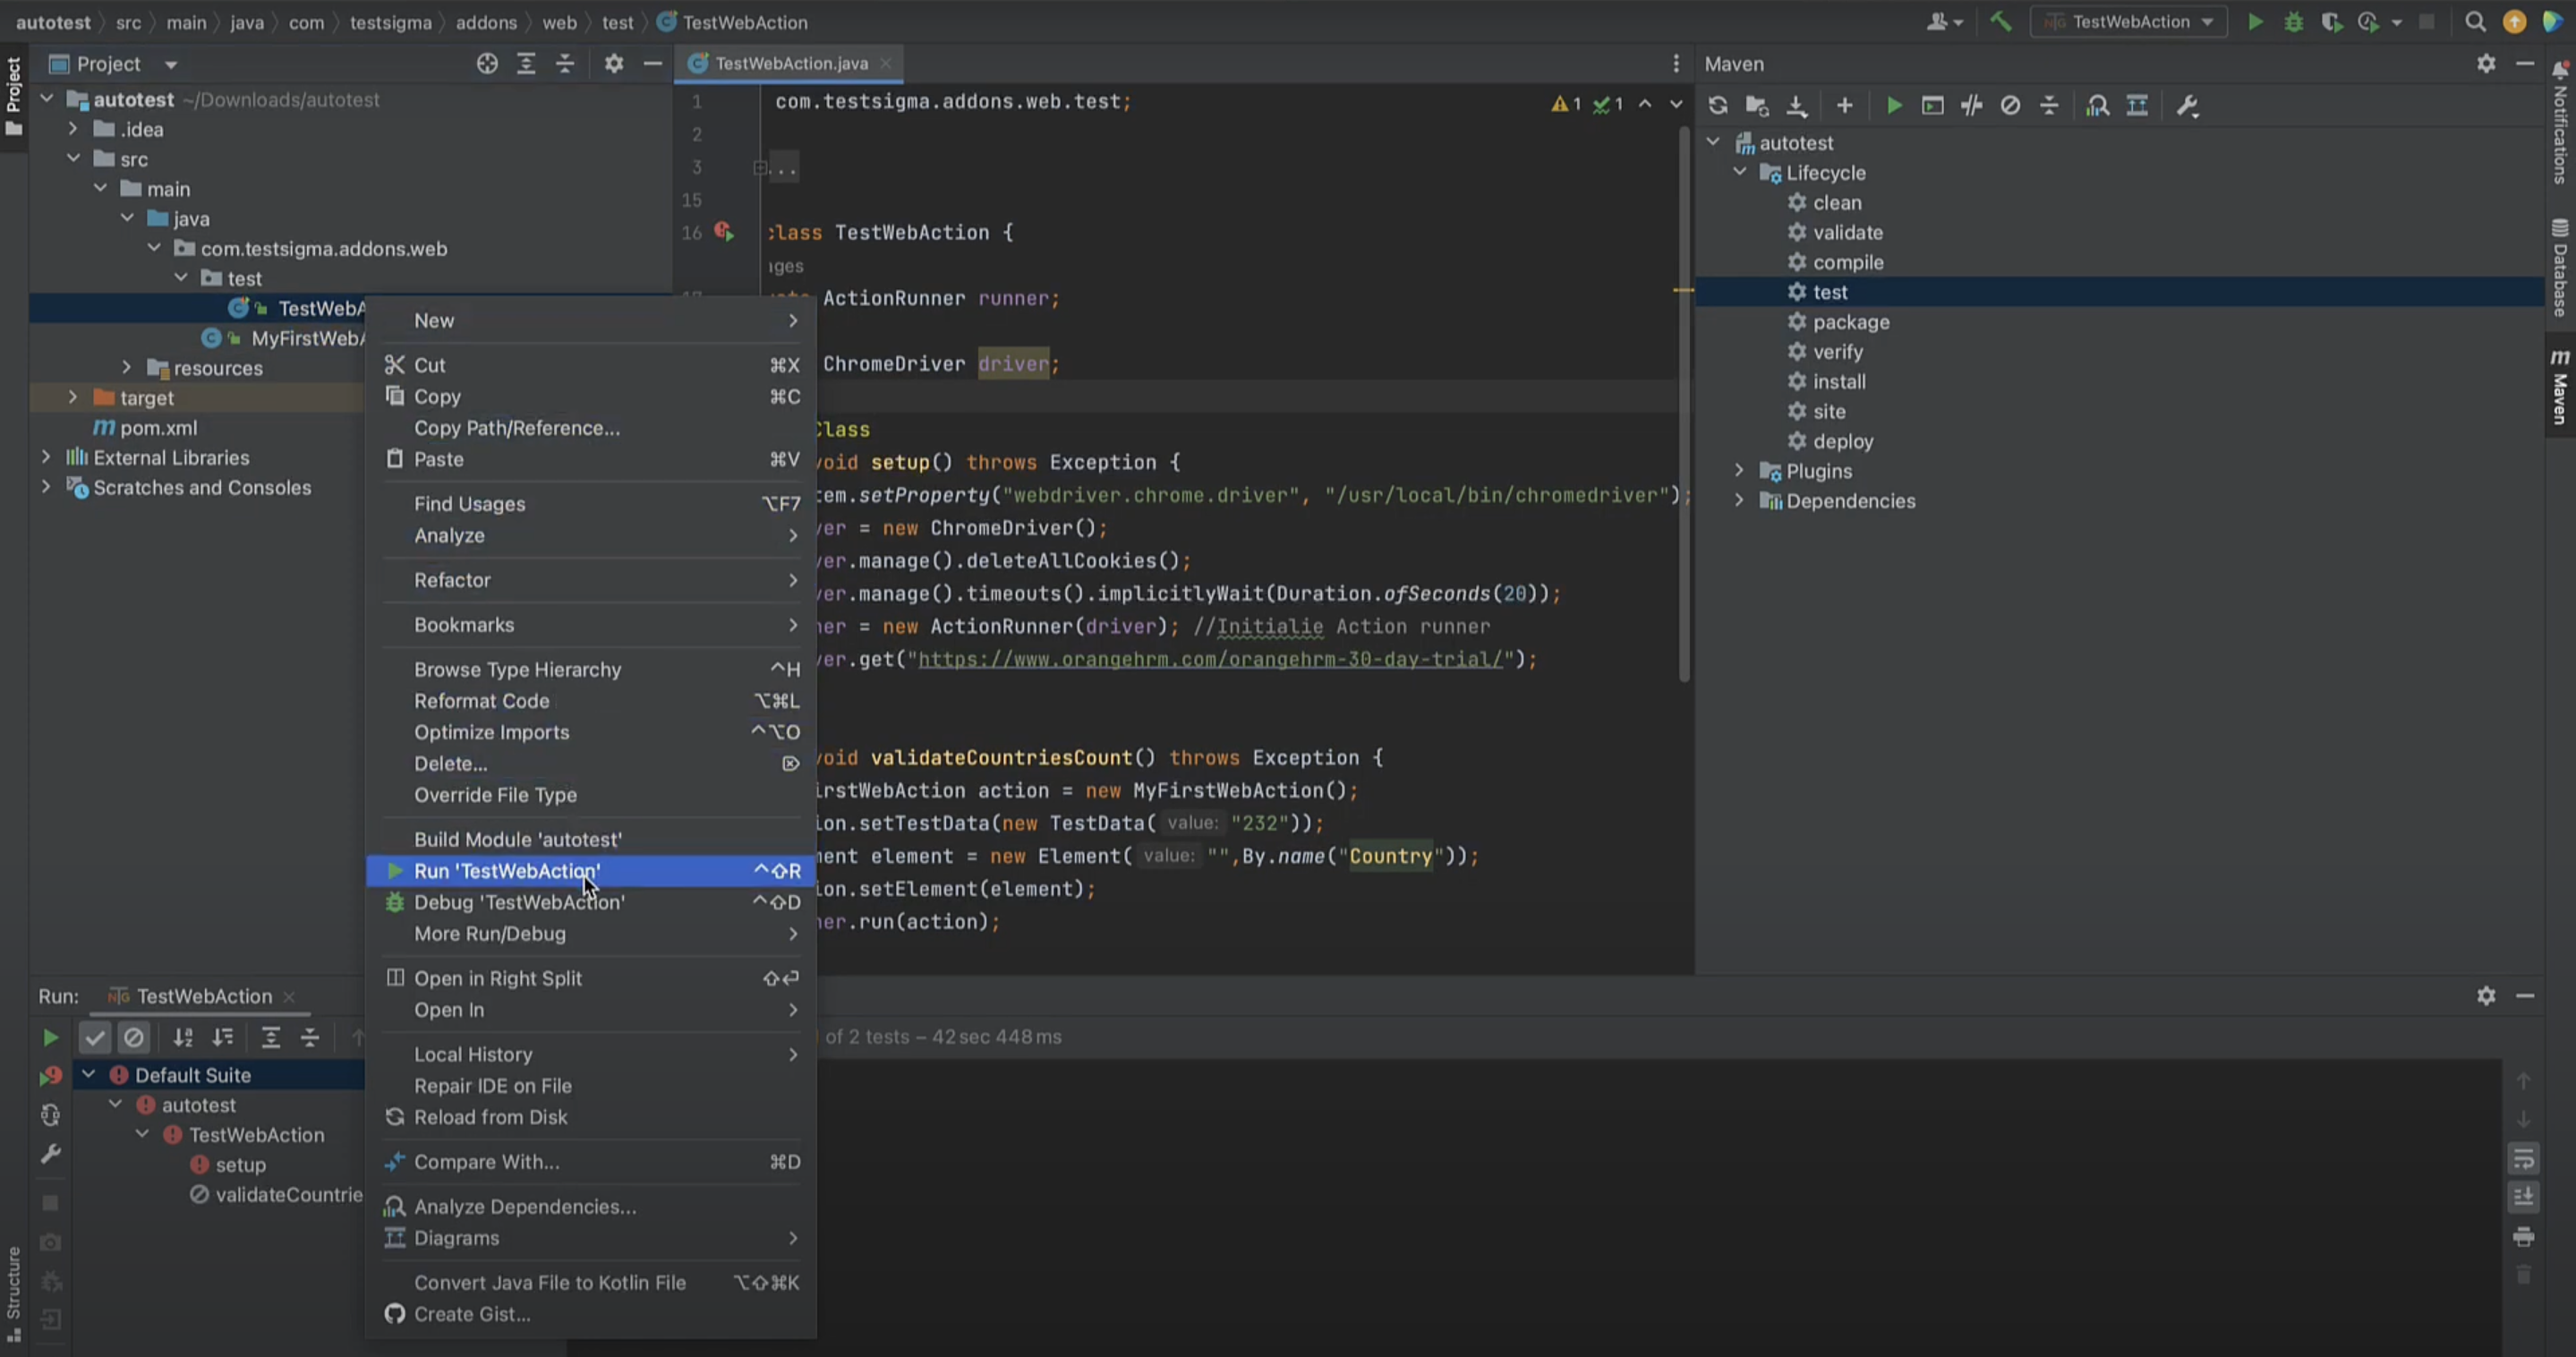
- Use JUnit or TestNG as your test runner.
- Right-click on the test class in your IDE and choose to run it as a JUnit or TestNG test.
- Verify that the addon performs as expected.
Upload the Updated Code
-
Once you have validated the code, save your changes and zip the project folder. You can use a command in a bash shell like:
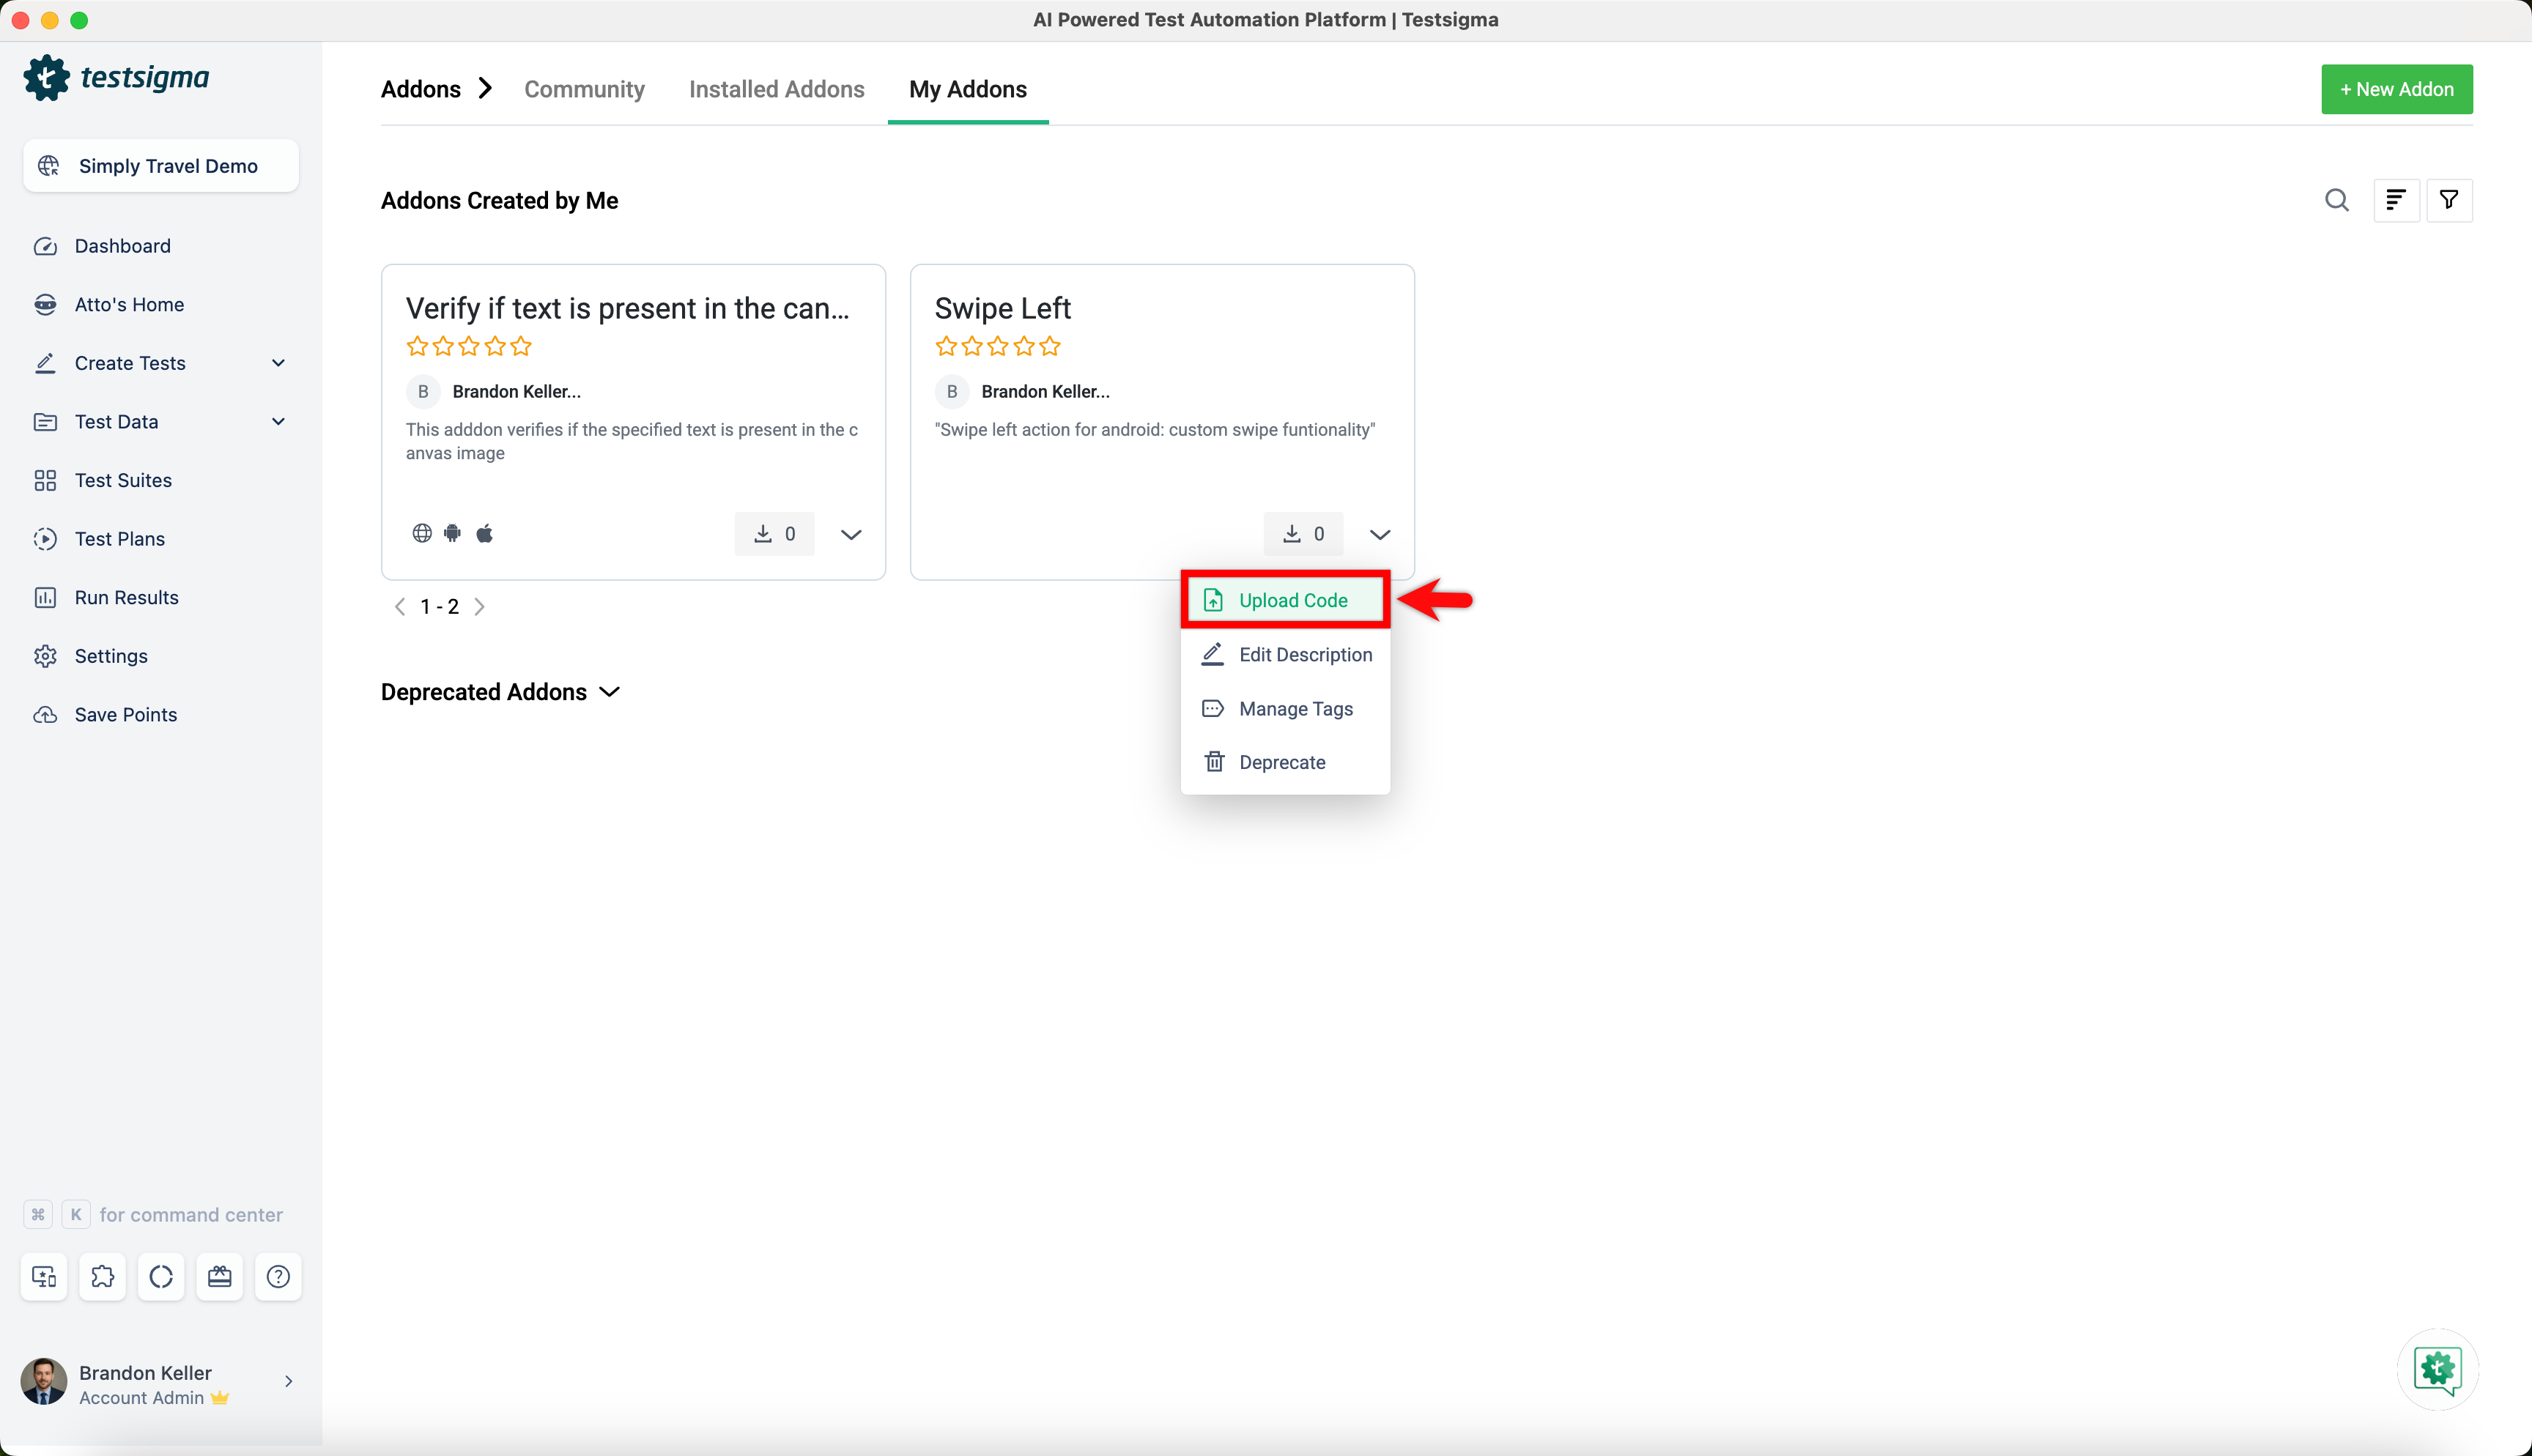
zip -r addonName.zip . -x "*" - Go to the Addons page, select your addon, and click Upload Code.
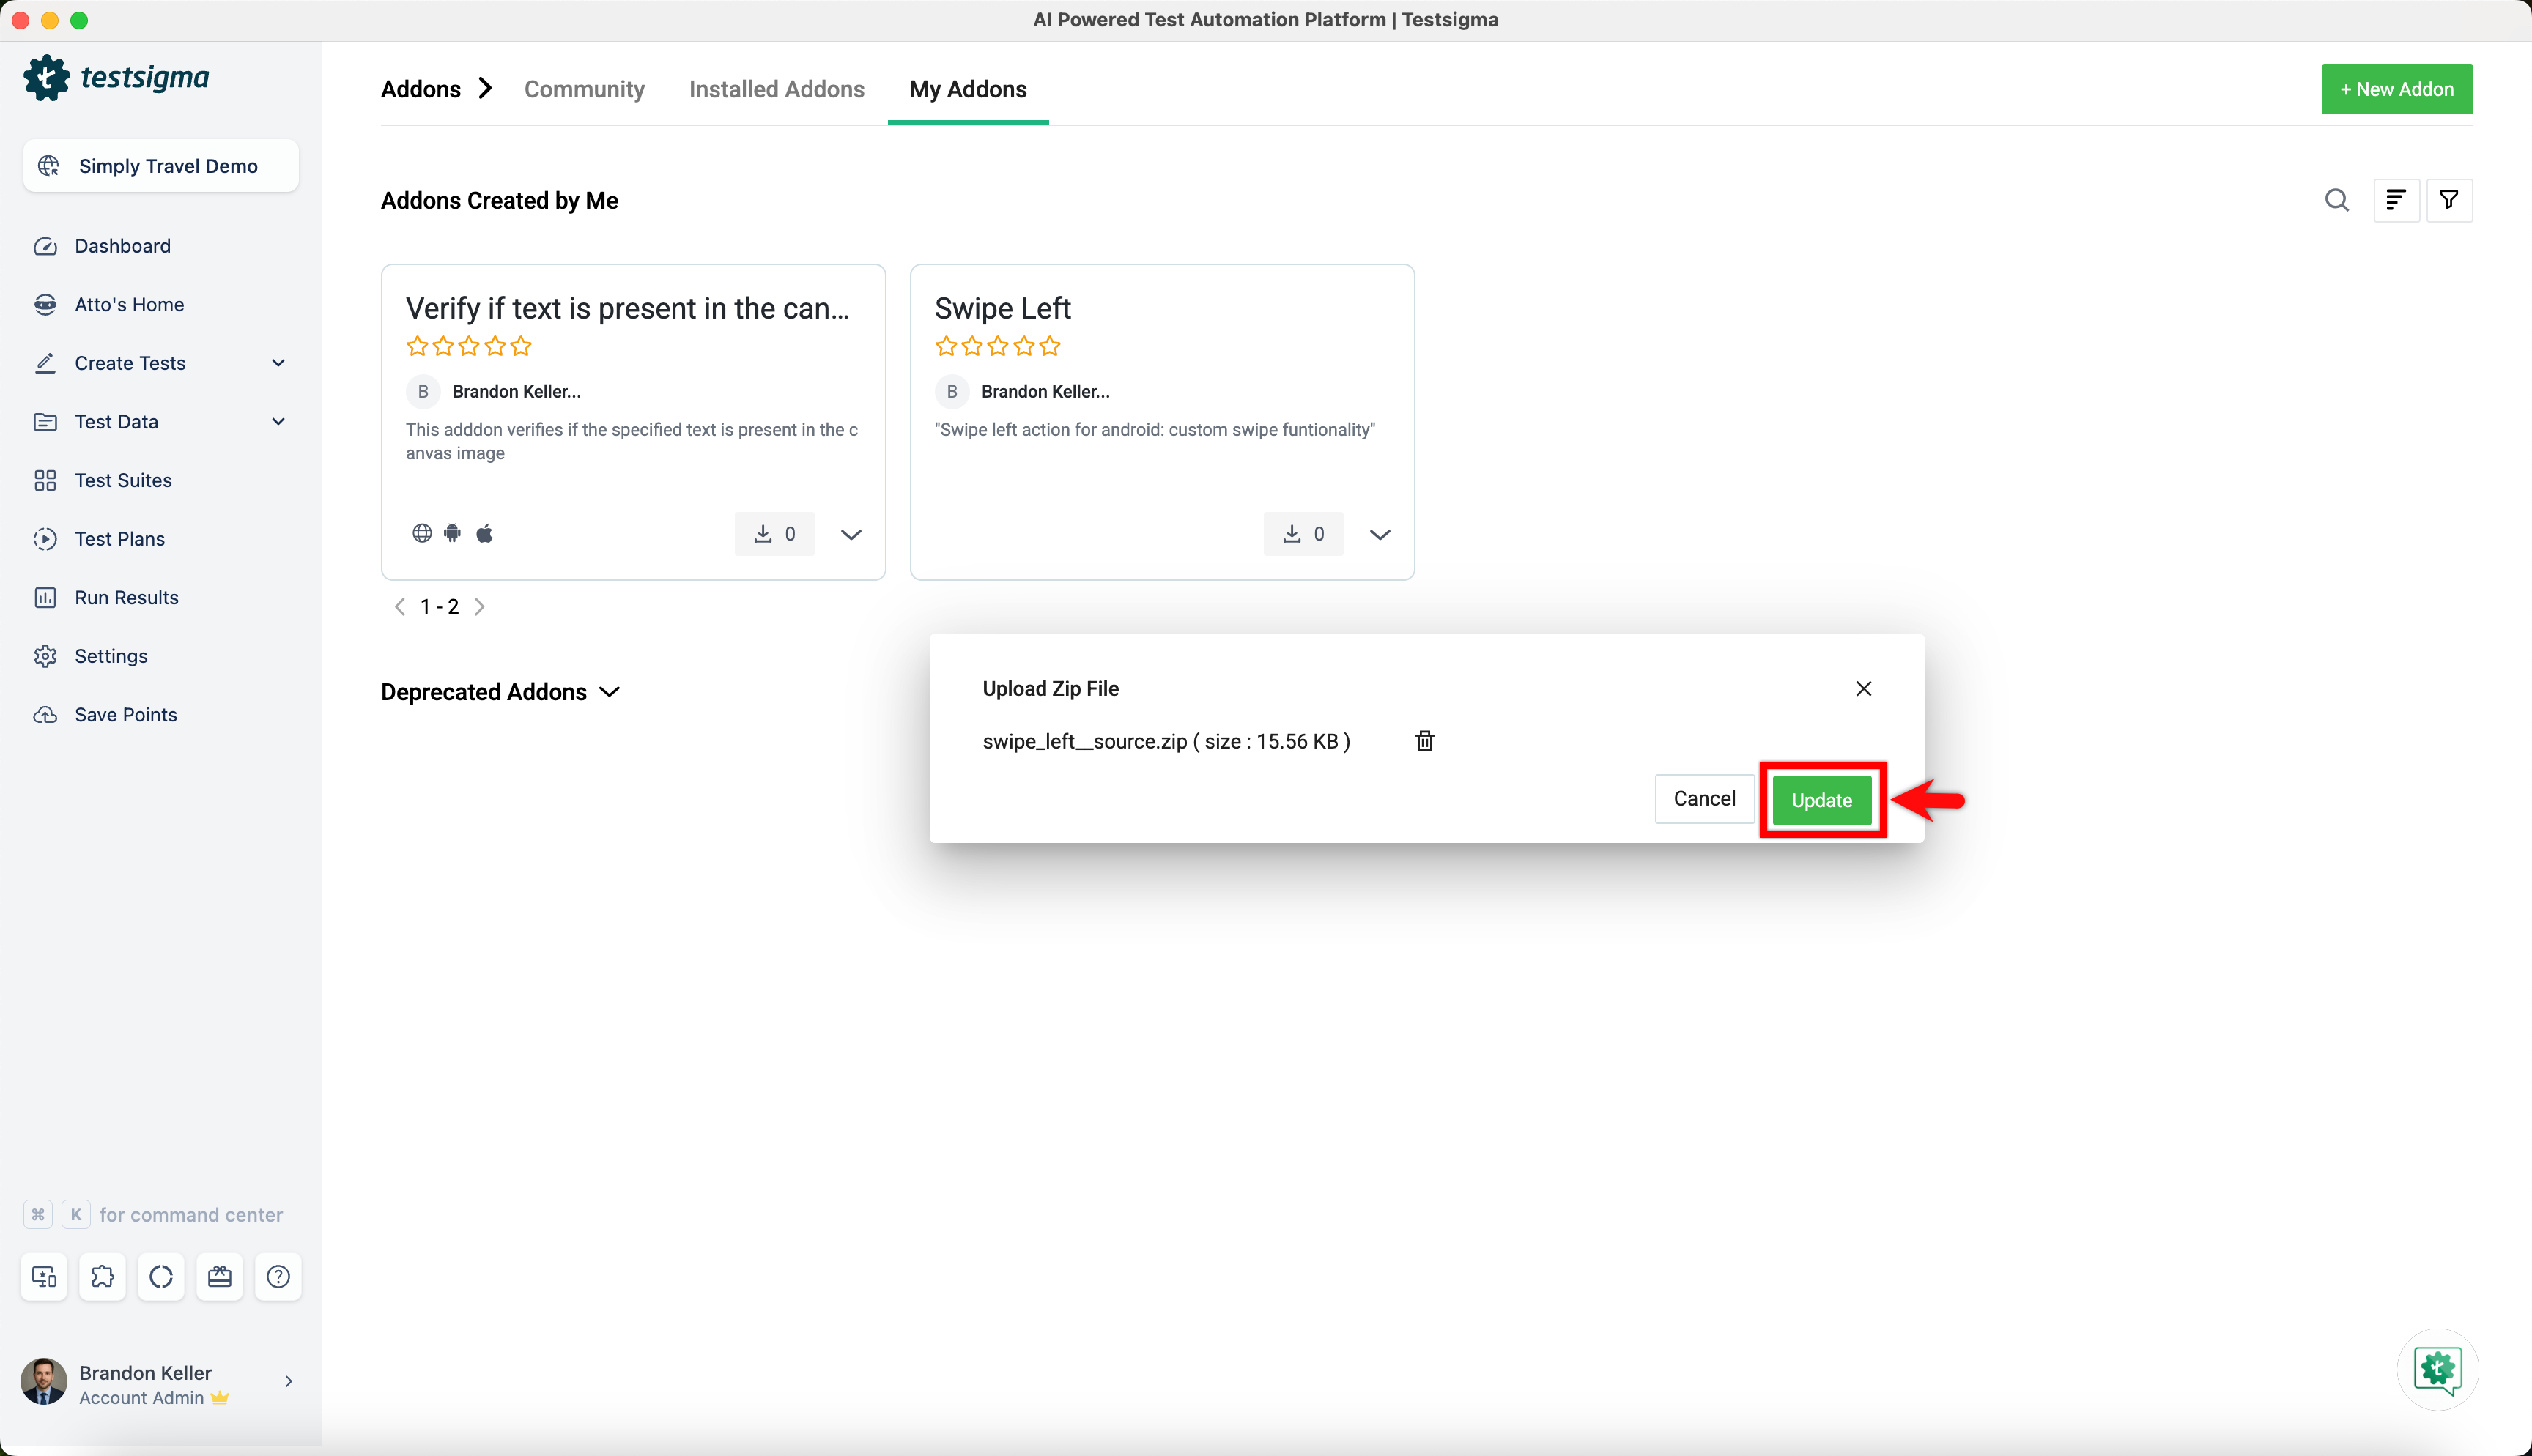
- Browse and select the zipped file, then click Update.
-
Additional options in the dropdown include:
- Edit Description: Update the description of your addon if needed.
- Manage Tags: Add tags or labels to organize your addon.
- Deprecate: Delete the addon if necessary.
Publish the Addon
-
After uploading the code, click on Publish from the dropdown menu.
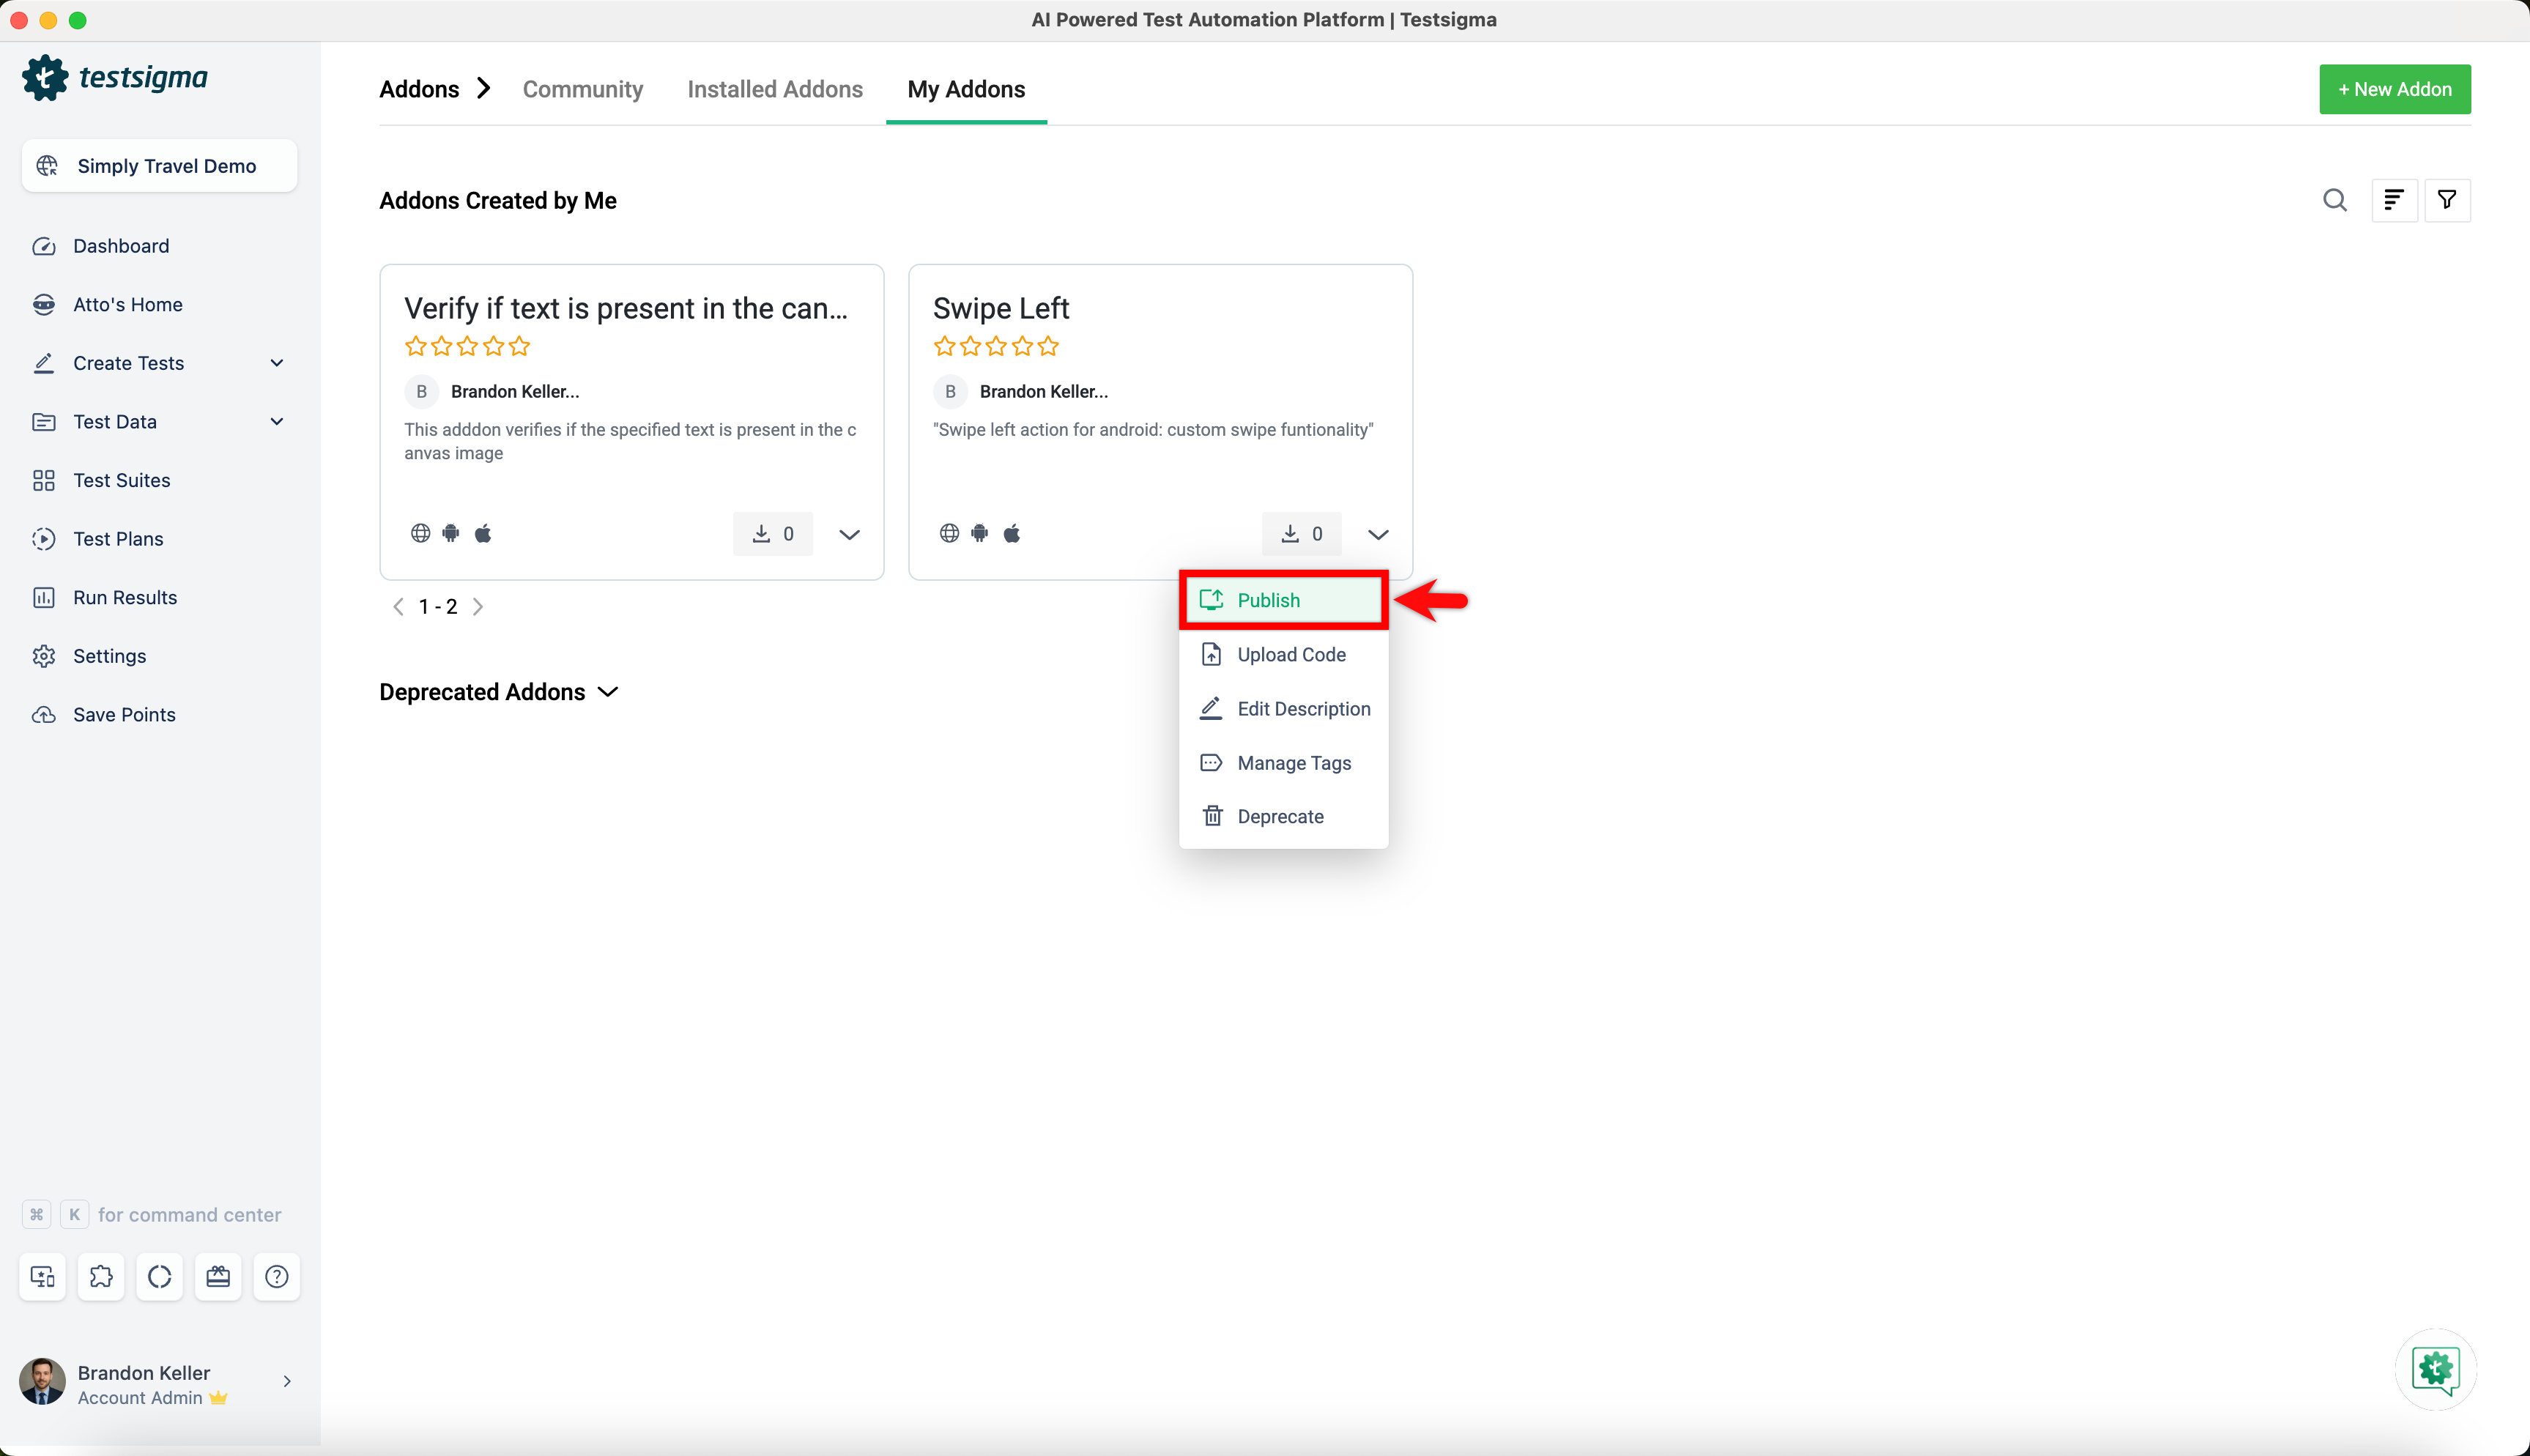
Then, choose your publish options:
- Public: Make the addon available to the entire Testsigma community.
- Private: Restrict availability to users within your organization.
- Once you select the required option, click Publish.
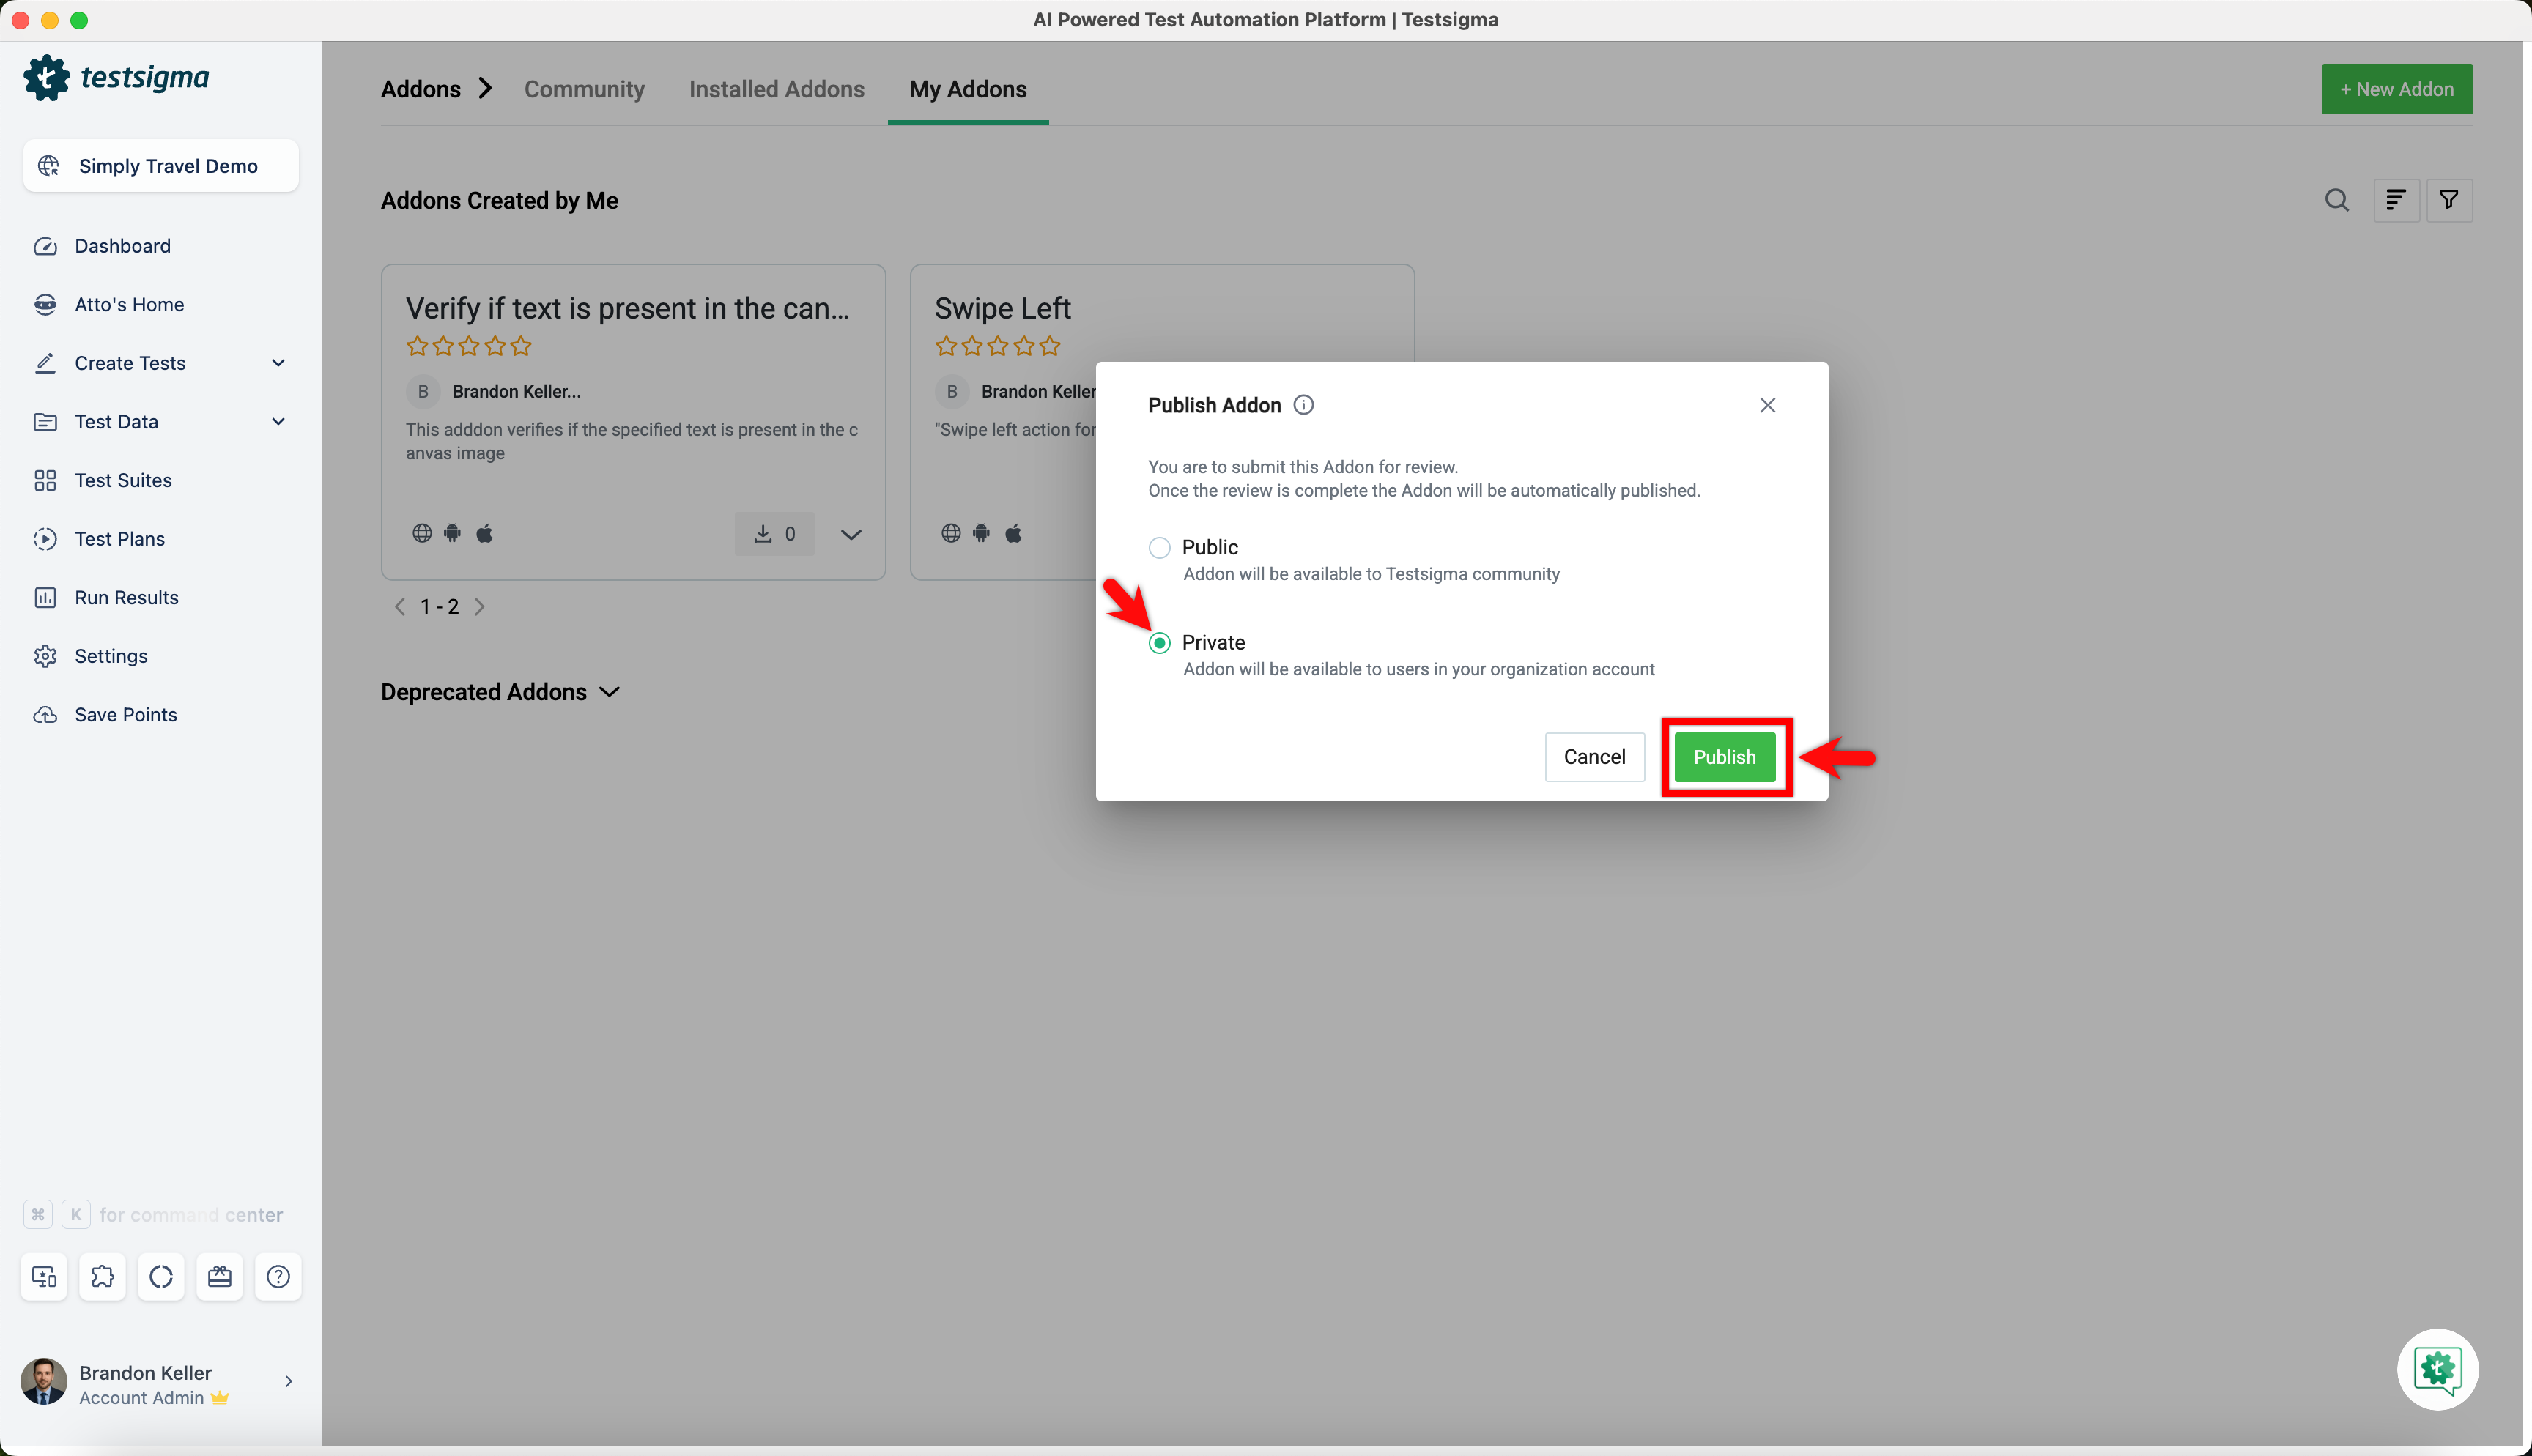
- An automatic security check will be done. If it passes, the addon will be published. If it fails, you will get an email notification.
Testsigma Support team will review your publishing request for trial users and send you an email notification once they approve the addon.
Use Addon in a Test Case
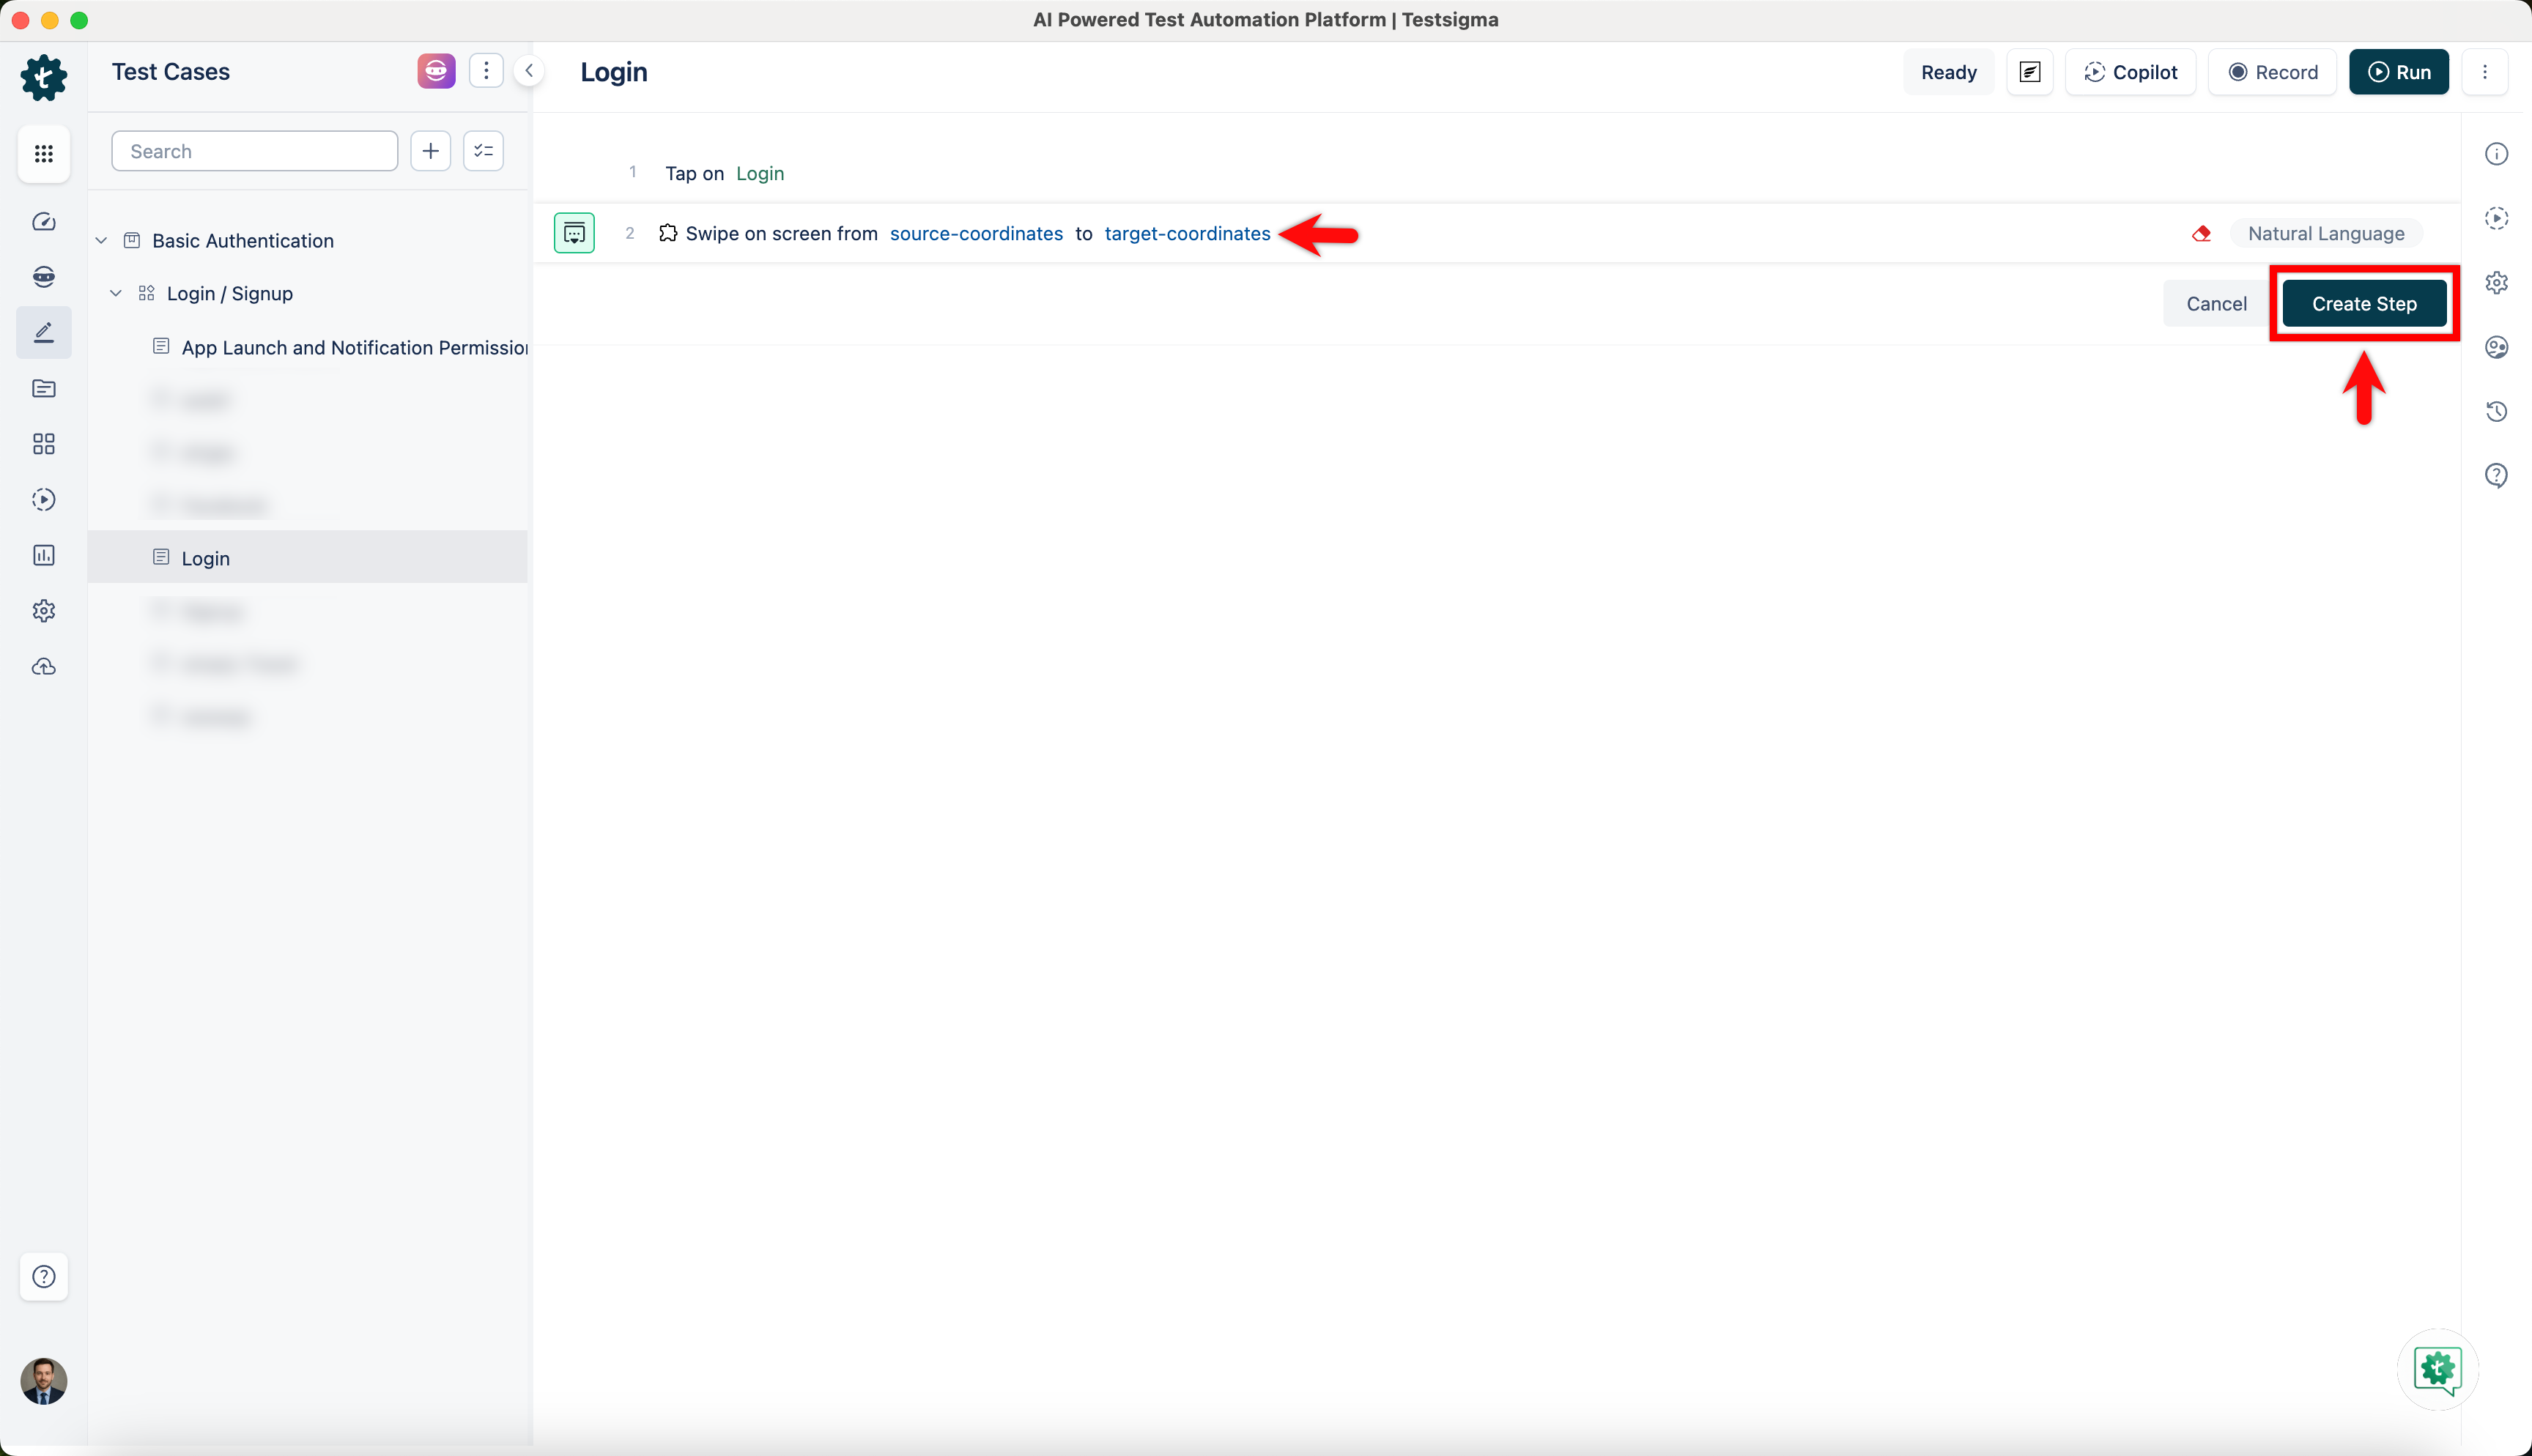
- Create a new test case or open an existing one. Click Add New Step and search for the action using the keywords.
- Look for the Addon icon before the test step to indicate it's from the Addon.
- Select it from the suggestions, update the test data and element, and then click Create Step.
Update an Existing Addon
Once your addon is live, you can revise it as requirements change, fixing bugs, adding features, or adjusting settings, without starting from scratch:
- Modify the addon's code and re-validate it using the same steps as Update the Action Code and Validate the Addon Code above.
- From the left navigation bar, go to Addons, open the My Addons tab, and select the addon you want to update.
- Click the dropdown icon on the addon and select Upload Code, then follow the same Upload and Publish steps described above.

Want to contribute or report missing content?