
Visual Regression Testing ensures that recent code or design updates don’t unintentionally alter how an application looks. It compares new UI versions with established baselines to detect layout shifts, color mismatches, or broken elements early. By maintaining visual consistency, teams can deliver a seamless and trustworthy user experience across every release.

Table Of Contents
- 1 Overview
- 2 What is Visual Regression Testing?
- 3 Why Perform Visual Regression Testing?
- 4 When to Perform Visual Regression Testing
- 5 How Does Visual Regression Testing Work?
- 6 How to Implement Visual Regression Testing
- 7 Different Methods of Visual Regression Testing
- 8 Benefits of Visual Regression Testing
- 9 When to Choose Manual vs Automated Visual Regression Testing
- 10 How to Choose a Visual Regression Testing Tool
- 11 Limitations of Traditional Visual Regression Testing Approaches
- 12 Best Practices for Automated Visual Regression Testing
- 13 How to Perform Visual Regression Testing Using Testsigma
- 14 Conclusion
- 15 FAQs
Overview
What is Visual Regression Testing?
Visual Regression Testing verifies that recent design or code changes haven’t unintentionally altered the appearance of your application. It compares new screenshots to baseline images to detect UI differences, such as misaligned elements, color shifts, or layout breaks.
When to Perform Visual Regression Testing
Run visual regression tests after UI or CSS updates, before releases, and during framework or dependency upgrades. Integrating them into CI/CD pipelines ensures continuous visual validation.
Common Visual Testing Methods
- Pixel-by-pixel comparison for precision
- DOM-based or layout comparison for structure validation
- AI-powered analysis for human-perceivable differences
What is Visual Regression Testing?
Visual Regression Testing is the process of verifying that recent code or design changes have not unintentionally altered the appearance of a website or application. It compares the latest version of a page with an earlier approved version, called the baseline, to detect visual differences such as alignment issues, color mismatches, broken layouts, or missing elements.
Unlike functional regression testing, which ensures that features continue to work correctly, visual regression testing focuses on how the interface looks and feels to users.
By identifying layout shifts or styling errors early, teams can maintain a consistent user experience and protect their brand identity across browsers and devices.
How Visual Regression Testing Differs From Functional Regression Testing
While both aim to ensure that new code changes do not introduce defects, visual regression testing and functional regression testing focus on different aspects of quality.
| Aspect | Functional Regression Testing | Visual Regression Testing |
| Purpose | Ensures that features and workflows continue to behave correctly after code updates. | Ensures that the appearance and layout of the user interface remain consistent after changes. |
| Focus Area | Application functionality and business logic. | UI design elements such as layout, colors, fonts, spacing, and overall visual consistency. |
| Question Answered | Does it work? | Does it look right? |
| Testing Method | Uses automated scripts or manual tests to validate user interactions, data flows, and outputs. | Compares screenshots or visual baselines to detect unintended UI changes. |
| Typical Tools Used | Selenium, Testsigma, Cypress, JUnit, TestNG. | Testsigma Visual Testing, Applitools, Percy, Chromatic. |
| Output Type | Pass/fail results based on functional validations. | Visual diffs highlighting UI discrepancies. |
| Primary Goal | Maintain feature reliability and prevent functional bugs. | Maintain visual consistency and prevent design regressions. |
Both are essential for delivering a seamless, reliable, and visually consistent user experience, functional regression testing ensures everything works, while visual regression testing ensures everything looks right. Explore the top Visual Regression Testing Tools to accelerate your QA journey
Why Perform Visual Regression Testing?
Visual Regression Testing helps ensure that every visual element of an application remains accurate and consistent after design or code changes. Even minor UI differences, such as misplaced buttons, overlapping text, or missing images, can disrupt the user experience and affect how users perceive your product.
By performing visual regression testing, teams can:
- Prevent visual defects from reaching production and damaging the brand image.
- Maintain consistency across browsers, devices, and screen resolutions.
- Improve release confidence, knowing that new changes have not introduced layout or styling issues.
- Reduce manual effort by automating visual checks that would otherwise require time-consuming human review.
At the end of the day, visual regression testing protects the usability, accessibility, and visual integrity of your application, key factors that influence user trust and satisfaction
Business Impact of Visual Consistency
Maintaining visual consistency across an application directly influences user trust, engagement, and conversion rates. A consistent interface reinforces brand identity and helps users navigate confidently, while inconsistencies can cause confusion or frustration. For businesses, even small visual errors can translate into lower user retention, reduced sales, and negative brand perception. By ensuring that every UI element appears as intended, visual regression testing safeguards both product quality and brand credibility.
Real-World Examples of Visual Regressions
Visual regressions often occur after front-end updates, style changes, or responsive design adjustments. For example:
- A checkout button may shift out of view after a CSS update, preventing users from completing purchases.
- Text overlap or color contrast issues may appear after font or theme changes, affecting readability.
- A navigation bar might disappear on mobile screens due to layout inconsistencies.
These visual issues may seem minor, but they can lead to significant usability problems, customer dissatisfaction, and financial loss if released unnoticed.
When to Perform Visual Regression Testing
Visual regression testing should be performed whenever there are changes that could affect the user interface, even if the functional behavior remains the same. Running these tests at the right stages helps detect visual issues early and maintain a consistent user experience.
You should conduct visual regression testing:
- After UI or CSS changes, to ensure that design updates do not cause layout or styling errors.
- Before releasing new builds, to verify that no unintended visual changes have been introduced.
- During integration of new features, to confirm that added components align visually with existing elements.
- After framework or library updates, as rendering differences may alter the appearance of components.
- Across major browser or device updates, to ensure the UI displays correctly in all supported environments.
How Does Visual Regression Testing Work?
Visual regression testing follows a repeatable workflow to detect unintended UI changes after updates. The process typically includes:
Baselining
Create approved reference screenshots of key pages and components across the required viewport matrix (e.g., mobile, tablet, desktop) and supported browsers/devices. Use stable test data, fixed time zones/locales, and seeded states (e.g., logged-in vs logged-out). Store baselines with version control and clear naming (page/state/viewport/browser).
Capturing Screenshots
After a code or design change, re-run the same journeys to capture fresh screenshots. Keep environment parity (fonts, OS rendering, DPI, network), mock dynamic elements (ads, live dates), and load critical resources before capture to avoid partial renders.
Comparison
Compare new images with baselines to surface visual diffs. Tools may support:
- Pixel thresholds (e.g., % of changed pixels)
- Perceptual/AI checks (human-noticeable changes)
- Layout/DOM-aware diffs (structure shifts)
- Reduce noise with ignore regions (dynamic timestamps, carousels), anti-aliasing compensation, and asset stabilization (e.g., cached icons).
Reporting
Produce a review report with before/after/diff panes, annotated regions, severity labels, and links to the failing commit/PR. Send results to CI dashboards, chat, or issue trackers. Group similar diffs (e.g., same header shift across pages) to speed triage.
Updating Baselines
- If the change is intentional, approve and update the baseline (with reviewer notes) so future runs compare against the new look.
- If unintended, log the defect, fix the UI, and re-run the suite until green.
How to Implement Visual Regression Testing
Implementing visual regression testing involves a sequence of defined steps that ensure your application’s visual integrity remains consistent throughout development. The process can be easily integrated into continuous delivery pipelines for reliable and automated checks.
Step 1: Create Test Scenarios
Identify the key user interfaces and workflows to test, such as login screens, dashboards, or checkout pages. Prioritize high-traffic and high-impact areas where layout or styling changes could directly affect user experience.
Step 2: Capture Screenshots
Use your chosen testing tool to capture baseline screenshots of these interfaces. Set up consistent browser, viewport, and device configurations to ensure accurate comparisons in later runs.
Step 3: Compare and Analyze
After each code or design update, rerun tests to take new screenshots and compare them against the baseline. The tool highlights any visual differences (diffs), helping identify misalignments, color changes, missing elements, or broken layouts.
Step 4: Review and Correct Issues
Inspect the diffs carefully to determine whether the changes are expected or regressions. Developers and QA teams should collaborate to verify if visual changes align with design intent or require fixes before release.
Step 5: Update Baselines and Re-Run Tests
Once verified, approve intentional changes and update the baseline to reflect the latest correct UI. Re-run the tests to confirm no new visual defects remain. This ongoing cycle keeps your UI consistent and reliable across versions and environments.
Different Methods of Visual Regression Testing
Visual regression testing can be performed using different techniques, each suited to specific project needs and levels of accuracy. The most common methods include:
Pixel-by-pixel Comparison
This is the simplest and most precise method, where two screenshots, baseline and new, are compared at the pixel level. Any variation in color, position, or shading is flagged as a difference. While highly accurate, this method may also detect insignificant changes caused by rendering differences, anti-aliasing, or font smoothing, leading to false positives.
Layout OR DOM Comparison
Instead of comparing individual pixels, this method analyzes the Document Object Model (DOM) and layout structure of the application. It focuses on the position, size, and arrangement of elements, making it more tolerant of visual noise. However, it may miss subtle design issues such as color or font inconsistencies.
Visual AI Comparison
AI-driven comparison tools use machine learning algorithms to detect only human-perceivable visual changes. These tools can differentiate between acceptable variations (like minor color shifts) and true regressions. Visual AI testing reduces false positives, scales better for large UI suites, and is ideal for dynamic or frequently changing interfaces.
Checkpoint-Based Validation
In this method, testers insert specific checkpoints in the UI workflow to validate key visual components, such as headers, buttons, or modals, at defined steps. It provides faster feedback by focusing on critical visual areas instead of comparing entire pages. This targeted approach works well in agile teams where testing needs to be both efficient and continuous.
Benefits of Visual Regression Testing
Visual regression testing plays a crucial role in ensuring that every UI update aligns with the intended design and user experience. By validating the interface continuously, teams reduce risk, improve efficiency, and safeguard product quality. Here are some key benefits:
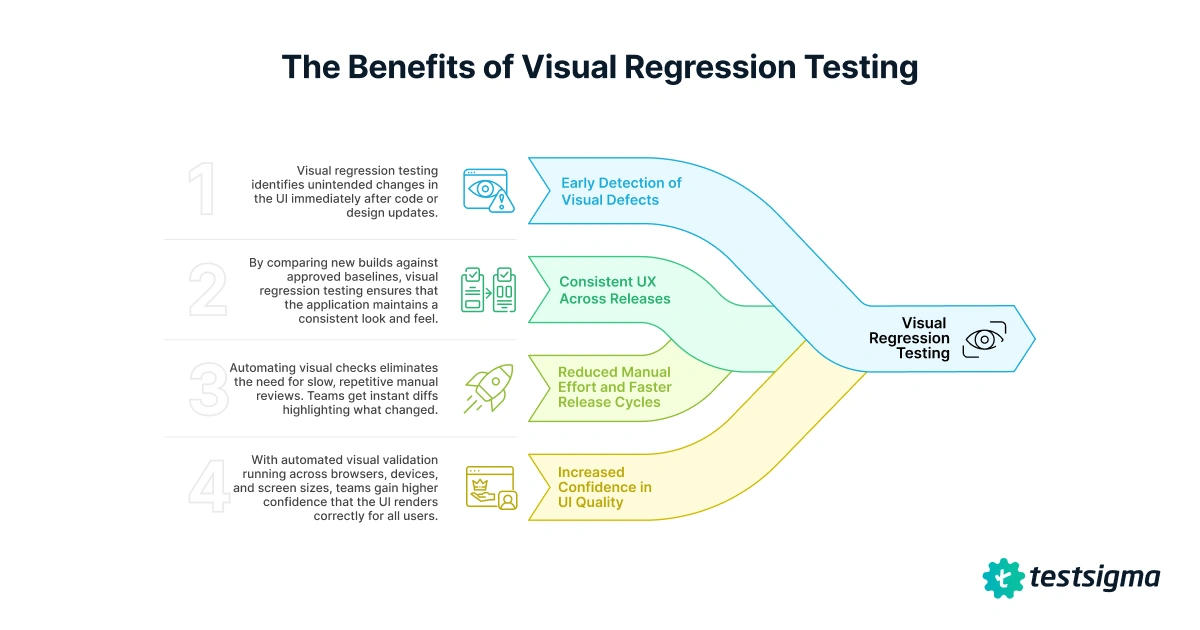
1. Early Detection of Visual Defects
Visual regression testing identifies unintended changes in the UI immediately after code or design updates. Detecting issues early helps prevent broken layouts, misaligned elements, or styling errors from reaching production, saving significant time and rework.
2. Consistent User Experience across Releases
By comparing new builds against approved baselines, visual regression testing ensures that the application maintains a consistent look and feel. This protects brand identity and helps users navigate seamlessly without encountering unexpected visual changes.
3. Reduced Manual Effort and Faster Release Cycles
Automating visual checks eliminates the need for slow, repetitive manual reviews. Teams get instant diffs highlighting what changed, allowing QA to focus on critical areas rather than scanning screens manually. This accelerates release cycles and improves overall testing efficiency.
4. Increased Confidence in UI Quality
With automated visual validation running across browsers, devices, and screen sizes, teams gain higher confidence that the UI renders correctly for all users. This reliability supports smoother deployments and enables more frequent, stable releases.
When to Choose Manual Vs Automated Visual Regression Testing
Both manual and automated approaches to visual regression testing have their advantages. The right choice depends on your project’s scale, release frequency, and resource availability.
| Factor | Manual Visual Testing | Automated Visual Testing |
| Accuracy | Subject to human error and fatigue | Consistent and objective results |
| Effort | High; repetitive visual checks | Low after initial setup |
| Speed | Slow; depends on tester capacity | Fast; runs parallel across builds |
| Cost | Increases with project size | Cost-effective over time |
| Scalability | Limited to small projects | Easily scales across pages and devices |
Manual testing may suit early-stage designs or small applications, while automated visual testing is better for ongoing releases and large-scale products.
How to Choose a Visual Regression Testing Tool
Selecting the right visual regression testing tool depends on your team’s workflow, tech stack, and testing maturity. Look for tools that simplify setup, integrate with your existing CI/CD pipeline, and provide accurate, noise-free comparisons.
Key Features to Look for
- Reliable baseline management with version control
- Integration with CI/CD pipelines for automated runs
- Cross-browser and device support
- AI or perceptual comparison to reduce false positives
- Clear diff visualization and reporting
- Collaboration features for review and approval
Quick Evaluation Checklist
- Easy setup and test creation
- Supports dynamic content handling (ignore regions, masking)
- Works with your framework (Selenium, Cypress, Playwright, etc.)
- Scalable cloud execution
- Detailed reporting and dashboard
Limitations of Traditional Visual Regression Testing Approaches
While visual regression testing is highly effective for maintaining UI quality, traditional methods come with certain challenges that can impact accuracy, scalability, and maintenance effort. Understanding these limitations helps teams choose smarter, more efficient solutions.
1. High Maintenance Effort
Traditional visual testing often requires frequent updates to baseline images whenever intentional design changes are made. Managing and versioning these baselines across multiple browsers, devices, and environments can become time-consuming.
2. False Positives and Visual Noise
Minor rendering differences, such as font smoothing, shadows, or anti-aliasing, can trigger false positives. This noise increases the review workload for QA teams, making it harder to distinguish genuine issues from acceptable variations.
3. Scalability Challenges
As applications grow in complexity, traditional image comparison tools struggle to handle large test suites efficiently. Running visual checks across many pages or dynamic states can slow down the testing process and require significant storage resources.
4. Dynamic Content Issues
Pages with frequently changing content (ads, timestamps, or live data) can produce inconsistent results. Without proper masking or ignoring rules, these variations create unnecessary test failures.
5. Limited Insight and Context
Conventional comparison tools highlight differences visually but often lack deeper analysis or integration with CI/CD pipelines. This limits collaboration, slows down triage, and delays fixes.
6. Manual Review Dependency
Even with automation, many traditional setups still rely heavily on human review to validate diffs. This introduces subjectivity, inconsistency, and extra effort, especially for large teams.
Modern AI-driven and cloud-based visual regression tools help overcome these issues by reducing false positives, supporting dynamic content handling, and providing scalable, automated workflows that fit seamlessly into CI/CD pipelines.
Best Practices for Automated Visual Regression Testing
Following a few best practices helps teams get the most reliable results from automated visual regression testing while keeping maintenance low and accuracy high.
- Integrate with CI/CD: Run visual tests automatically with every build or pull request to catch regressions early. For teams aiming to streamline continuous testing even further, pairing visual regression checks with visual automation testing ensures end-to-end coverage.
- Version and Manage Baselines: Store baseline images in version control and update them only after verified UI changes.
- Mask Dynamic Content: Exclude elements like timestamps, ads, or animations to prevent false positives.
- Focus on Critical User Flows: Start with essential journeys such as login, checkout, or dashboards before expanding coverage.
- Review and Tune Regularly: Periodically revisit thresholds, ignore regions, and environment setups to maintain consistent and meaningful test results.
How to Perform Visual Regression Testing Using Testsigma
Testsigma makes visual regression testing simple and efficient through its built-in Visual Testing feature. You can quickly identify UI changes, maintain design consistency, and ensure every release looks exactly as intended, all without writing any code.
Step 1: Enable Visual Testing in Test Steps
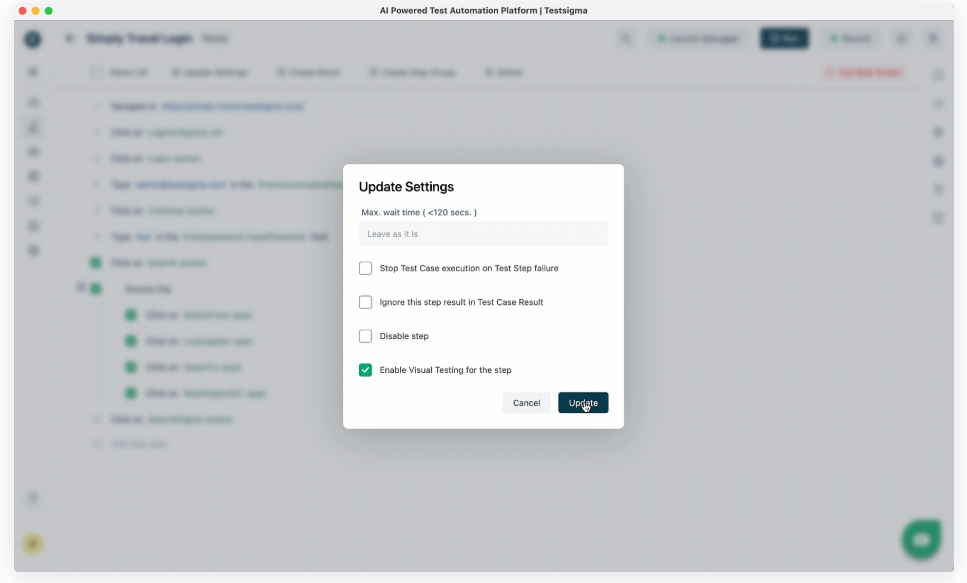
- Open an existing or new test case.
- Go to the test step details.
- Click the ellipsis (⋮) icon.
- Select Enable Visual Testing to capture a baseline image after the next successful run.
- You can also bulk-enable this option for multiple steps
Step 2: Run Tests and Review Visual Diffs
Re-run the test case. Visual validation steps show camera icons, green for no differences, red for detected changes. Click the icon to open the Visual Difference overlay to compare before/after images, view highlighted changes, and mark ignore regions for dynamic content.
Step 3: Update Baseline Images
- If changes are intentional, click Mark as Base Image.
- Testsigma automatically saves this as the new baseline for future comparisons
Step 4: Optimize and Customize
- Choose between Strict Mode (pixel-perfect validation) or Lenient Mode (allows minor differences).
- Define ignore regions to exclude dynamic or changing elements.
- This helps reduce false positives and streamline test reviews.
By integrating visual testing into your CI/CD workflow, Testsigma helps teams detect visual regressions early, minimize review effort, and maintain UI consistency across browsers and devices.
Conclusion
Visual regression testing ensures every release maintains design accuracy and user experience consistency. By automating these checks, teams can detect layout or styling issues early and release with greater confidence. With Testsigma’s visual testing, setting up and running automated visual regression tests takes only a few steps. Its AI-driven comparisons, flexible modes, and CI/CD integrations make visual validation faster, smarter, and easier to scale.
FAQs
Visual regression tests detect issues by comparing new screenshots of an application’s interface against previously approved baseline images. When differences are found, the testing tool highlights the affected areas so teams can visually inspect and identify the cause, such as CSS changes, missing assets, or layout shifts. This side-by-side comparison makes it easy to pinpoint exactly where and how the UI has changed.
Yes. Visual regression testing is highly effective in agile environments where frequent updates are made. Automated visual tests can run as part of CI/CD pipelines, ensuring that every new build is visually validated within minutes. This enables teams to maintain rapid release cycles without compromising on design quality or user experience.
Visual regression testing helps catch UI issues that functional tests may overlook, such as overlapping elements, broken layouts, color inconsistencies, and missing images. It also identifies design drifts introduced by CSS or framework updates. By preventing these problems early, teams deliver visually consistent, user-friendly applications across all browsers and devices.

