- Projects
- Test Cases
- Data Sets
- Imports and Exports
- Step Groups
- Test Runs
- Test Plans
- Integrations
- Testsigma Two-way Integration
- Settings
- Manage Users
- Reports & Analytics
- CI/CD Integrations
Sprint Planner: For Effortless Test Planning with AI
Quickly turn Jira sprint stories into ready-to-run test cases with minimal effort.
You can generate test cases automatically by integrating Jira with Test Management by Testsigma. Atto detects sprints from Jira and displays them on the Atto Home. You can activate a sprint and select user stories to generate multiple test cases with just a few clicks.
The Sprint Planner Agent helps you manage and organize your Jira sprints in Testsigma, while the Generator Agent automatically generates test cases from selected sprint stories. This article explains how to use these agents together for a seamless test creation workflow.
Prerequisites
Before you begin, ensure:
- You have a project created in Test Management by Testsigma.
- The project is connected to a Jira project.
- You have Admin Access in Jira to authorize the initial integration with Test Management by Testsigma.
- You know how to create WebHooks in Jira to enable real-time sync between Jira and Test Management by Testsigma. For more information, see Creating WebHooks in Jira
Interactive Demo
Attach a Jira Project
- On the Dashboard, click the Candy Box icon, and then select + New Project.
- In the Create a New Project dialog, enter the Project Name, Description, and Project Key.
-
From the Jira Project dropdown, select the project you want to attach.
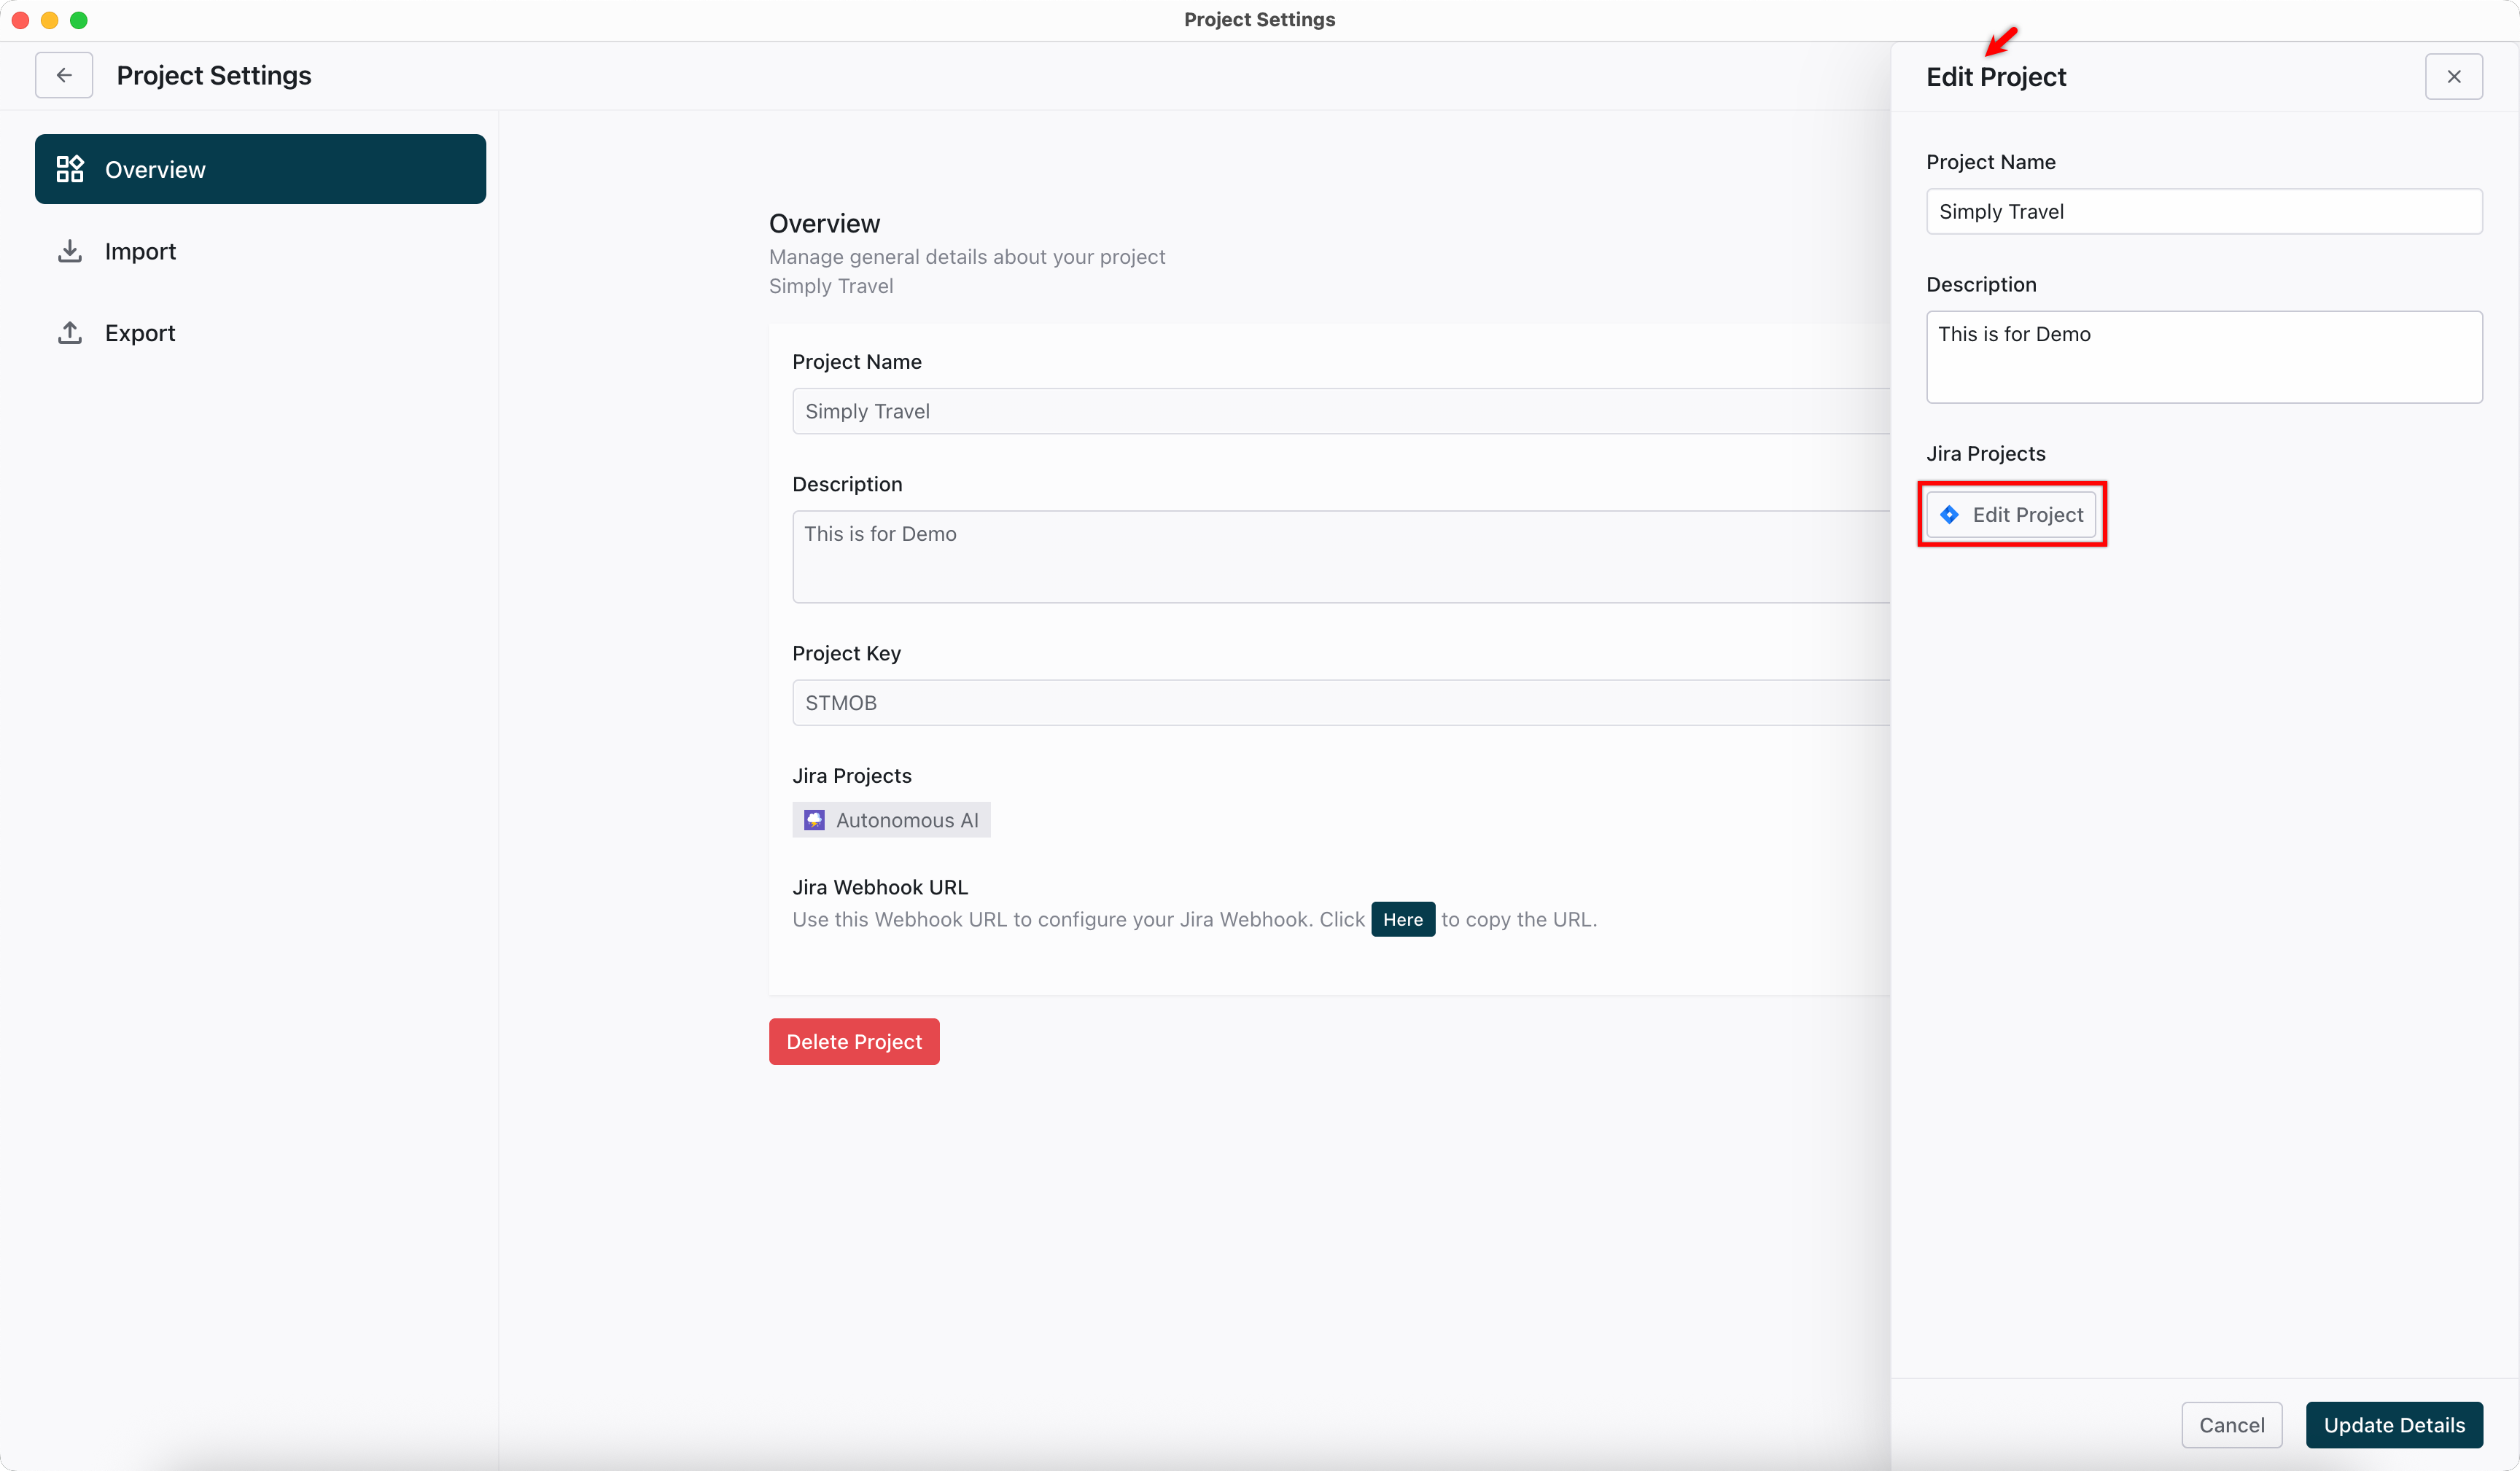
Alternatively, you can also attach the Jira project from the Project Settings overlay.
View & Activate Jira Sprints in Atto
- On the Dashboard, click Atto’s Home.
- Go to the Other Sprints tab to view all available sprints from your Jira project.
-
In the Other Sprints tab of Atto’s Home, you can see the following tabs:

- Inactive: Displays sprints that are imported from Jira but are not yet active in Testsigma. You can activate these sprints for test case generation.
- Completed: Displays sprints that were previously activated and done with the test case generation.
- Deleted: Displays sprints that are deleted in the Jira project.
Use these filters to easily find the sprints you need based on their current workflow status.
- Review the list of sprints. Each sprint card shows the Sprint ID, Name, Number of stories waiting for test generation, and the Last Updated Date.
-
Select a sprint to view the list of stories associated with that sprint. The sprint view shows the following details:
a. Sprint Name and Duration
b. Tabs to filter stories by status: All Stories, To Do, In Progress, and Done
c. Search by title box to find a specific story
d. Story list with ID, Title, and Current Status (e.g., To Do)
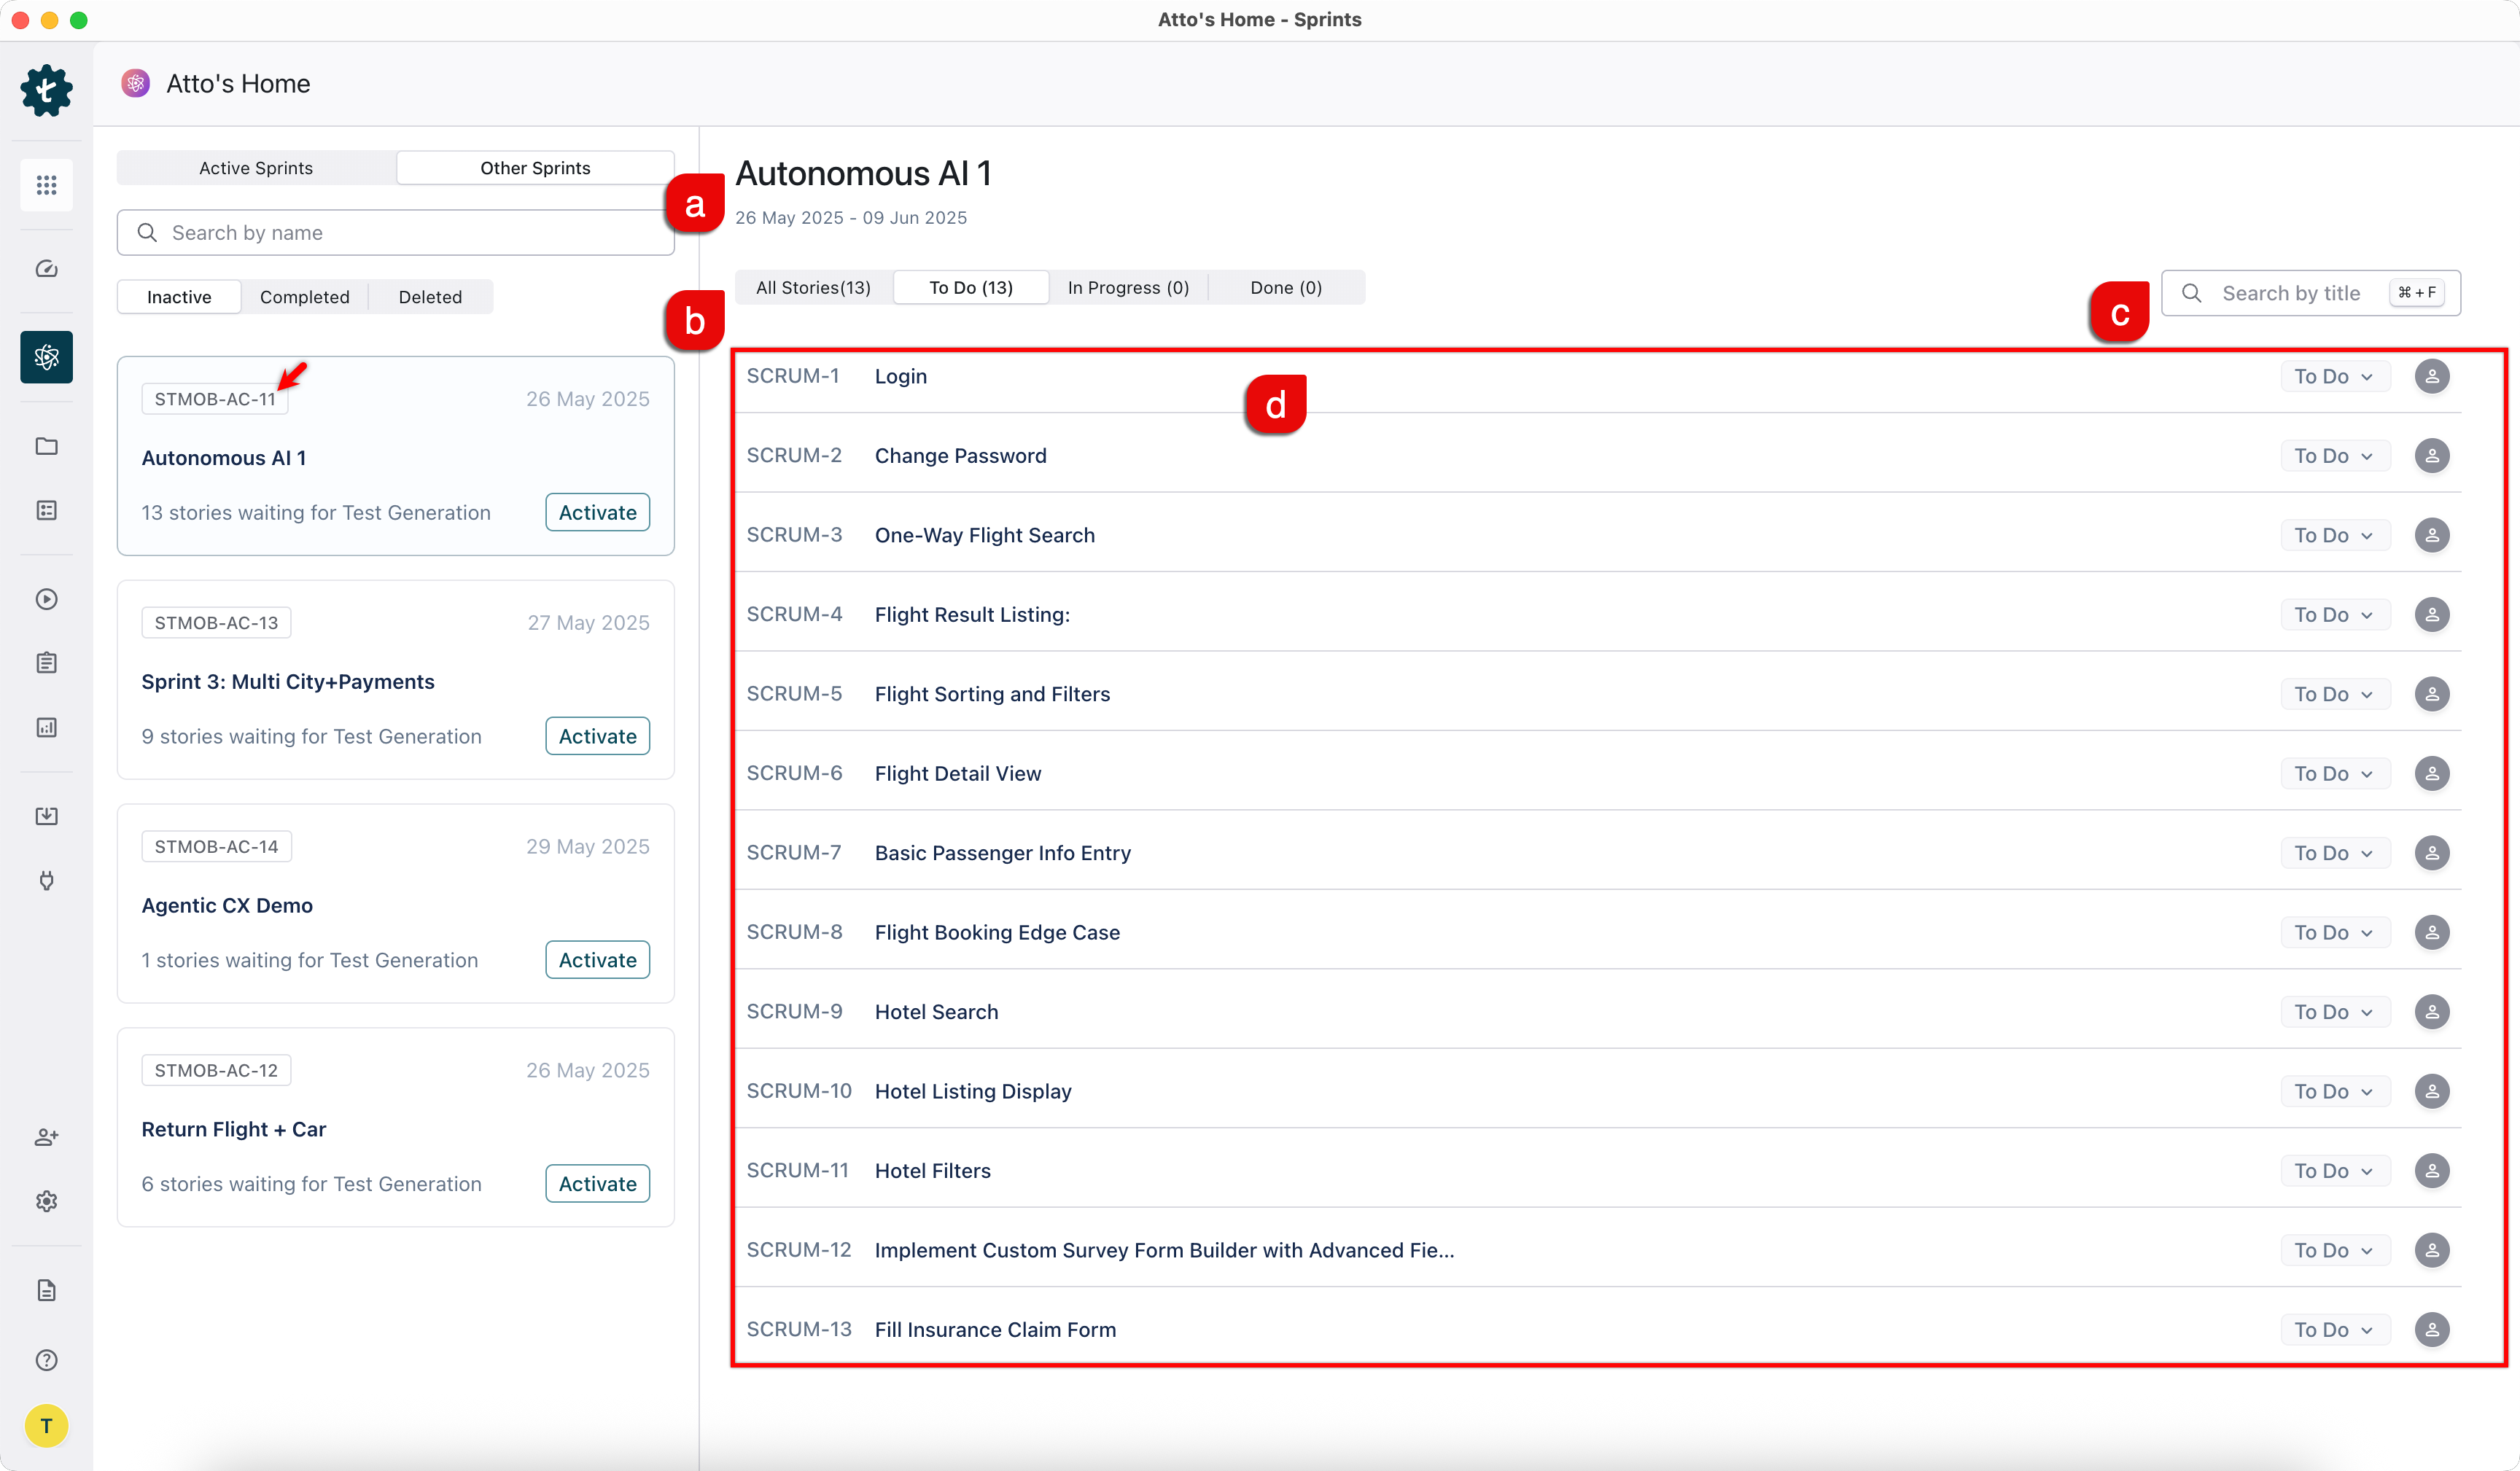
- Click Activate next to the sprint for which you want to generate test cases.
View Sprint Details & Generate Test Cases
-
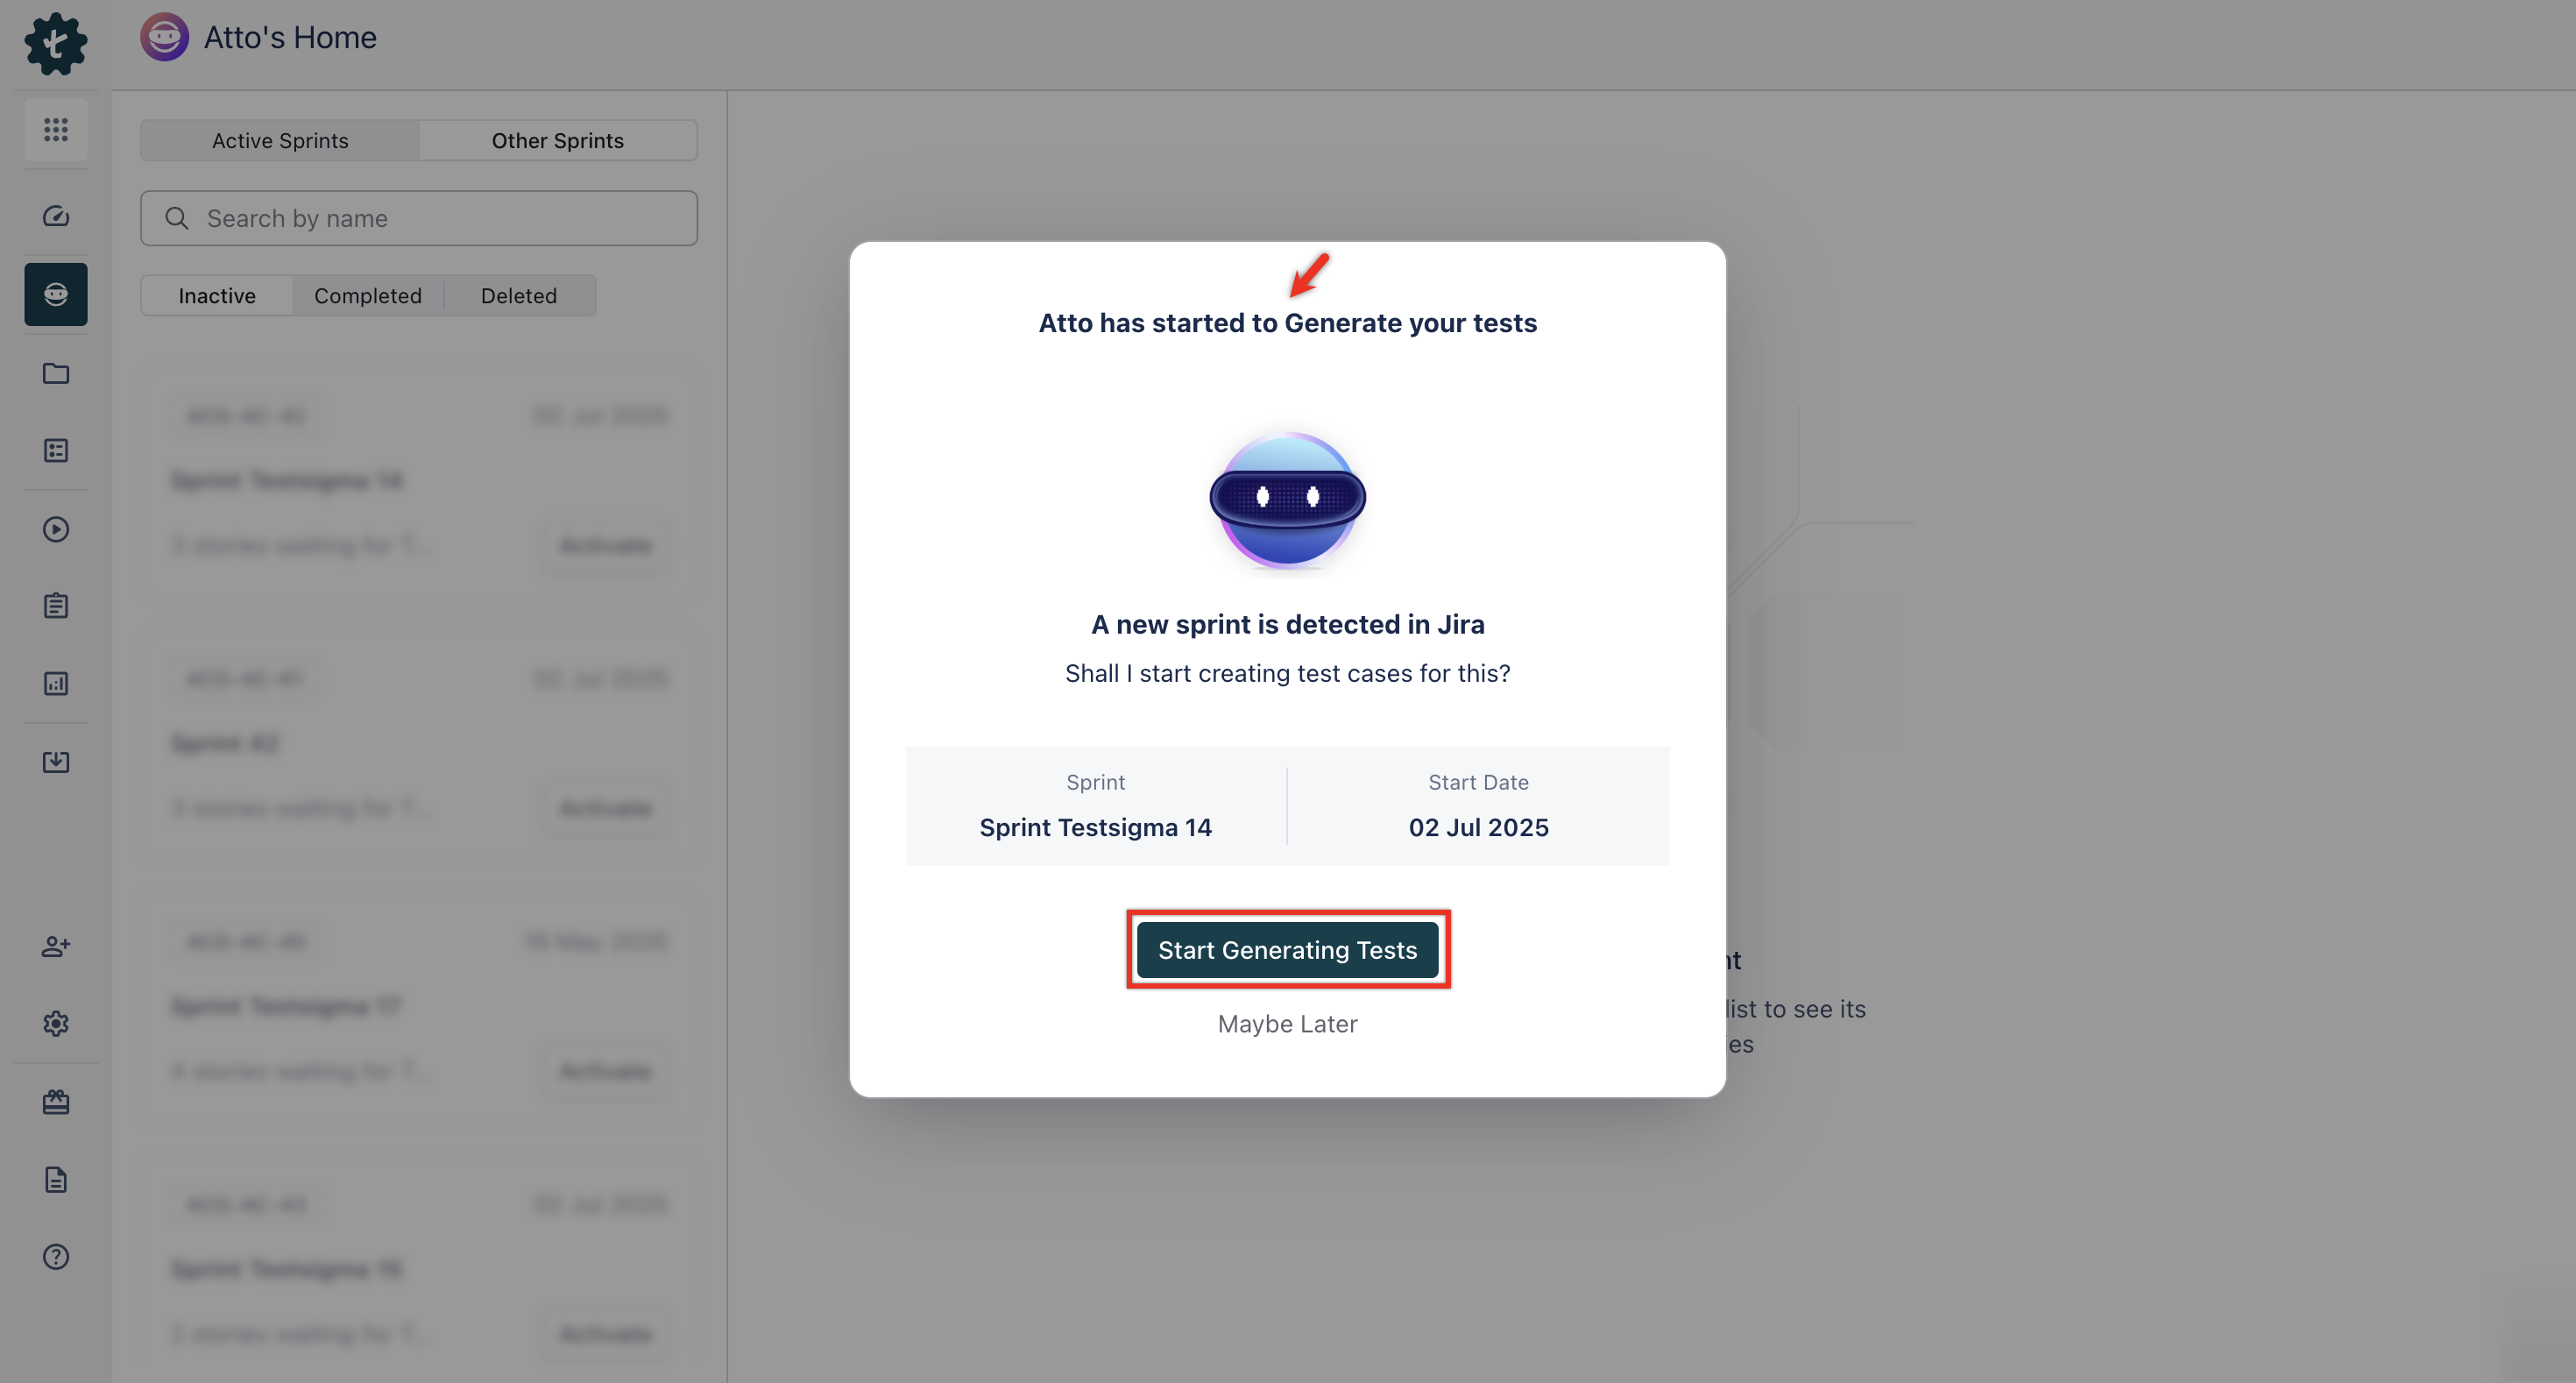
Once you activate a sprint in Jira, Atto detects and displays sprint details in a popup in Test Management by Testsigma.
NOTE:At this stage, the Generator Agent takes over and starts generating test cases automatically based on the selected user stories. You can review, edit, and organize these cases before saving them.
- Click Start Generating Tests to start generating tests for the attached stories.
-
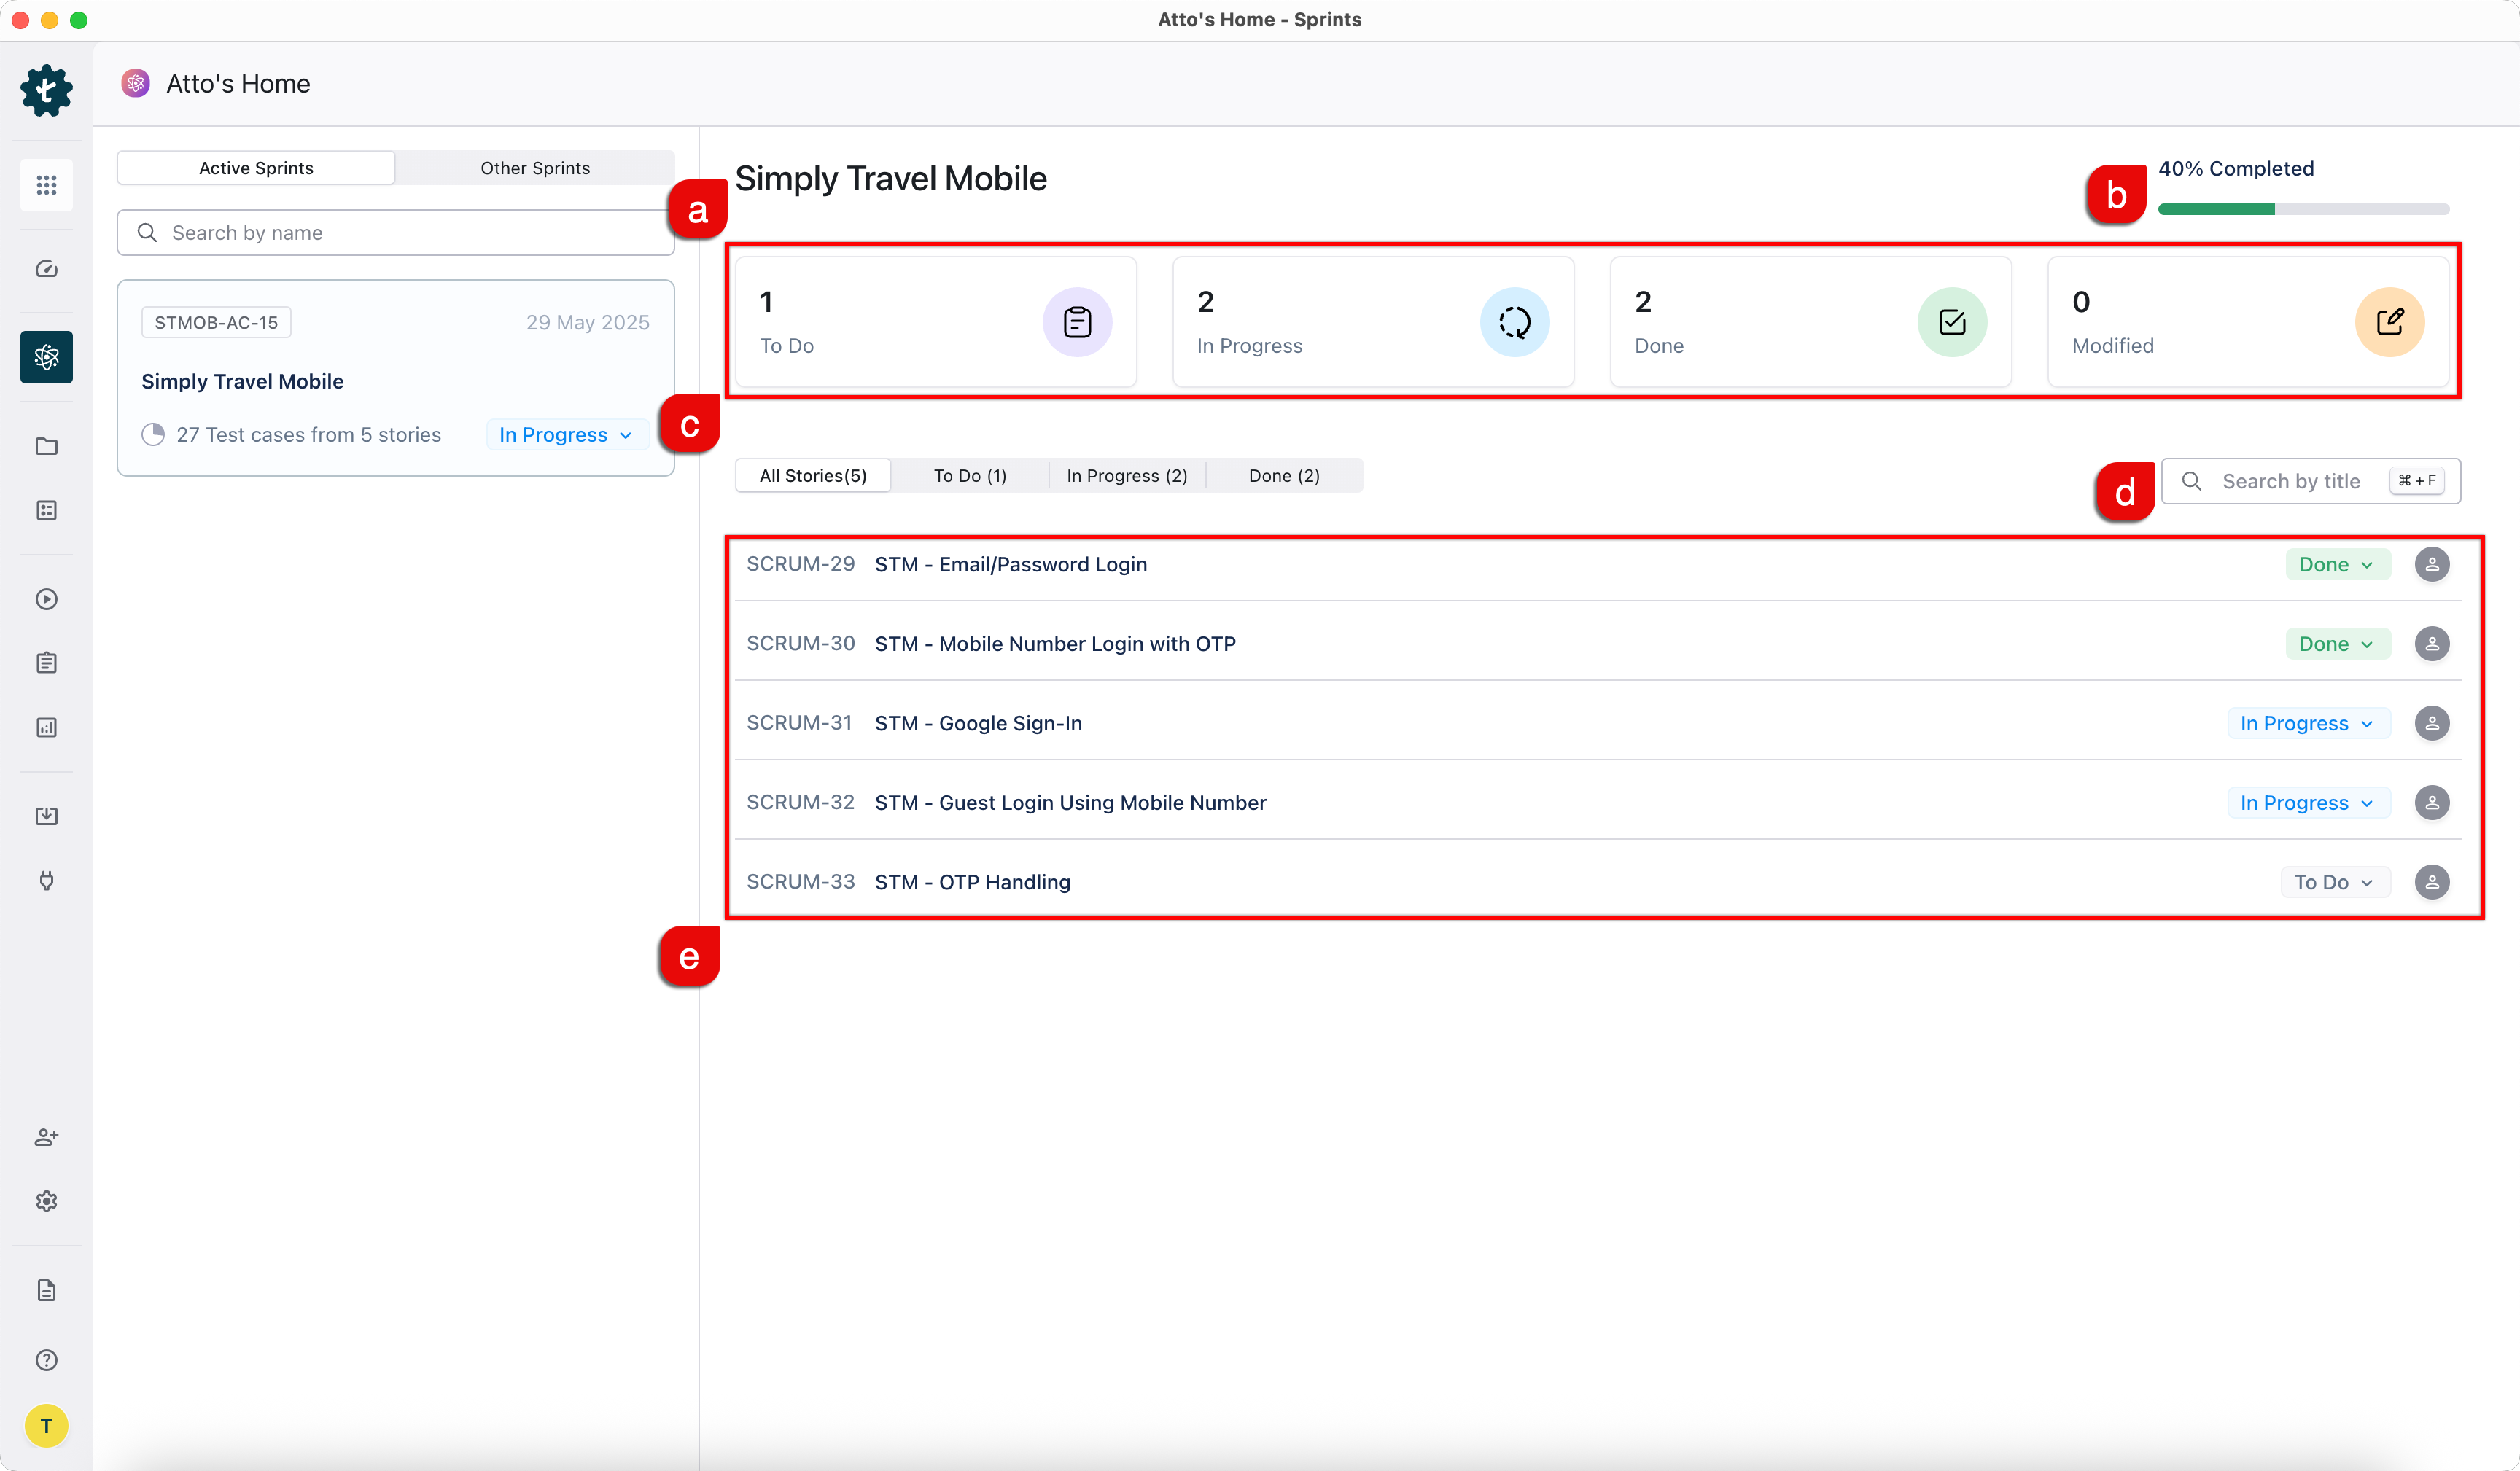
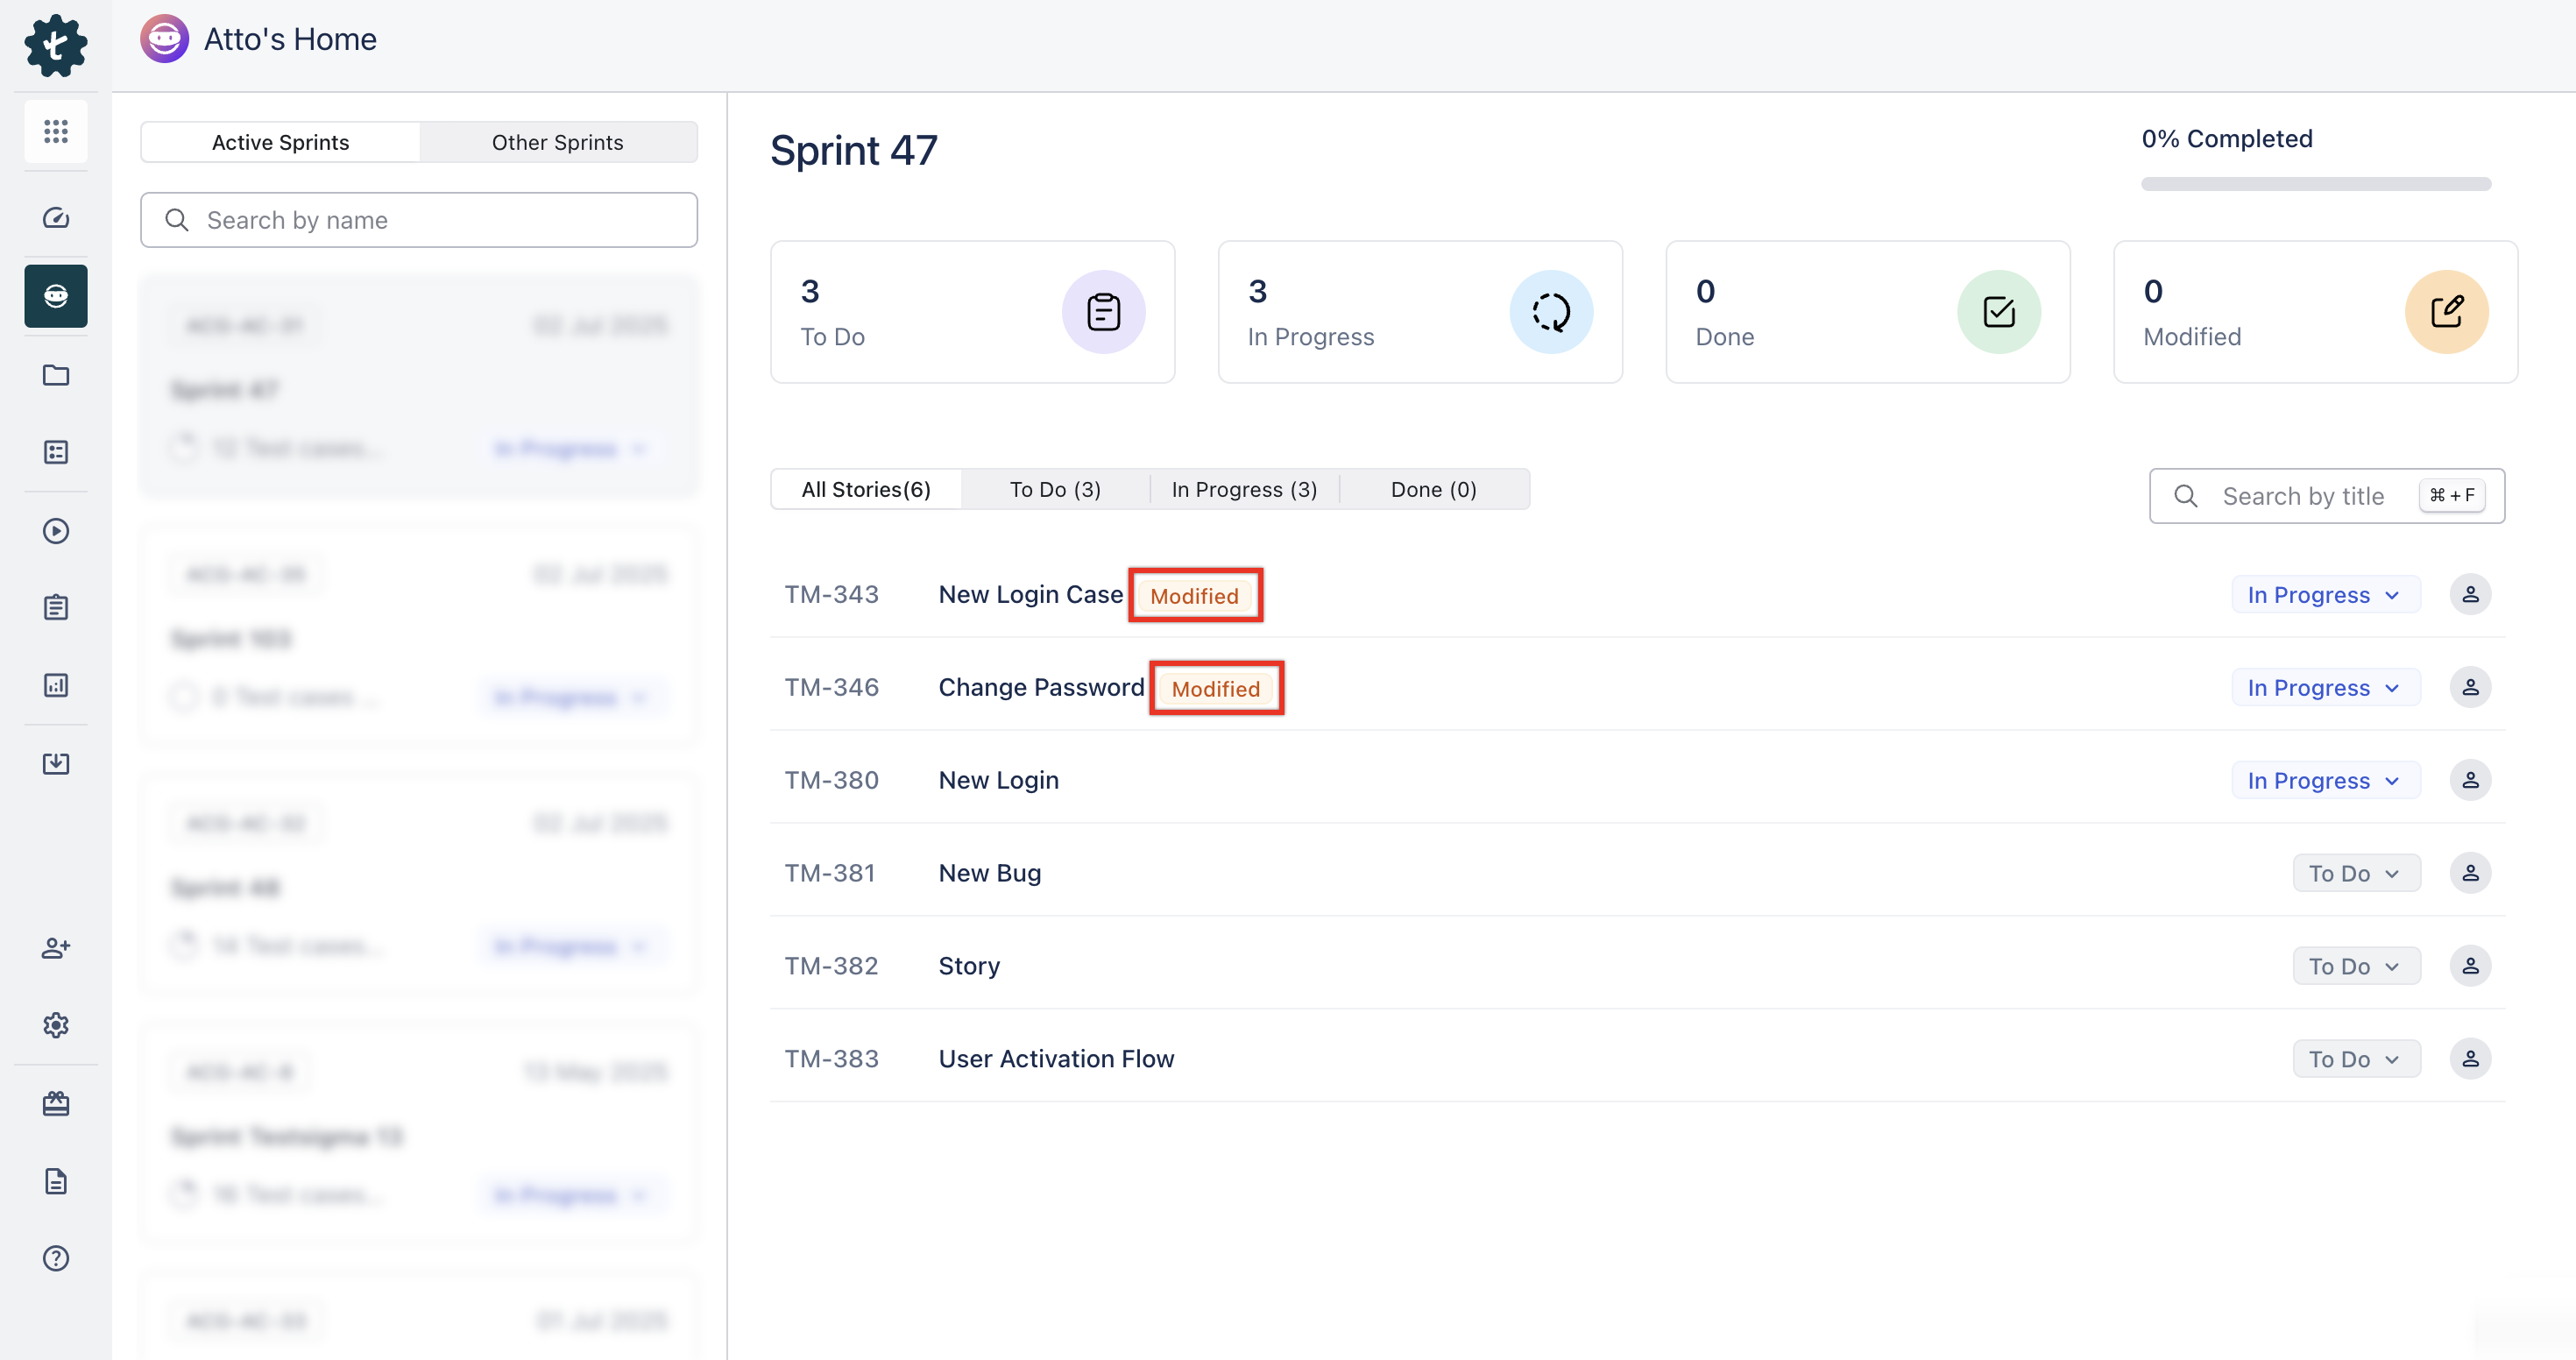
Once the Sprint moves to In Progress, you can view high-level metrics, including:
a. Sprint Name
b. A completion percentage bar
c. Number of stories in To Do, In Progress, Done, and Modified states.
d. Search by title box to find a specific story
e. Story list with ID, Title, and Current Status (e.g., To Do)
- Atto starts generating test cases using the data from the selected story.
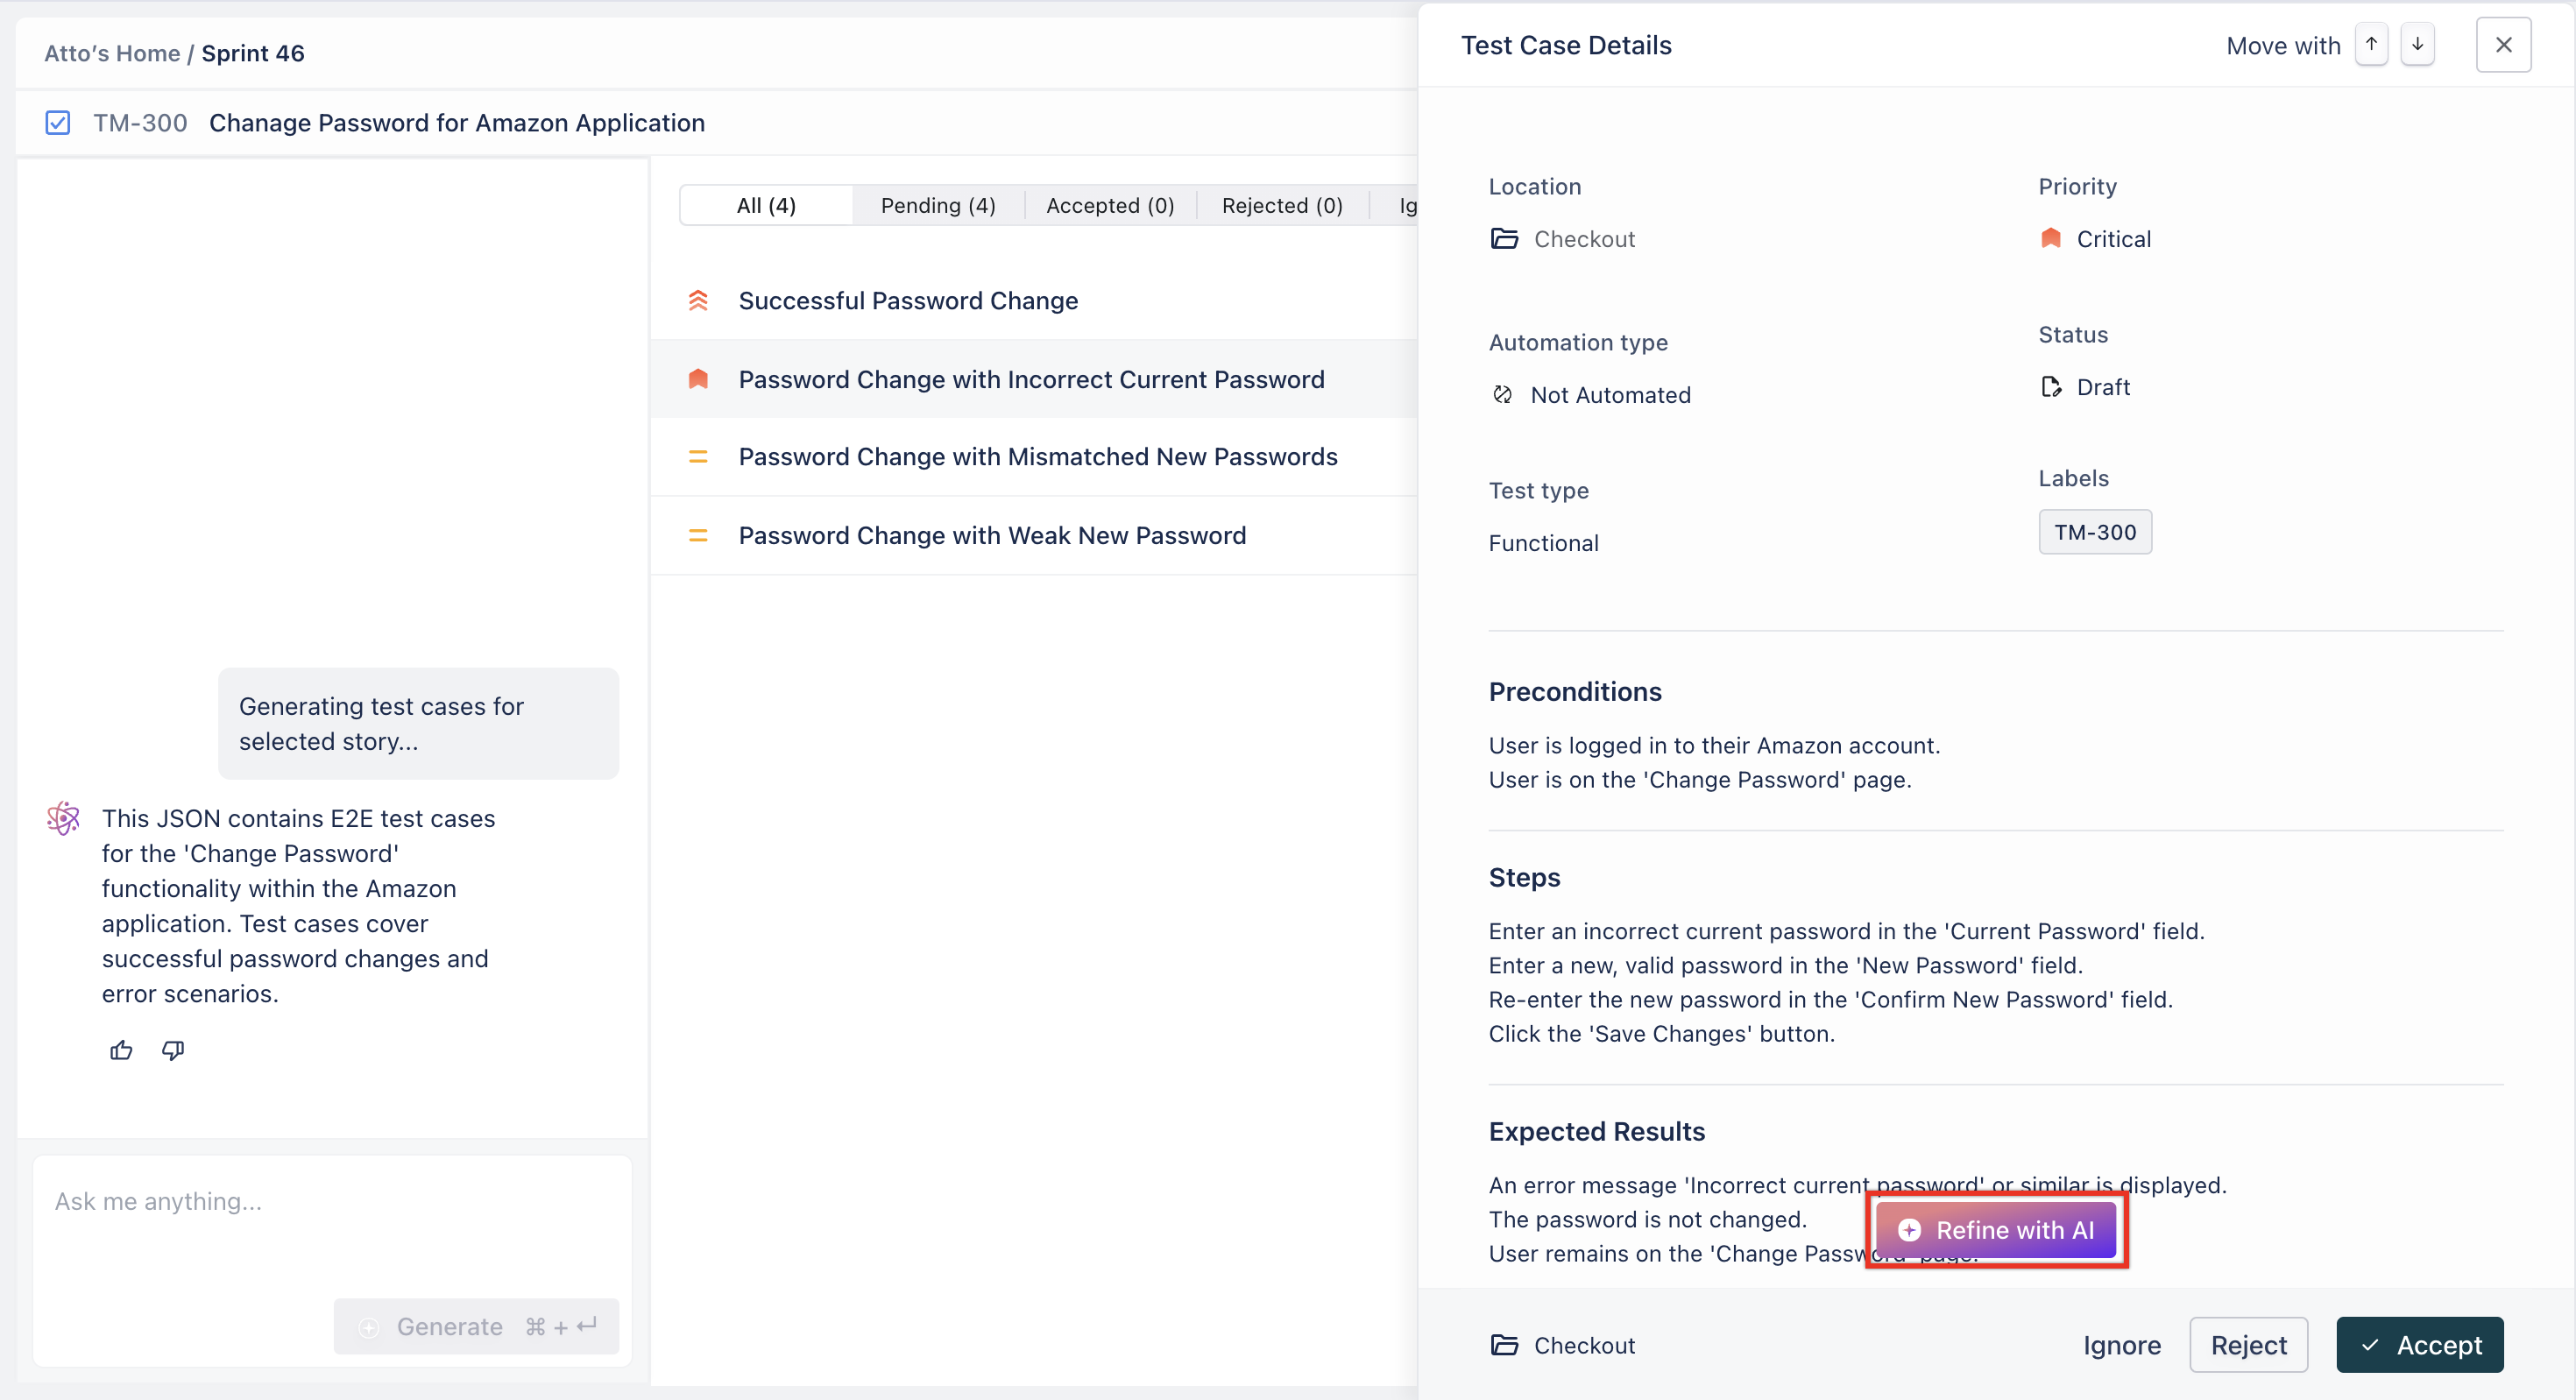
- Click on any test case to view details such as preconditions, test steps, and expected results.
- Review the test case and select the folder where you want to save it.
- Click Accept to add the test case to the selected folder.
- Repeat steps 5–7 to review and save other generated test cases.
- Atto automatically sets the story status to In Progress once test case generation completes.
- Repeat these steps for each story in the sprint.
Synchronization of Jira Actions in Test Management
Atto automatically updates story statuses based on sprint activity and user actions. The following statuses help you track progress throughout the sprint lifecycle.
1. Sprint Activation
When you activate a sprint in Jira, Atto detects and displays sprint details in a popup in Test Management by Testsigma.
2. Story Modification
When a story is updated after test generation, Atto marks it as Modified. A "Modified" label appears next to the story in the sprint view.
3. Accepting & Refining Test Cases
When a test case is generated, you can review and refine it using AI. After finalizing the test case, click Accept to save it.
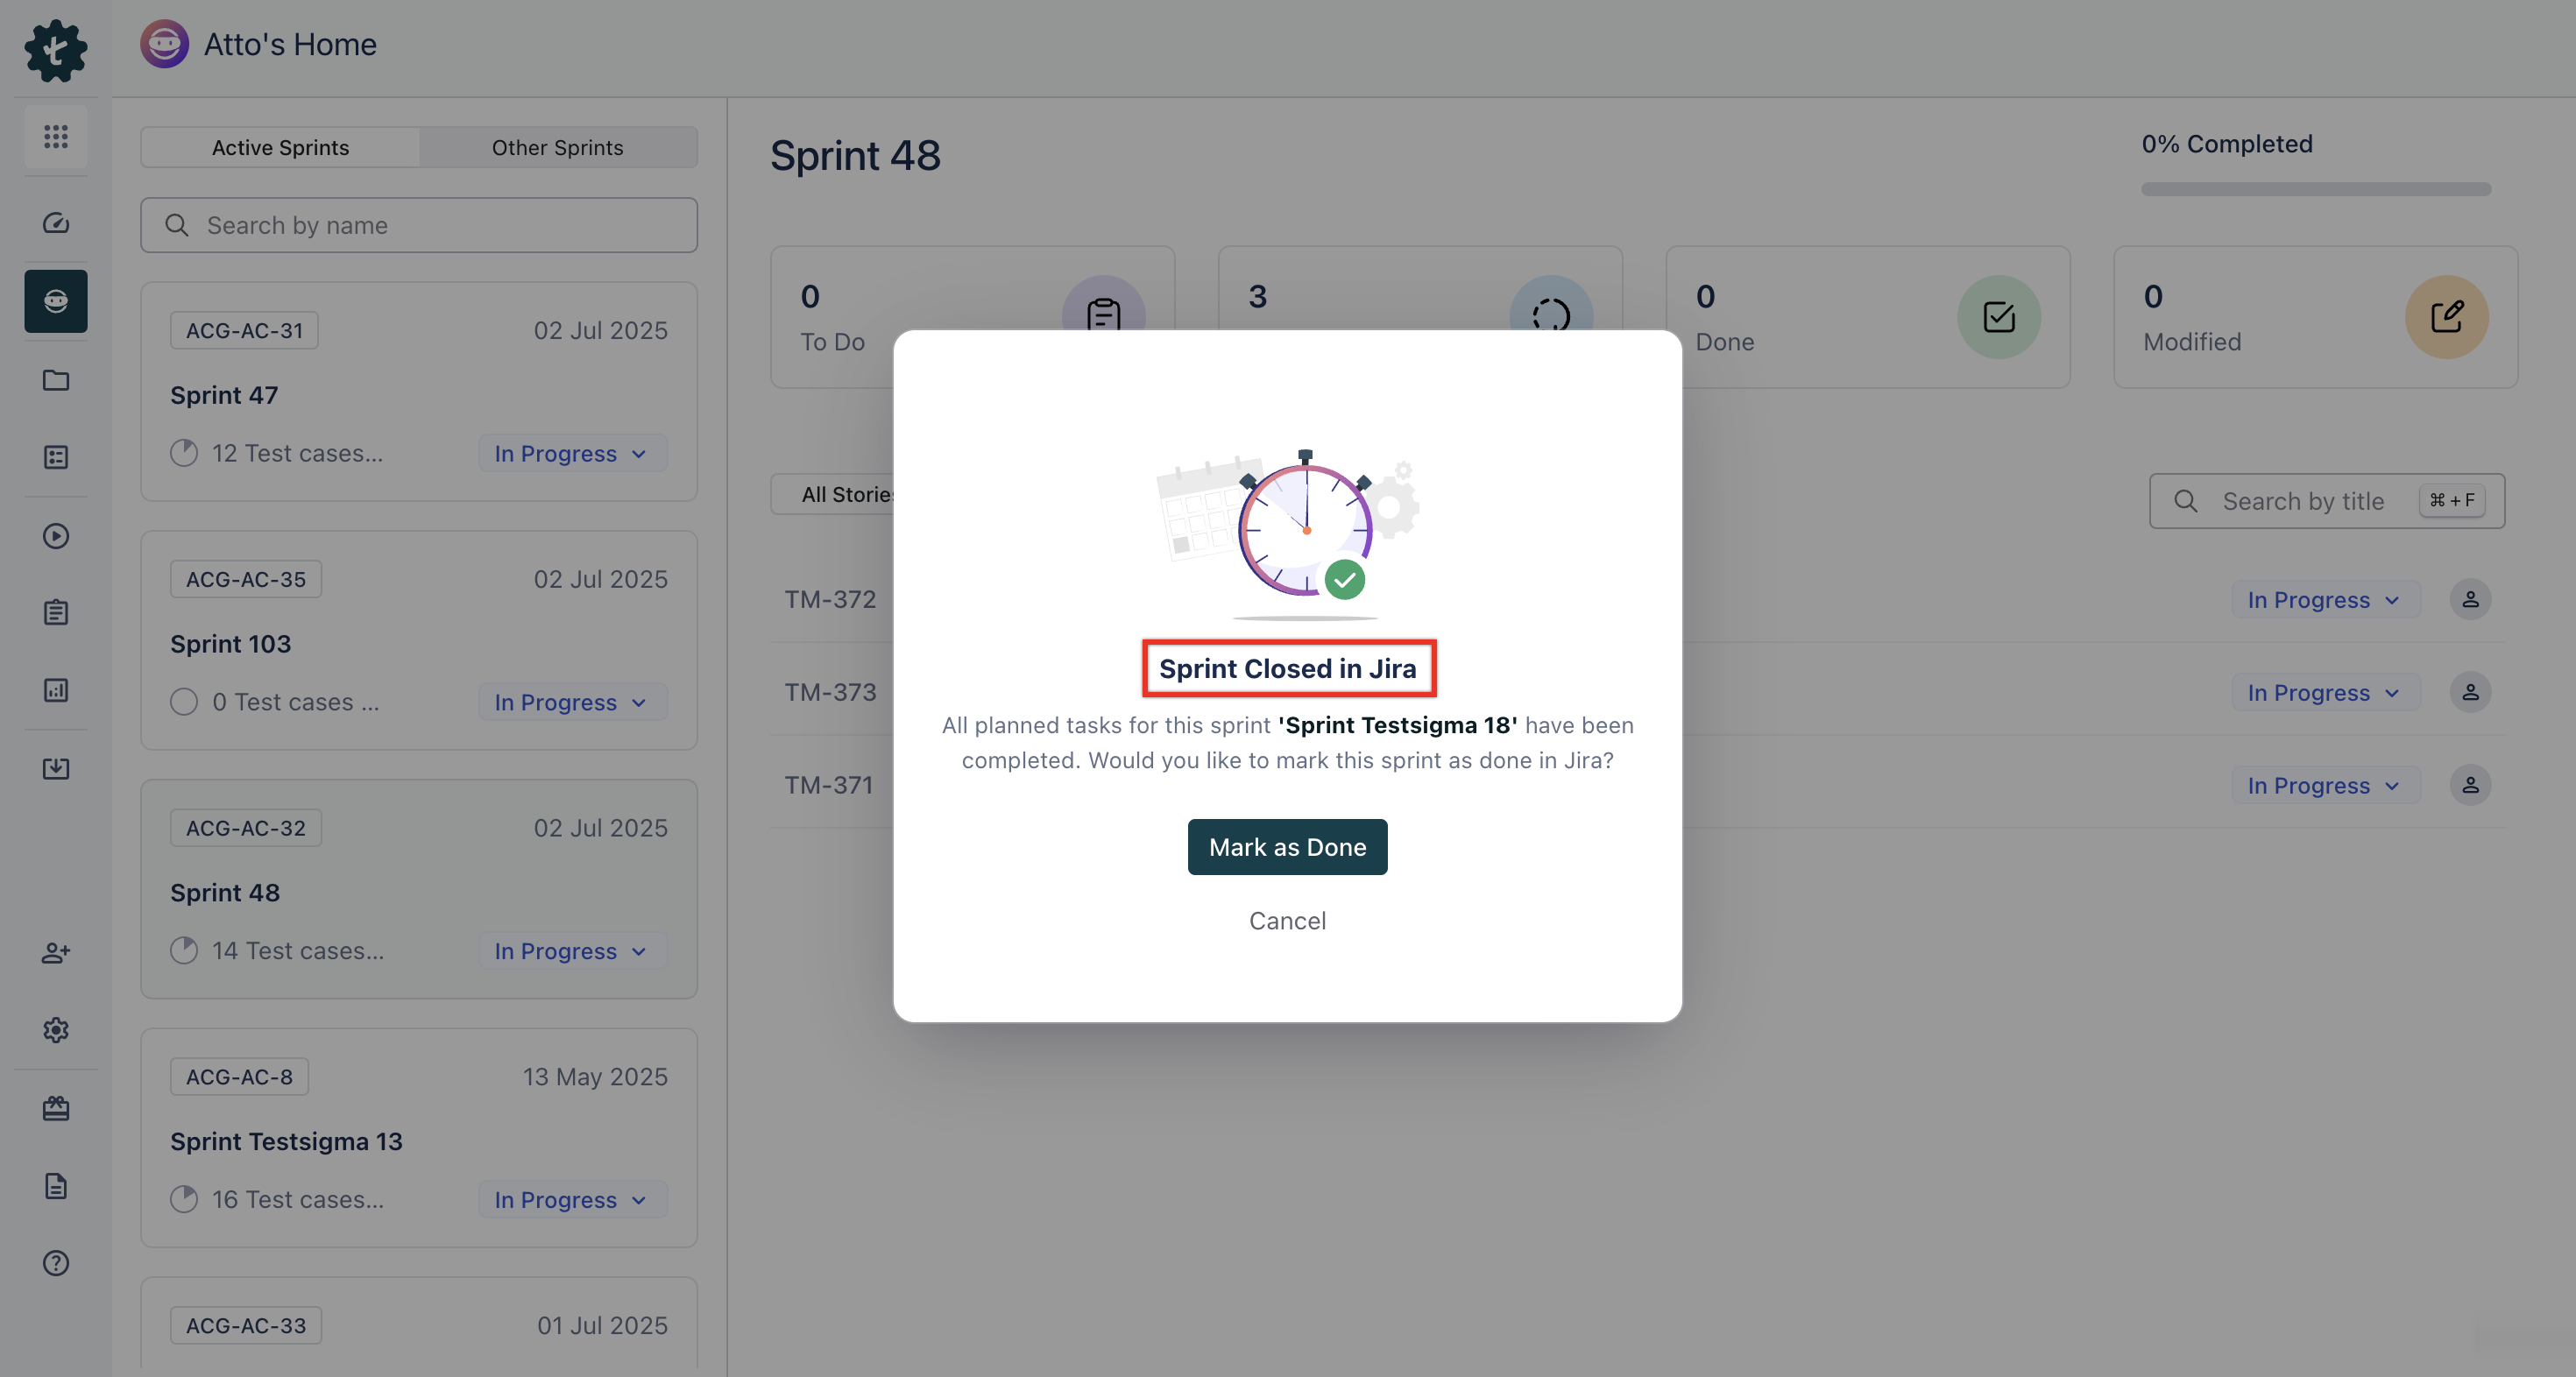
4. Sprint Completion
When the sprint is closed in Jira, a "Sprint Closed in Jira" popup appears. Click Mark as Done to close the sprint in Test Management by Testsigma.
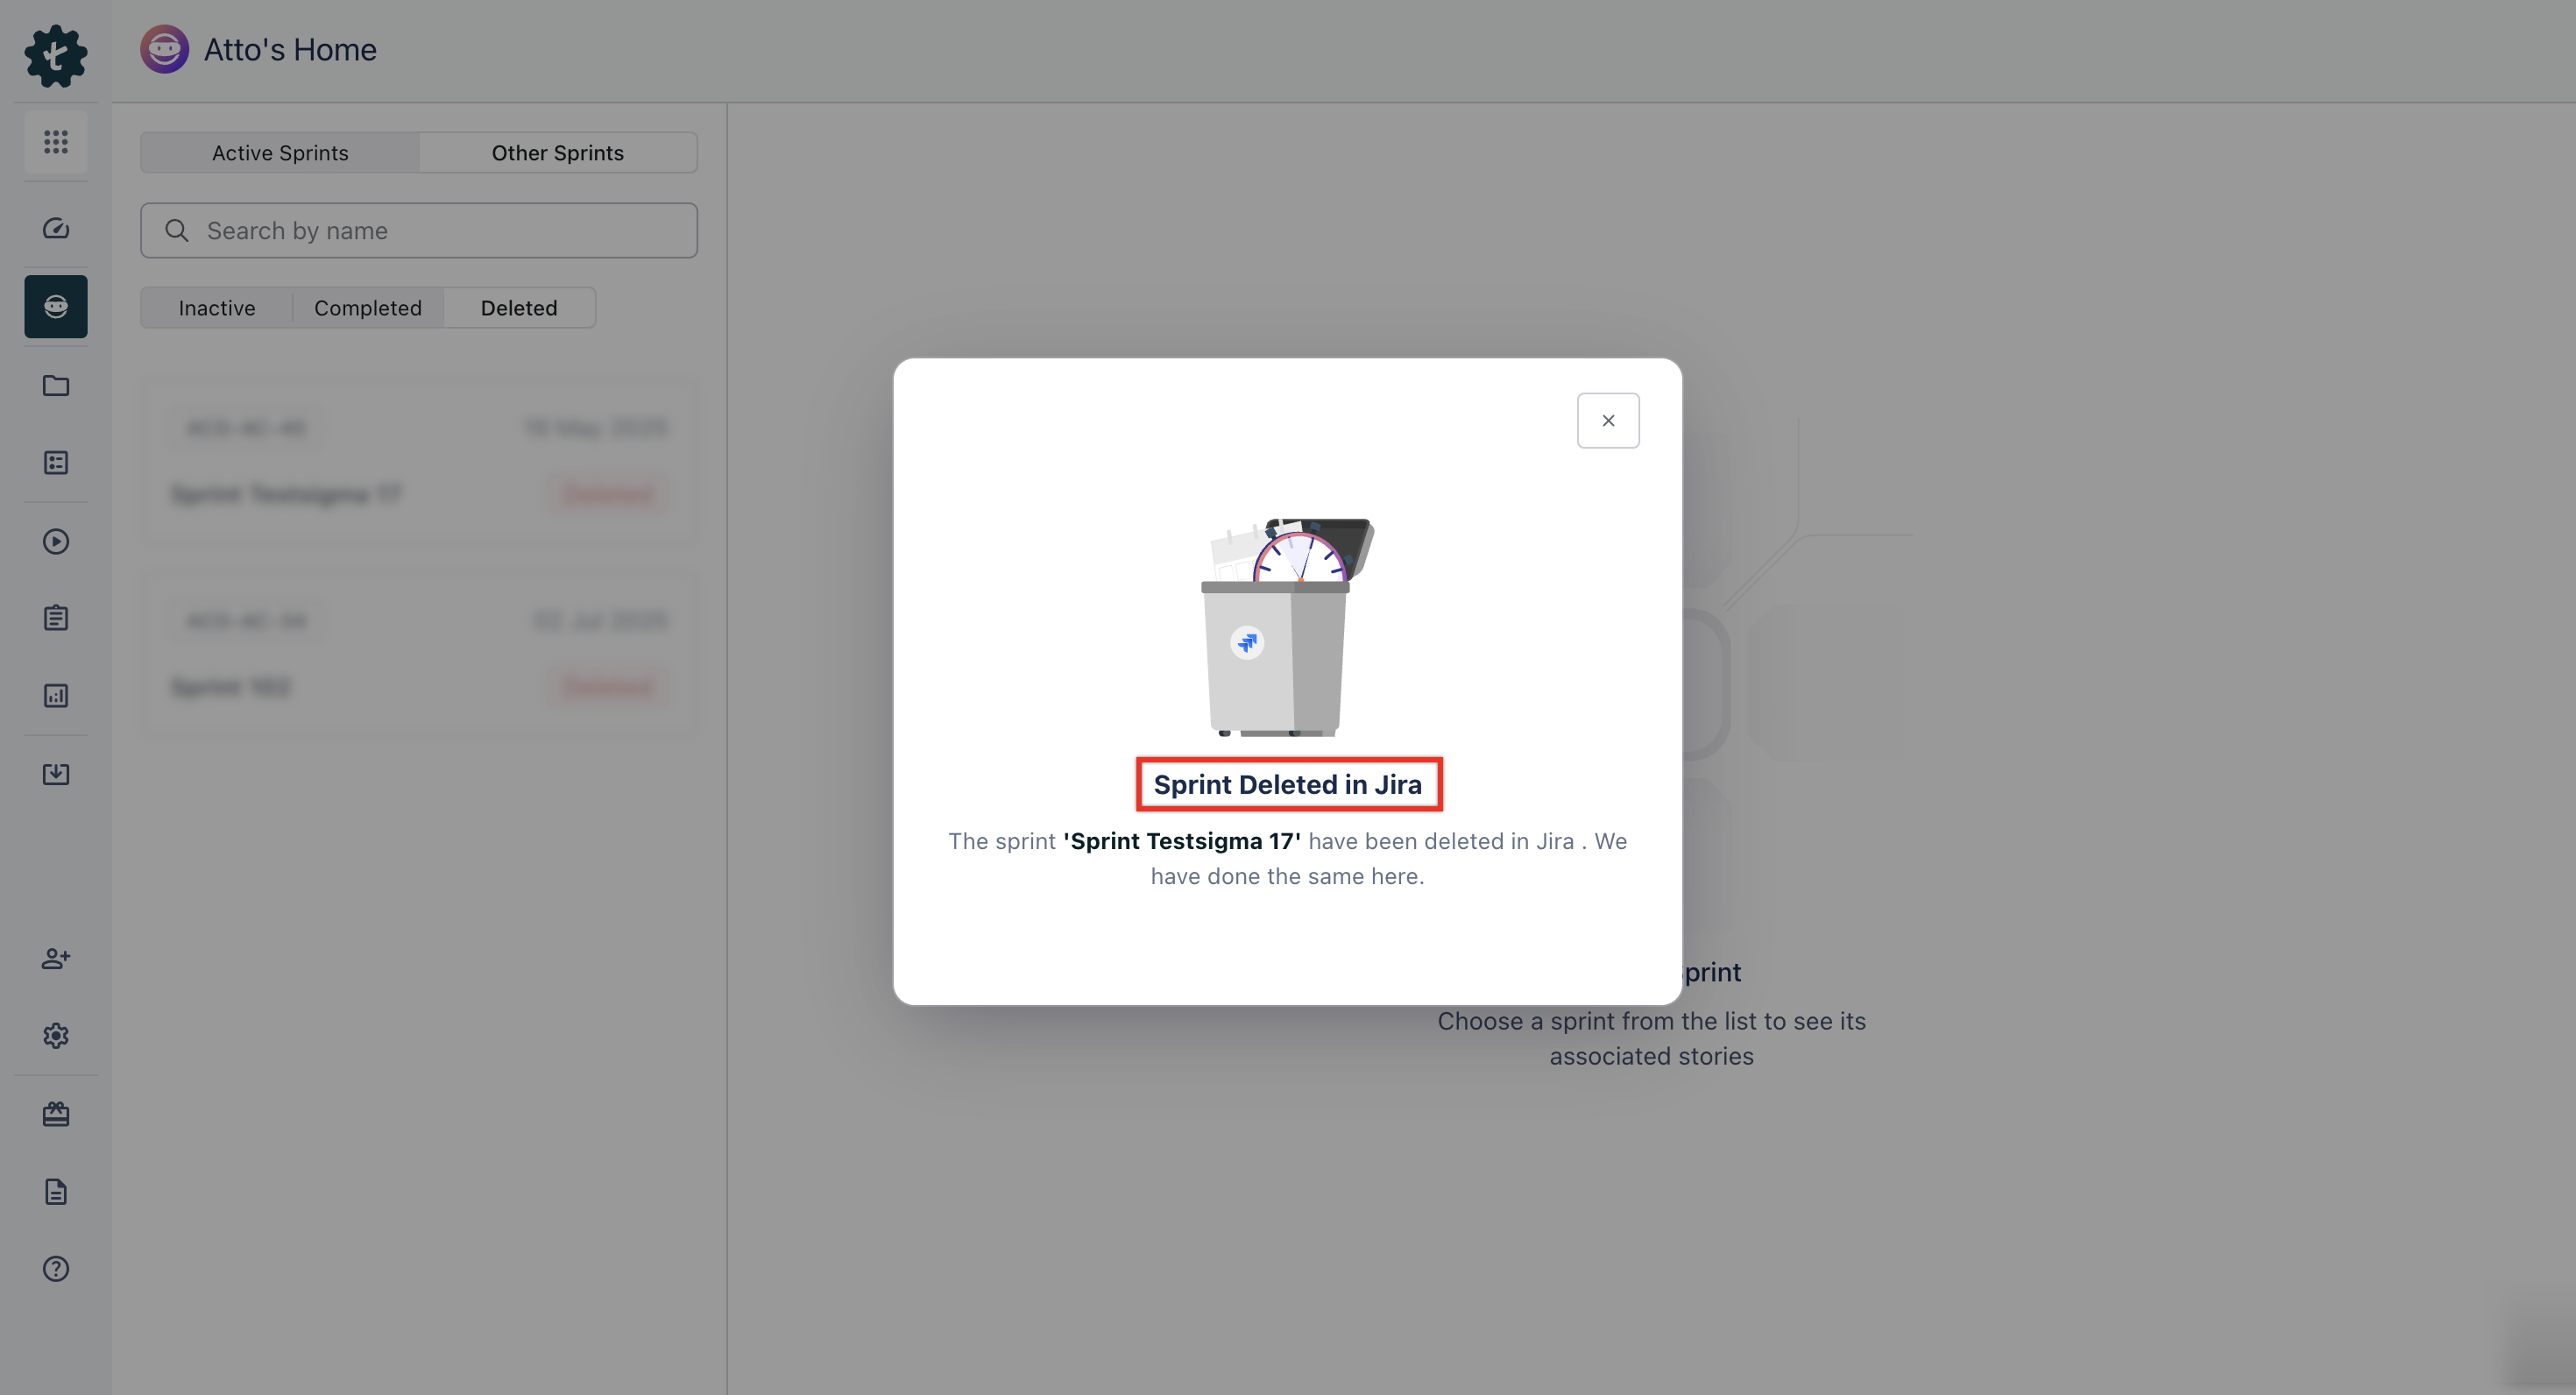
5. Sprint Deletion in Jira
If a sprint is deleted in Jira, a "Sprint Deleted in Jira" popup appears in Atto. The sprint becomes read-only, you can view the content but cannot make changes.
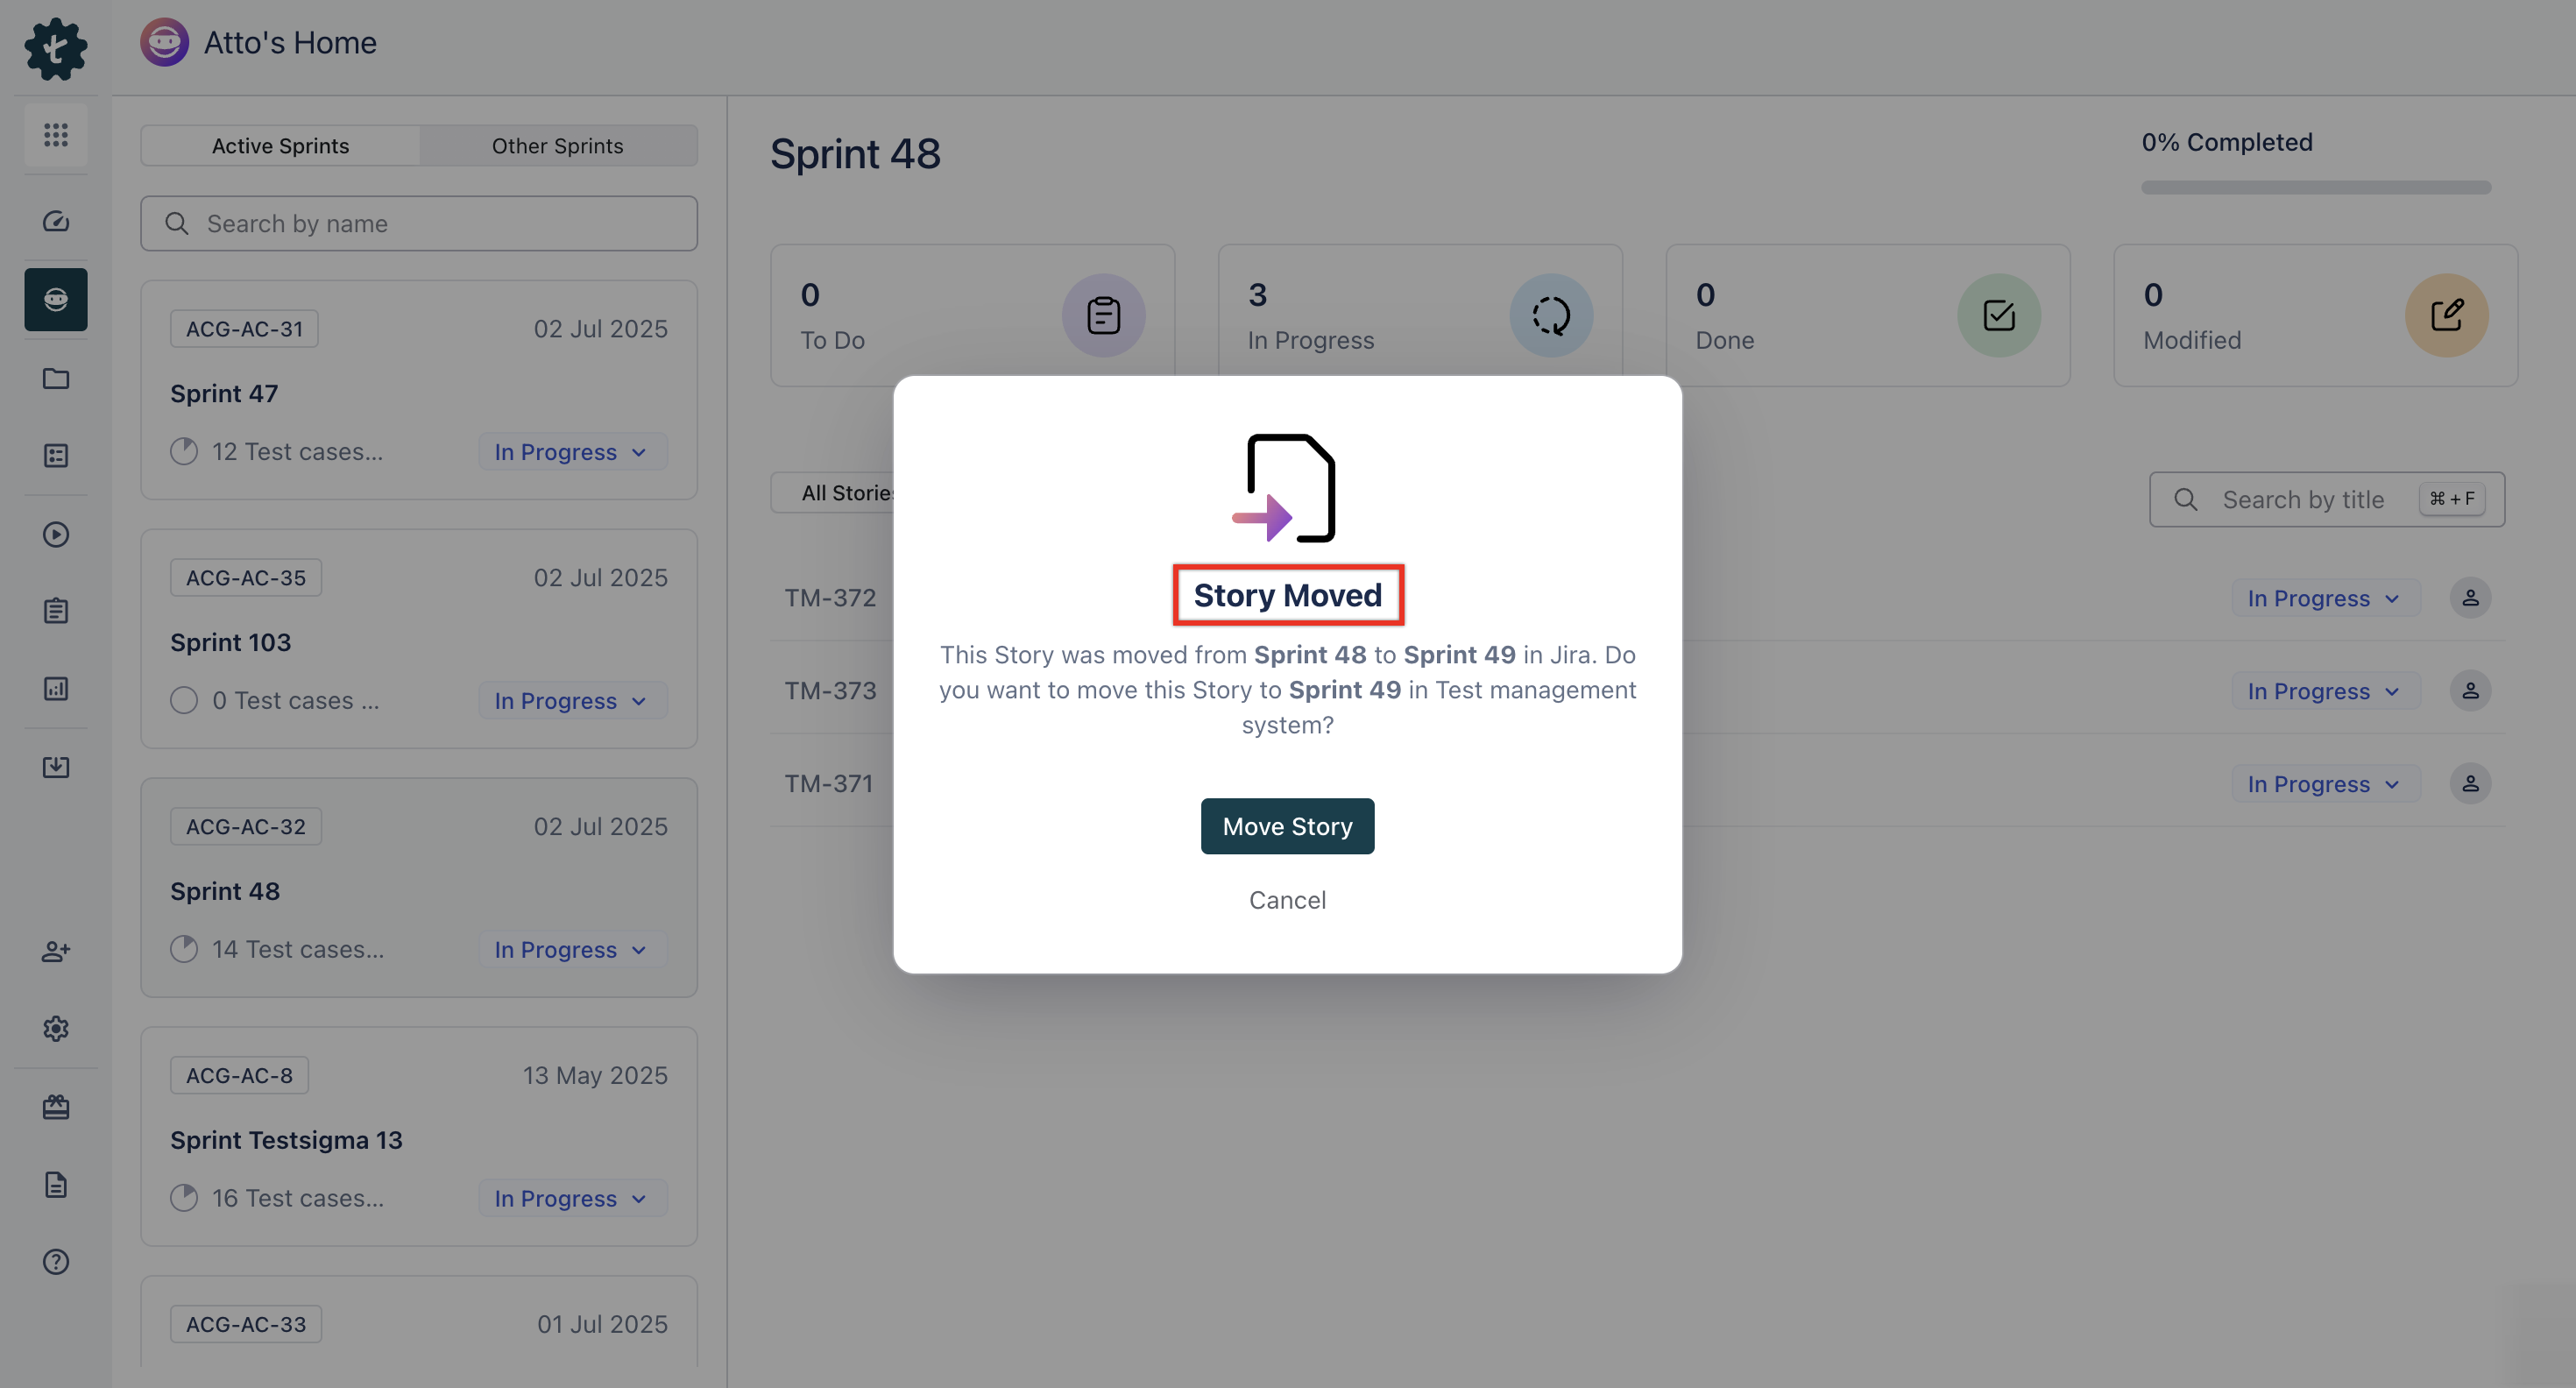
6. Story Movement Between Sprints
If a story is moved from one sprint to another, Atto displays a "Moved" label and shows a popup indicating the change.
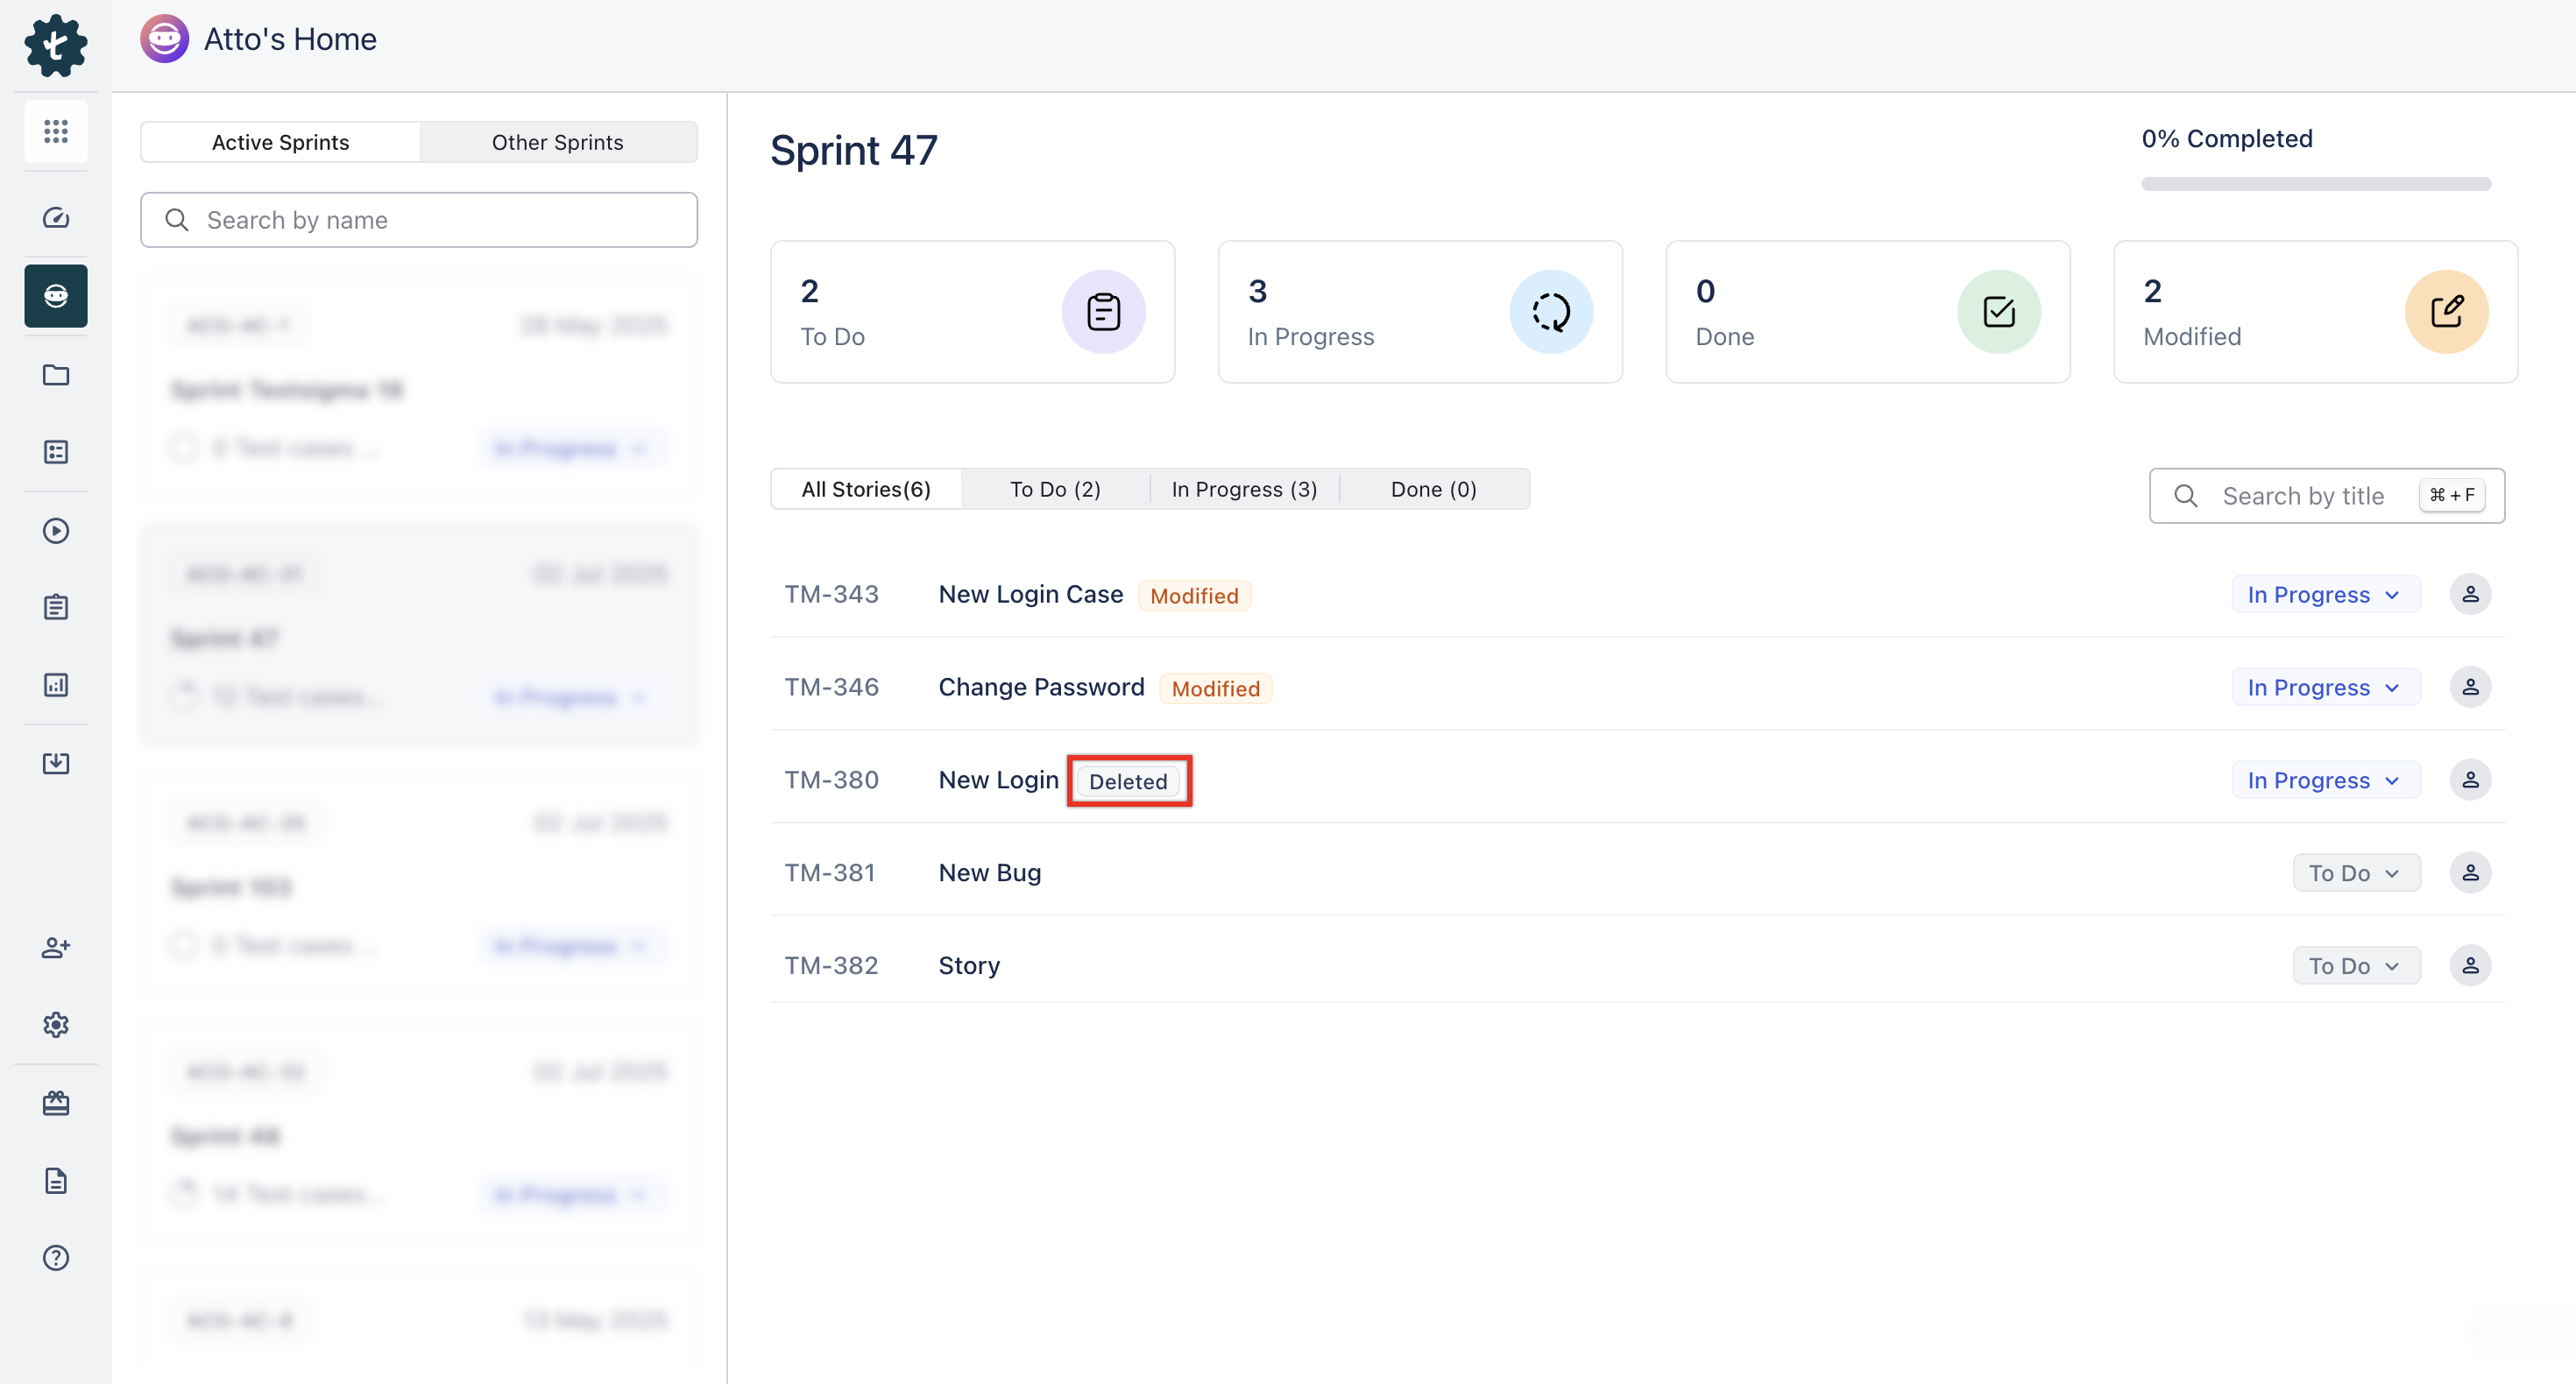
7. Story Deletion from Sprint
When a story is deleted from a sprint, it is only available in View Mode. Any test cases already generated for the story remain visible and accessible.
Want to contribute or report missing content?