- Projects
- Test Cases
- Data Sets
- Imports and Exports
- Step Groups
- Test Runs
- Test Plans
- Integrations
- Testsigma Two-way Integration
- Settings
- Manage Users
- Reports & Analytics
- CI/CD Integrations
Sprint Planner for ClickUp Tasks
Quickly turn ClickUp Tasks into ready-to-run test cases with minimal effort.
You can generate test cases automatically by integrating ClickUp with Test Management by Testsigma. Atto detects Lists/Sprints from ClickUp and displays them on Atto's Home. You can activate a List/Sprint and select artifacts from ClickUp to generate test cases. This article discusses using ClickUp Lists/Sprints to generate test cases in Test Management by Testsigma automatically.
Prerequisites
Before you begin, ensure:
- You have a project created in Test Management by Testsigma.
- The project is connected to a ClickUp Space.
Interactive Demo
Attach a ClickUp Space
- On the Dashboard, click the Candy Box icon, and then select + New Project.
- In the Create a New Project dialog, enter the Project Name, Description, and Project Key.
- Click Link ClickUp Space under Project Management Tool and select the ClickUp Space you want to attach.
Alternatively, you can also attach the ClickUp Space from the Project Settings overlay.
View and Activate ClickUp Lists/Sprints in Atto
- From the Dashboard, click Atto’s Home.
-
Atto’s Home displays two sections:
- Active Lists: Displays all activated lists/sprints. Click a list/sprint to view its details and the tests generated from it.
- Other Lists: Displays additional lists/sprints.
- Go to the Other Lists tab to view all lists/sprints from your ClickUp Space.
-
In the Other Lists tab, you can see the following tabs:
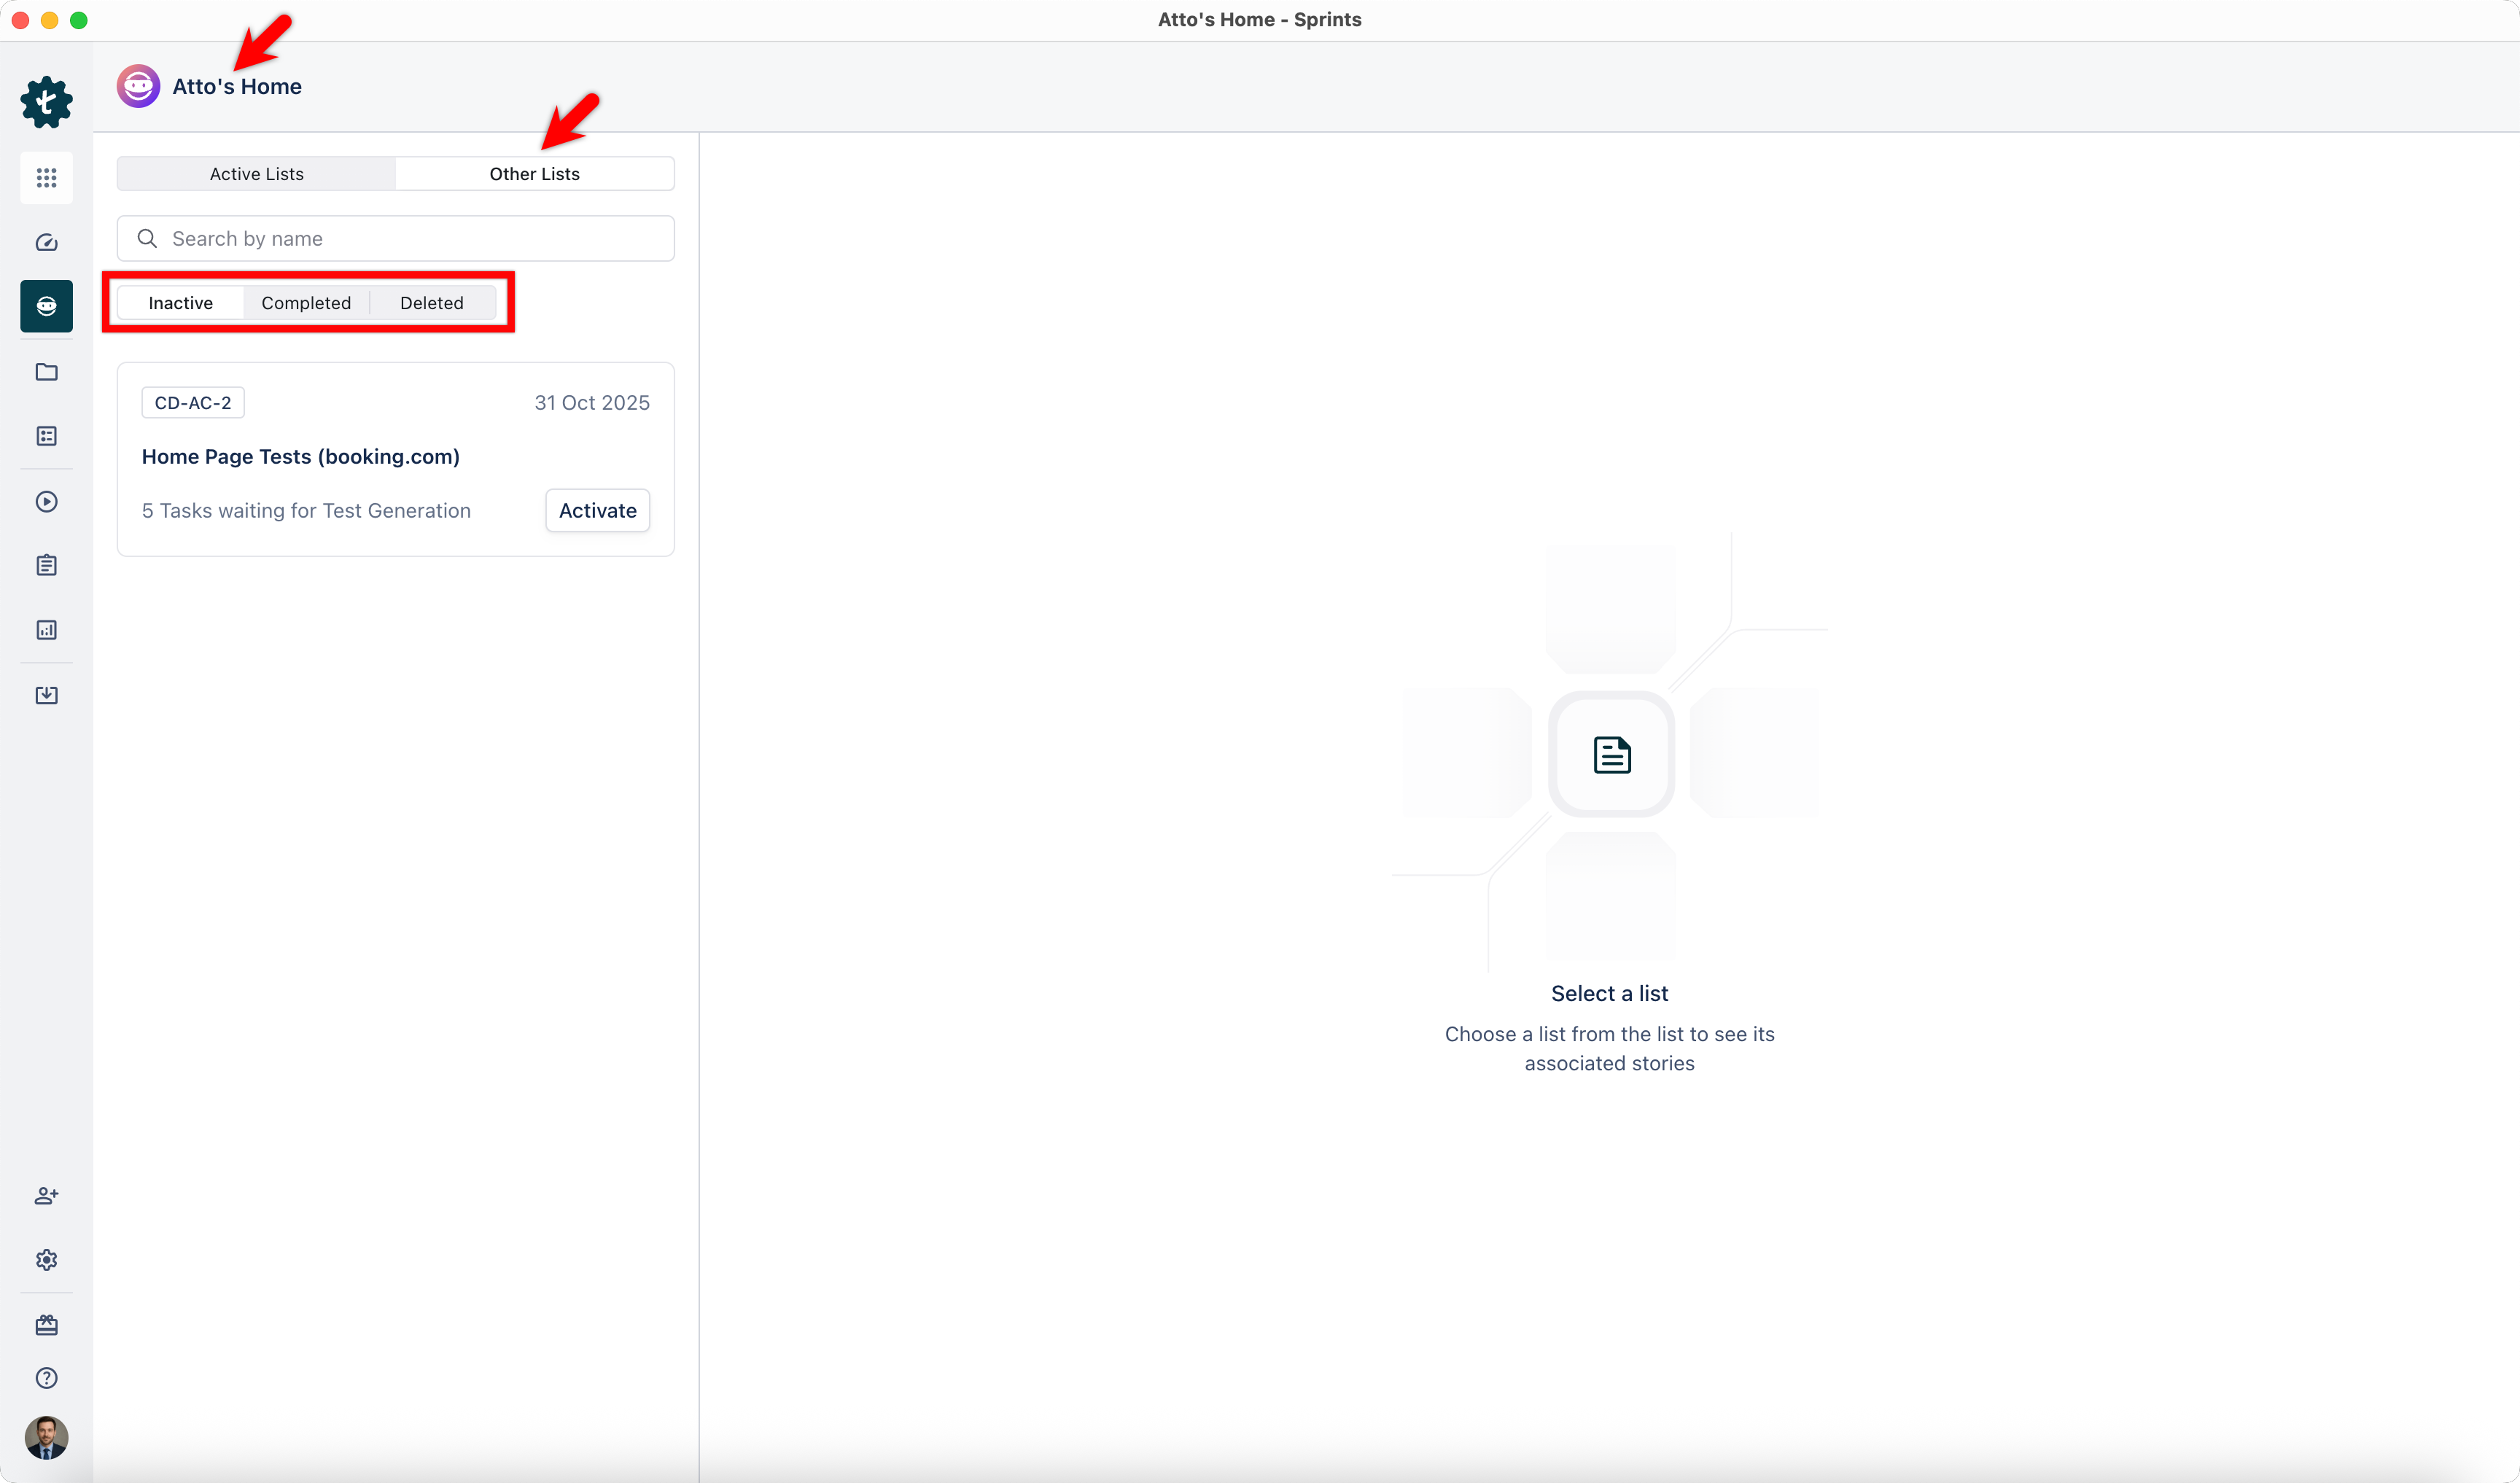
- Inactive: Displays lists/sprints that are imported from ClickUp but are not yet active in Testsigma. You can activate these lists/sprints for test case generation.
- Completed: Displays lists/sprints that were previously activated and done with the test case generation.
- Deleted: Displays lists/sprints that are deleted in the ClickUp Space.
Use these filters to easily find the lists/sprints you need based on their current workflow status.
- Review the lists/sprints. Each card shows the List ID, Name, Number of tasks waiting for test generation, and the Last Updated Date.
-
Select a list/sprint to view all the tasks associated with it. The list view shows the following details:
- List/sprint Name
- Tabs to filter stories by status: All, To Do, In Progress, and Done
- Search by title box to find a specific task
- Task list with ID, Title, and Current Status (e.g., To Do)
- Click Activate next to the list for which you want to generate test cases.
View List/Sprint Details and Generate Test Cases
- Once you activate a list/sprint, Atto displays the details.
-
When the list/sprint status changes to In Progress, you can view key metrics, including:
a. Name
b. Completion percentage bar
c. Number of tasks in To Do, In Progress, Done, and Modified states
d. Search box to find stories by title
e. Task list showing ID, Title, and Current Status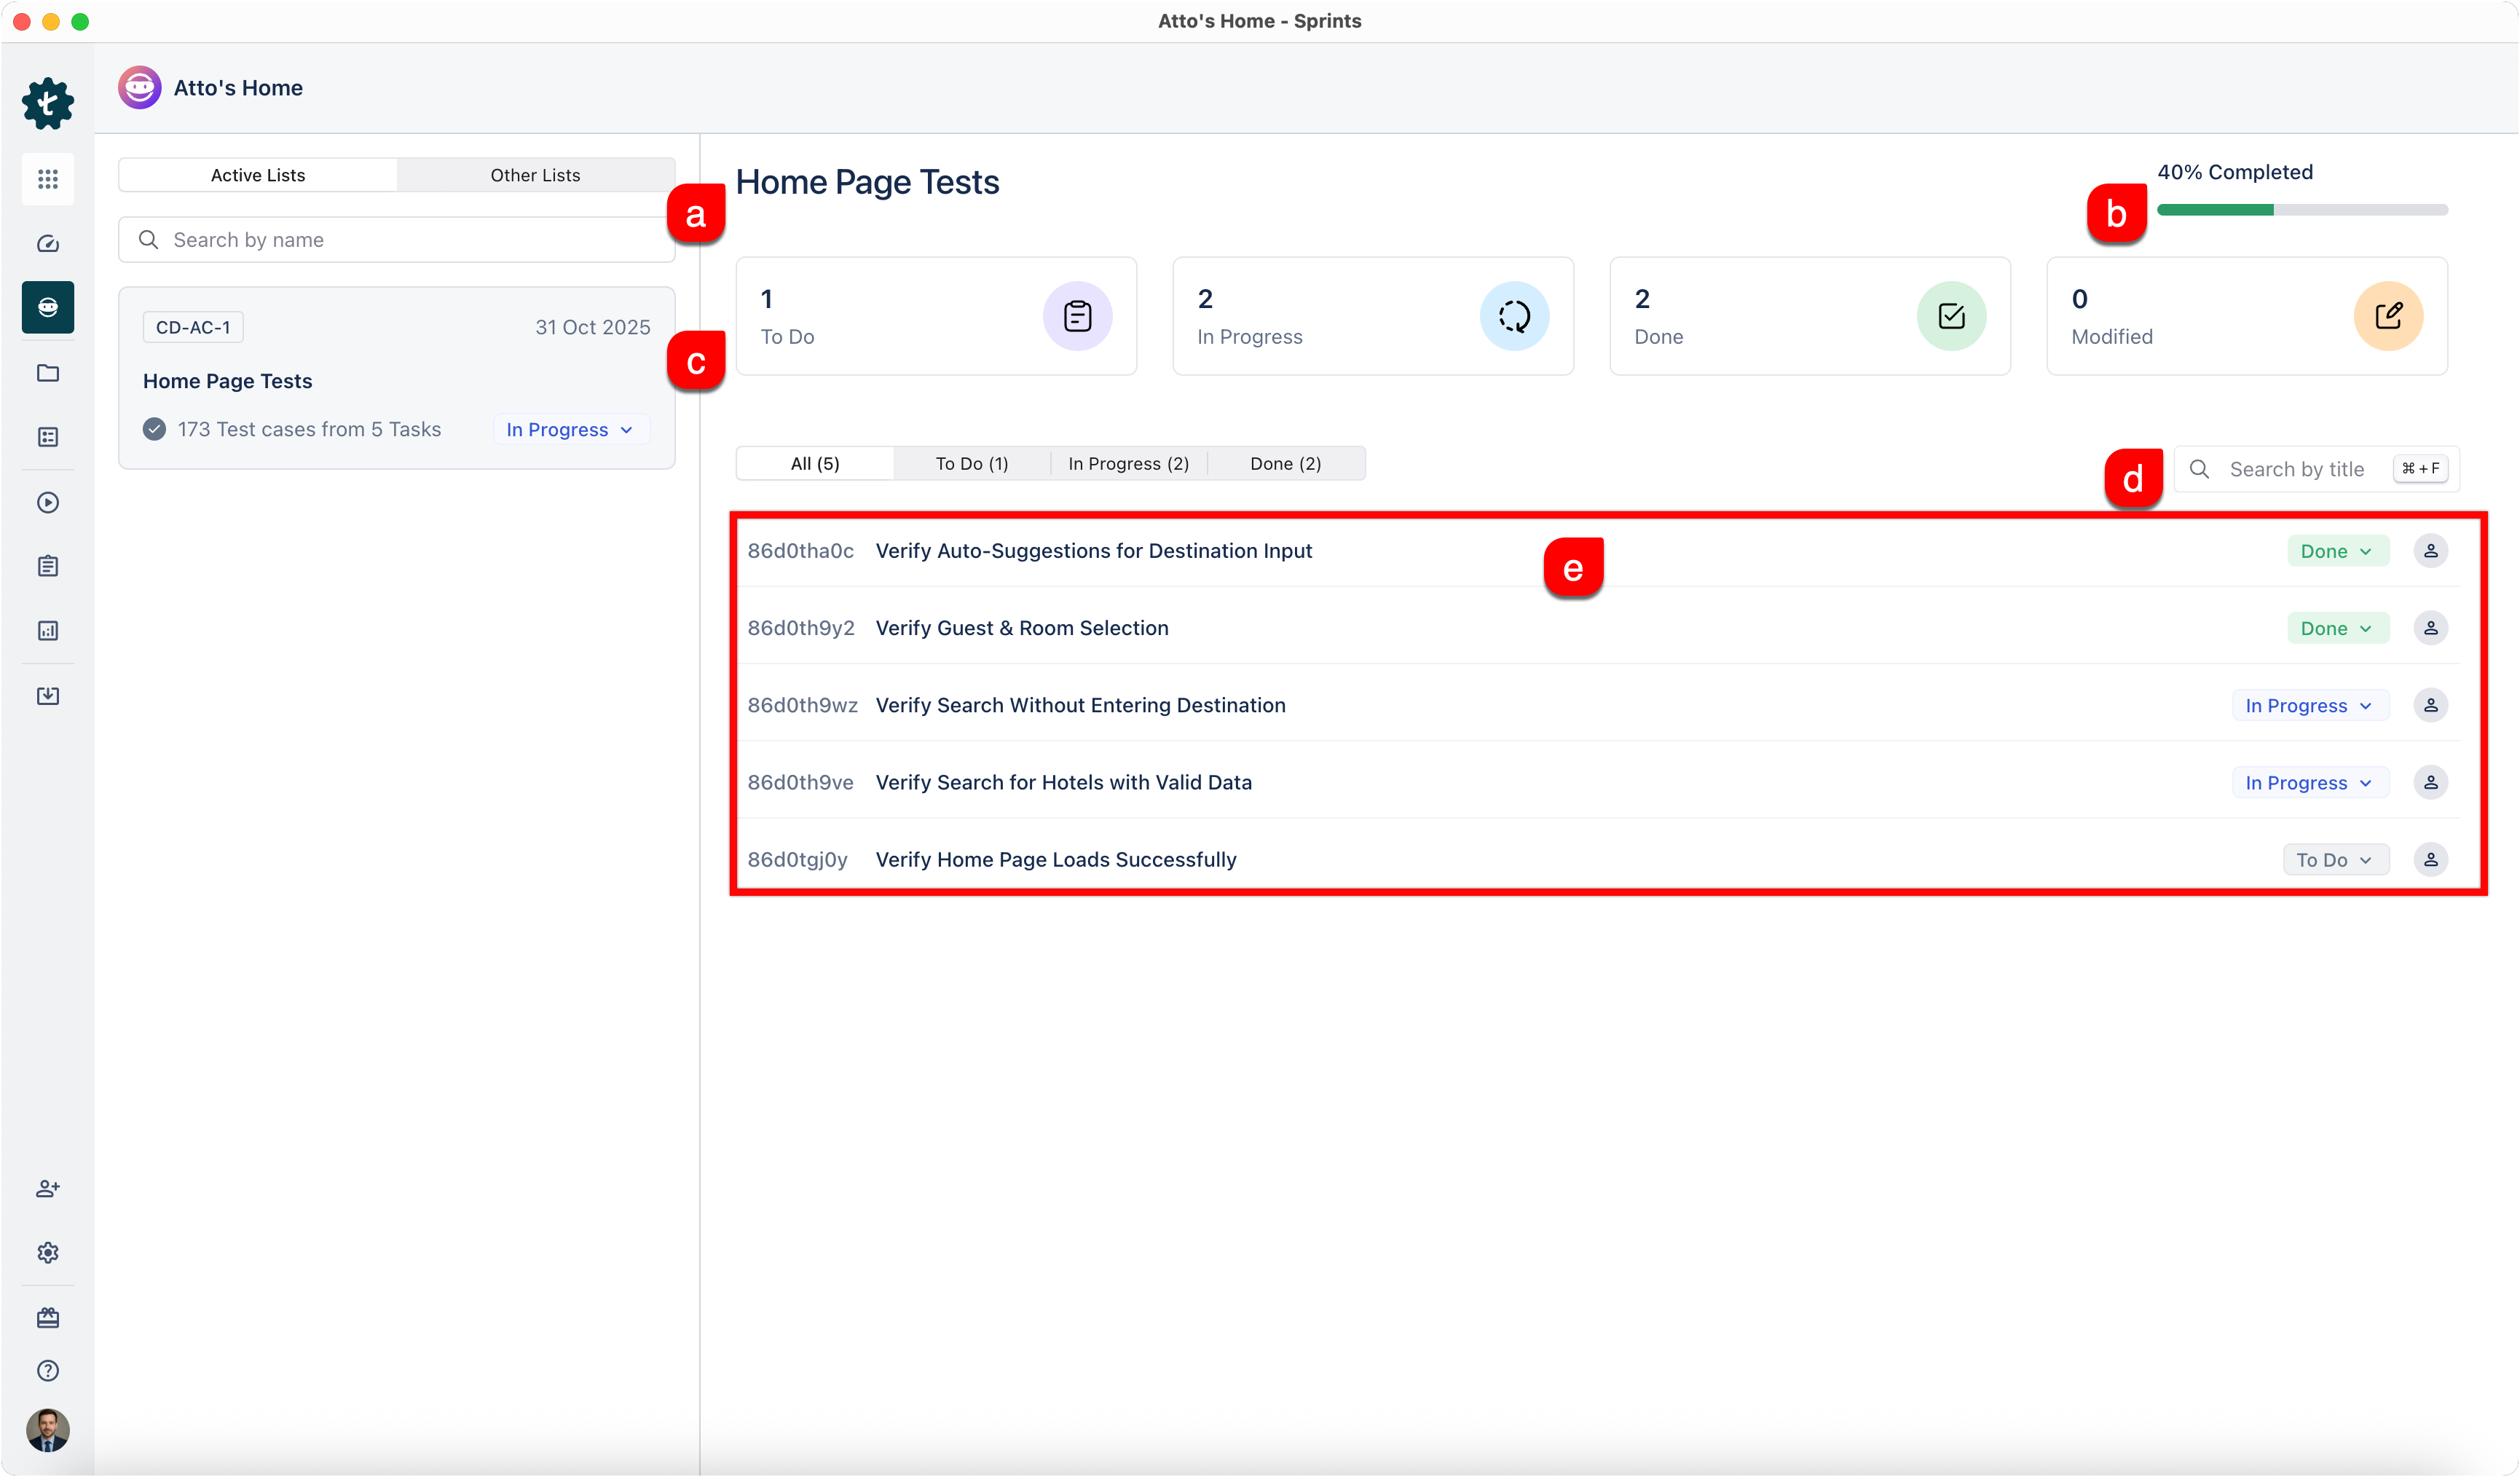
-
Atto automatically updates the task status to In Progress for the task currently being processed for test case generation.
NOTE:You can use the tabs to filter tasks by their status or use the Search box to find a specific task.
- Click a task to open its details page. The page displays multiple scenarios and the test cases generated from the task data.
- Expand a scenario to view its associated test cases.
-
Click a generated test case to view its details, including:
- Preconditions
- Test steps
- Expected results
- Review the test case and select the folder where you want to save it.
- Click Accept to add the test case to the selected folder.
- Repeat steps 6–8 to review and save other generated test cases.
- When test case generation completes for the current task, Atto automatically sets the next task status to In Progress.
- Repeat these steps for each task in the list.
Want to contribute or report missing content?