
Prompt Templates for Pro-level test cases
Get prompt-engineered templates that turn requirements into structured test cases, edge cases, and negatives fast every time.
Suppose you’ve built a beautiful iOS app and it’s ready for launch. But during testing, a login button works on the simulator but becomes unresponsive on a real iPhone 13. This is not uncommon. Differences in device hardware, OS versions, and permissions often lead to unexpected behavior that simulators can miss. Appium iOS testing makes it possible to automate and scale real-device testing, helping teams deliver reliable iOS apps.
Table Of Contents
- 1 Overview
- 2 What is Appium iOS Testing?
- 3 Why Use Appium for iOS Testing?
- 4 Prerequisites for Appium iOS Testing
- 5 How to Set Up Appium for iOS
- 6 Writing the Appium Test Script for iOS Devices
- 7 Running Appium Tests on iOS
- 8 Using Appium Desktop vs CLI
- 9 Common Errors and Troubleshooting
- 10 Best Practices for Appium iOS Testing
- 11 Why is Running Appium Tests on Real iOS Devices the Best
- 12 Why Testsigma for Appium iOS Testing
- 13 Conclusion
Overview
What is Appium iOS Testing?
Appium is an open-source framework for automating iOS native, hybrid, or web apps using the WebDriver protocol. It uses Apple’s XCUITest to run tests on real devices or simulators without modifying the app.
Why Use Appium for iOS Testing?
Appium supports cross-platform automation, multiple programming languages, and real-device testing. Its open-source ecosystem and CI/CD integrations make it a flexible choice for teams.
Prerequisites for Appium iOS Testing
You need macOS with Xcode, Node.js with Appium installed, provisioning profiles, and WebDriverAgent setup. Cloud platforms like Testsigma simplify access to real iOS devices.
Setting Up Appium for iOS
Setup involves installing dependencies, configuring WebDriverAgent, and specifying desired capabilities in test scripts. Tools such as Appium Inspector help identify UI elements.
Running Appium Tests on iOS
Tests can run fast on simulators or with more accuracy on real devices. Real-device testing ensures reliable performance, gesture validation, and hardware-level checks.
Common Errors and Troubleshooting
Common issues include WebDriverAgent build failures, device connection errors, and difficulties detecting UI elements. Correct signing, use of accessibility IDs, and proper configuration typically resolve these problems.
Best Practices for Appium iOS Testing
Use accessibility IDs instead of XPath selectors, test across multiple iOS versions, and leverage cloud device labs for scalability. Include logging, screenshots, and proper test cleanup to improve reliability.
Why Test on Real iOS Devices?
Simulators cannot fully replicate real-world factors like battery, network conditions, or hardware features. Testing on actual devices catches device-specific bugs and ensures readiness for the App Store.
Why Testsigma for Appium iOS Testing
Testsigma offers a no-code, AI-driven platform with access to 3000+ real devices, accelerating test creation, execution, healing, and CI/CD integration for easier Appium iOS testing.

What is Appium IOs Testing?
Appium iOS testing refers to automating the functional testing of iOS apps using Appium, an open-source framework that supports native, hybrid, and mobile web applications. It allows developers and testers to write automation scripts for iOS in languages like Java, Python, JavaScript, and Ruby, using the WebDriver protocol.
Internally, Appium uses Apple’s XCUITest framework to interact with UI elements. You write tests once and run them on a wide range of iOS devices, iOS simulator online, or even in the cloud.
Why Use Appium for IOs Testing?
Appium is a popular open-source tool for automating iOS application testing because of the following reasons:
1. Cross-Platform Testing
Write one set of scripts and run them across both Android and iOS platforms. This ensures consistency in test logic and reduces duplication.
2. Language and Framework Flexibility
Appium supports multiple programming languages and test frameworks like TestNG, JUnit, Mocha, and Jasmine.
3. No Source Code Modification
You don’t need to recompile or modify your iOS app. Appium works directly with the production-ready app binaries (IPA).
4. Support for Real Devices and Simulators
Appium makes it possible to test both on iOS simulators and real Apple devices, increasing your test coverage.
5. Open Source Ecosystem
Being open source, Appium has a large community, detailed documentation, and frequent updates. It integrates easily with CI/CD tools and device clouds.
Prerequisites for Appium IOs Testing
Before starting with iOS app testing using Appium, make sure your environment is properly set up. Here’s what you’ll need:
1. Macos with Xcode Installed
Since iOS development and testing rely on Apple’s developer tools, Xcode is a must. Install the latest stable version from the Mac App Store. You’ll also need to install the Xcode Command Line Tools:
xcode-select –install
1
2xcode-select –install
3
2. Node.js and Appium
Appium is built on Node.js, so installing Node is the first step. Once Node.js is installed, you can install Appium using npm (Node Package Manager):
1
2npm install -g appium
3
This command installs Appium globally on your system, allowing you to launch the Appium server from anywhere via terminal.
Optional: Install Appium Doctor
Appium Doctor is a helpful utility that verifies whether your system is correctly configured for Appium. It checks dependencies like Xcode, Carthage, Java, and Android SDK.
npm install -g appium-doctor
appium-doctor
1
2npm install -g appium-doctor
3appium-doctor
4
Appium Doctor outputs a checklist of required tools and flags missing or misconfigured components so you can fix issues early.
3. IOs Device and Developer Account
To test on physical iOS hardware, you have two options:
Option 1: Maintain a Real Device Lab
Physically manage and provision iPhones and iPads using USB or wireless connections.
Option 2: Use a Cloud-Based Real Device Testing Platform
Platforms like Testsigma provide a mobile device testing lab, offering instant access to a wide range of real iOS devices for parallel and scalable testing, without hardware maintenance overhead.
In both cases, you’ll need:
- A paid Apple Developer account
- Provisioning profiles and signing certificates
- Device UDID (Unique Device Identifier) if connecting local hardware
4. Webdriveragent (Wda)
Appium uses WebDriverAgent as a bridge to communicate with iOS devices using Apple’s XCUITest framework.
WDA is a WebDriver server built by Facebook that Appium deploys to the iOS device. It listens for commands (like tap, scroll, enter text) and executes them on the device UI. You must clone, sign, and build the WDA project in Xcode before running real device tests.
5. Carthage
Appium uses Carthage, a dependency manager, to build WebDriverAgent and its libraries.
brew install carthage
Carthage downloads and builds necessary iOS dependencies. Appium uses it to compile the components needed for WebDriverAgent to run properly on devices.
How to Set up Appium for IOs
Setting up Appium for iOS involves a series of steps that ensure your test environment is properly configured. Here’s a detailed explanation of each step to guide you through the process:
Step 1: Install Xcode Command Line Tools
The command line tools are essential for building and signing iOS apps and for using system-level utilities needed during testing.
xcode-select –install
1
2xcode-select –install
3
This installs compilers, Git, and other tools required for iOS development and for building WebDriverAgent later.
Step 2: Install Appium Via NPM
Once you have Node.js installed, install Appium globally using npm:
npm install -g appium
1
2npm install -g appium
3
This installs the Appium server, which you can run from any terminal window. This server acts as the core engine for executing your test scripts.
Step 3: Install Appium Inspector (optional but Recommended)
Appium Inspector is a GUI tool that helps you inspect the UI of your iOS apps and locate elements using selectors like Accessibility ID or XPath.
- Download from: Appium Inspector GitHub
Why use it? It visually represents the app’s UI hierarchy, allowing you to interact with elements and view their attributes, which simplifies test script creation.
Step 4: Clone Webdriveragent and Set up Code Signing
WebDriverAgent is required for Appium to communicate with the iOS device. You need to clone and configure it to run on your device.
Navigate to the WebDriverAgent folder:
cd /usr/local/lib/node_modules/appium/node_modules/appium-webdriveragent
Open the WebDriverAgent.xcodeproj file in Xcode:
open WebDriverAgent.xcodeproj
Then:
- Select a valid development team in the Signing & Capabilities tab.
- Change the Bundle Identifier for the WebDriverAgentRunner target to something unique.
- Connect your iOS device and ensure it appears in the device list.
This step ensures the WebDriverAgent can be built and signed to run on your iOS device.
Step 5: Configure Desired Capabilities in Your Test Script
Desired Capabilities are used to specify test environment details and connect to the Appium server.
Here’s an example using Java:
1
2DesiredCapabilities caps = new DesiredCapabilities();
3caps.setCapability(“platformName”, “iOS”);
4caps.setCapability(“deviceName”, “iPhone 14”);
5caps.setCapability(“platformVersion”, “16.4”);
6caps.setCapability(“automationName”, “XCUITest”);
7caps.setCapability(“udid”, “your-device-udid”);
8caps.setCapability(“bundleId”, “com.example.myapp”);
9- platformName: Specifies the OS (iOS)
- deviceName: Model name as shown in Xcode or instruments -s devices
- platformVersion: The iOS version running on the device
- automationName: Always set to XCUITest for iOS
- udid: Unique device identifier (can be found in Xcode or with idevice_id -l)
- bundleId: The identifier of the app to be tested
These capabilities allow Appium to locate the device and launch the specified app for testing.
Writing the Appium Test Script for IOs Devices
You can write tests using any WebDriver-compatible language. Below is a sample in Java with TestNG:
1
2public class iOSTest {
3  IOSDriver<MobileElement> driver;
4  @BeforeClass
5  public void setUp() throws MalformedURLException {
6    DesiredCapabilities caps = new DesiredCapabilities();
7    caps.setCapability(“platformName”, “iOS”);
8    caps.setCapability(“deviceName”, “iPhone 13”);
9    caps.setCapability(“automationName”, “XCUITest”);
10    caps.setCapability(“bundleId”, “com.example.iosApp”);
11    caps.setCapability(“udid”, “device-udid-here”);
12    driver = new IOSDriver<>(new URL(“http://localhost:4723/wd/hub”), caps);
13  }
14  @Test
15  public void validateLogin() {
16    driver.findElement(By.id(“username_field”)).sendKeys(“user1”);
17    driver.findElement(By.id(“password_field”)).sendKeys(“1234”);
18    driver.findElement(By.id(“login_button”)).click();
19  }
20  @AfterClass
21  public void tearDown() {
22    driver.quit();
23  }
24}
25
Running Appium Tests on IOs
Appium tests on iOS can be run on simulators or real devices.
- On Simulators
- Simulators are fast and easy to use.
- No real-device provisioning needed.
- Ideal for functional and UI tests in early stages.
Note: Simulators can’t test camera, push notifications, or real network behavior.
- On Real Devices
- Real devices are essential for accurate performance, battery, and gesture testing.
- Appium communicates via WebDriverAgent to the device.
- You need to build and deploy the WDA project onto the device before test execution.
Using Appium Desktop Vs CLI
Appium can be interacted with primarily through the Command Line Interface (CLI) and via Appium Desktop. Each offers distinct advantages and caters to different user needs.
| Method | Best For | Notes |
| Appium Desktop | Inspecting elements, debugging | UI-based interface |
| Appium CLI | Test execution, CI/CD integration | Faster and scriptable for automation |
Common Errors and Troubleshooting
While Appium is a powerful and widely used automation framework, its complexity and reliance on various underlying components (like Xcode, WebDriverAgent, and iOS simulators/devices) make it susceptible to multiple issues. Common errors encountered during Appium iOS testing include:
- WebDriverAgent Fails to Build
WebDriverAgent (WDA) is a critical component that Appium uses to communicate with iOS devices through Apple’s XCUITest framework. One of the most common issues during setup is that WDA fails to build in Xcode. This usually happens due to code signing issues, missing provisioning profiles, or incompatible Xcode project settings.
How to troubleshoot:
- Open WebDriverAgent.xcodeproj in Xcode and ensure a valid Apple Developer Team is selected in Signing & Capabilities.
- Check the Bundle Identifier and ensure it is unique and correctly configured.
- Delete Xcode’s derived data:
Go to ~/Library/Developer/Xcode/DerivedData/ and delete the WebDriverAgent folder, then rebuild. - Make sure you’re using a compatible version of Xcode with Appium.
- Could Not Connect to iOS Device
Sometimes Appium throws errors saying it cannot connect to the real iOS device. This usually occurs when the device is not detected properly by macOS, the required permissions aren’t granted, or the device isn’t authorized for development.
How to troubleshoot:
- Ensure the device is unlocked, and you’ve tapped “Trust This Computer” if prompted.
- Use a genuine Apple USB cable and check that the device shows up in Xcode’s Devices and Simulators window.
- Restart the Appium server and reconnect the device to refresh the connection.
- Check that developer mode is enabled on the iOS device.
- Timeout Errors During Test Execution
During test execution, Appium might throw timeout errors like newCommandTimeout, especially when the device is inactive or unresponsive. These errors halt the test session unexpectedly.
How to troubleshoot:
Increase the newCommandTimeout capability value to give more buffer time between actions:
caps.setCapability(“newCommandTimeout”, 300);
- Ensure the iOS device does not go to sleep during long test runs. Disable auto-lock temporarily in device settings.
- Avoid long idle times in your test scripts by adding intermediate actions or logs.
- Appium Inspector Doesn’t Detect Elements
When using Appium Inspector, you might notice that certain UI elements are not showing up or aren’t accessible. This usually indicates that the app hasn’t been properly instrumented for UI testing, or that accessibility labels aren’t in place.
How to troubleshoot:
- Ask your developers to ensure all relevant UI components have accessibility labels or identifiers set. Appium relies on these attributes (like accessibilityId) to locate elements reliably.
- Use XCUITest’s Accessibility Inspector in Xcode to verify if elements are recognized.
- If using XPath, double-check the DOM structure. However, prefer accessibilityId wherever possible for better performance.
Best Practices for Appium IOs Testing
- Use accessibility IDs instead of XPath for better reliability and speed.
- Avoid hardcoded waits and use explicit waits with expected conditions.
- Test across multiple iOS versions to catch backward compatibility issues.
- Use cloud-based device labs to reduce local setup time.
- Clean up user data before and after tests to ensure test isolation.
- Include logging and screenshots in test reports for debugging.
Why is Running Appium Tests on Real IOs Devices the Best
Simulators can’t perfectly replicate the nuances of real devices, so iOS testing on real hardware is essential for catching device-specific bugs and ensuring consistent behavior across different devices and OS versions. Here’s why testing on real iOS devices is important:
1. Real-World Accuracy
Real devices allow your tests to reflect actual user experiences, including physical conditions and limitations that simulators abstract away.
- Tests can account for factors like battery levels, network fluctuations (e.g., switching from 5G to 3G), and device heat under load.
- Helps simulate how the app performs when backgrounded, resumed, or interrupted by system notifications, something simulators can’t reliably mimic.
- You get to test with real input methods (tap, swipe, scroll, pinch), which ensures gesture precision and response validation.
2. Access to Physical Hardware Features
Simulators are software-based representations and lack access to physical components.
- Testing camera functionalities, Face ID/Touch ID, geolocation (GPS), Bluetooth, NFC, haptic feedback, and accelerometer is only possible on real hardware.
- Crucial for apps in domains like healthcare, e-commerce, finance, or transportation, where biometric verification and GPS are integral.
3. Detection of Device-Specific Bugs
Not all iOS devices behave the same, even with the same OS version. Differences in screen size, resolution, chipsets, and GPU can all impact app performance.
- Real devices expose layout breaks, UI misalignments, or animation glitches that may occur only on specific models (e.g., iPhone SE vs. iPhone 14 Pro Max).
- Helps you catch memory leaks or crashes on lower-end devices that may not be apparent in the simulator.
- Validates that your app scales properly across different aspect ratios, safe areas, and notch configurations.
4. Ensures App Store Readiness
Apple’s App Store policies are stringent. Apps that behave inconsistently or crash on real devices risk rejection, regardless of simulator test results.
- Running tests on real devices ensures compliance with Apple’s real-world behavior expectations.
- You reduce the chances of rejection for issues like poor gesture handling, feature failures, or poor performance on actual devices.
- Builds confidence in your release pipeline before submitting for App Store review.
5. Improved Performance and Resource Testing
Simulators don’t reflect how an app consumes real device resources such as CPU, memory, and battery.
- You can validate how your app behaves under low memory conditions, CPU spikes, or high battery usage.
- Helps optimize performance for real-world usage, improving app ratings and retention.
6. Better Debugging and Reproducibility
Some bugs appear only on physical devices due to environmental or hardware interactions.
- Real devices help reproduce intermittent issues that users report, like app freezes, touch unresponsiveness, or sensor-related failures.
- You can capture logs and crash reports directly from the device for accurate debugging.
7. Critical for Regression and End-to-end Testing
End-to-end scenarios involving multiple layers (UI, hardware, APIs) require real device interaction for completeness.
- Ensures backend services, push notifications, and in-app purchase flows work seamlessly.
- Helps validate user journeys under real device constraints like multitasking, incoming calls, or OS-level popups.
Also Read: iOS testing frameworks
Why Testsigma for Appium IOs Testing
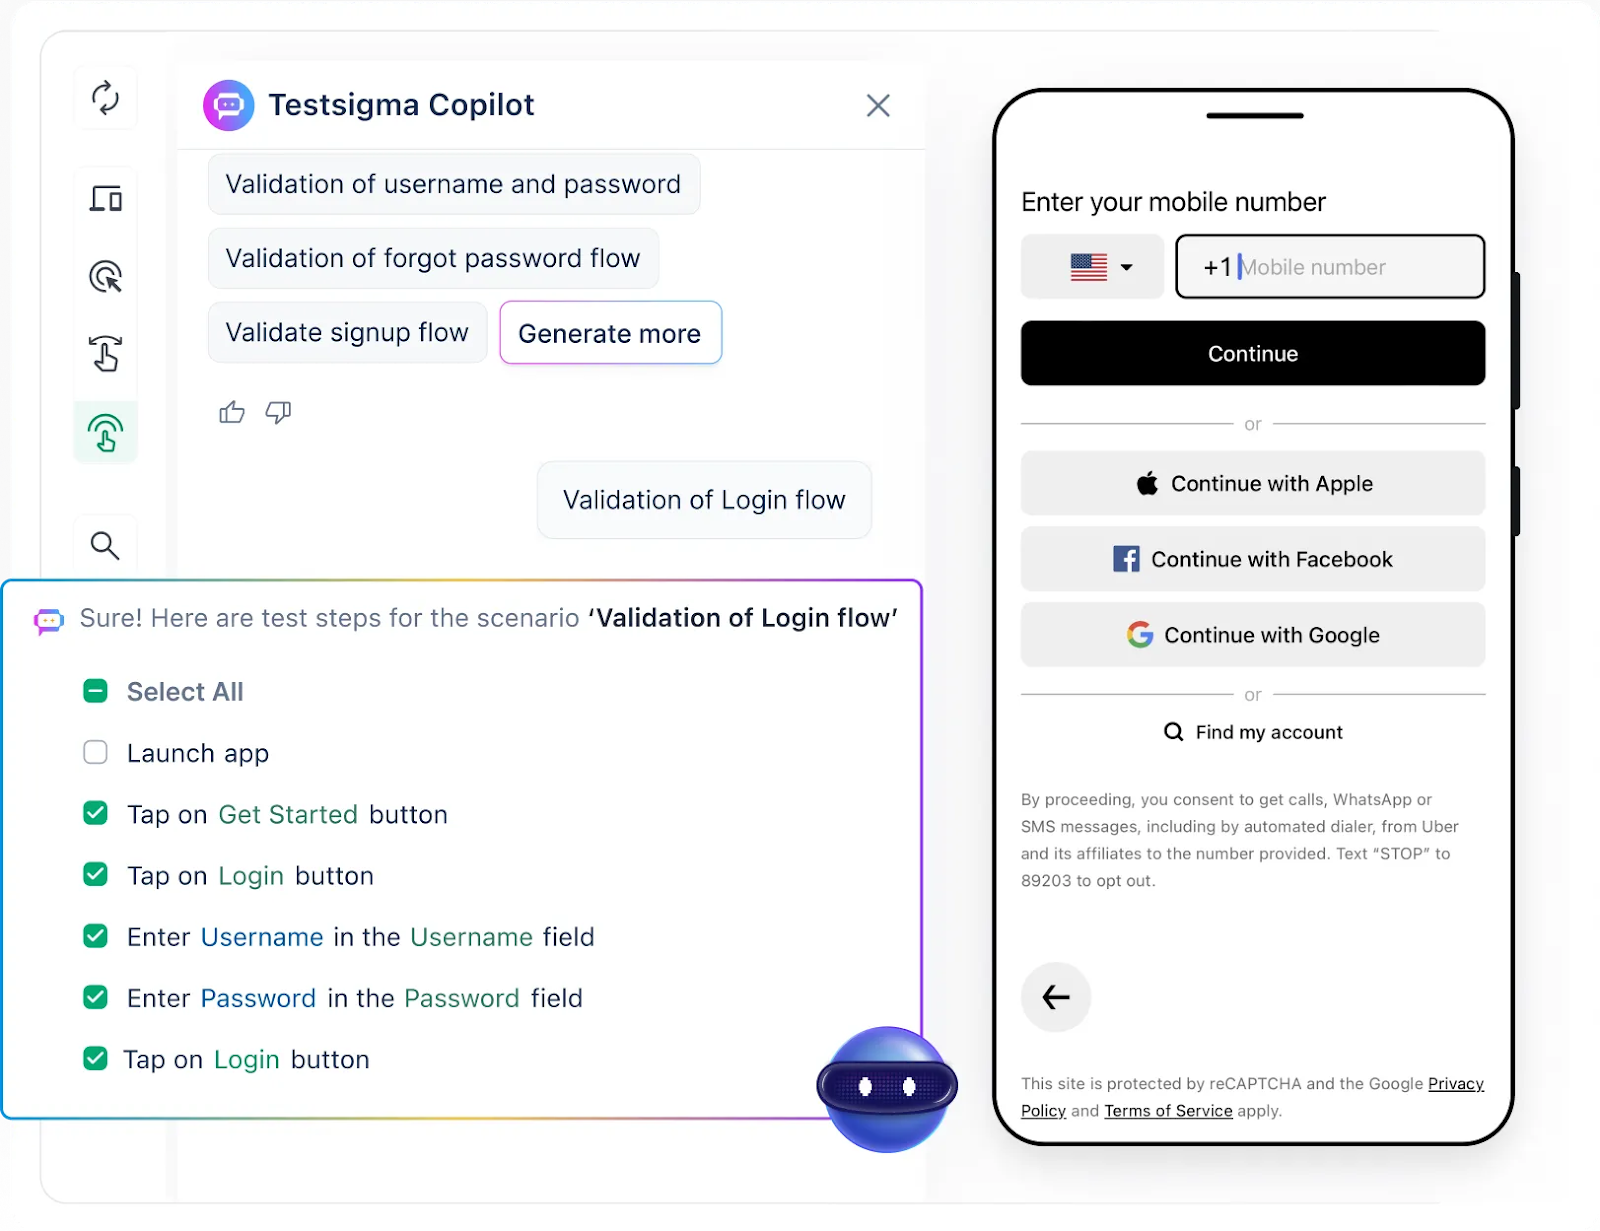
Testsigma is a codeless AI-driven test automation platform for automating tests across mobile, web, desktop, API, and enterprise applications like Salesforce and SAP. Designed for speed, scale, and simplicity, Testsigma enables autonomous testing with 10x faster execution by deploying specialized AI-powered agents at different stages of the testing lifecycle:
- Generator Agent: Automatically creates test cases from prompts in plain English, Figma designs, Jira tickets, images, videos, etc. This reduces the manual effort needed for test authoring.
- Runner Agent: Executes tests with 10x speed across multiple environments, supporting parallel test runs on real iOS devices.
- Analyzer Agent: Performs root cause analysis when tests fail, helping you quickly identify what’s wrong and where.
- Healer Agent: Automatically heals broken tests by identifying UI changes and updating test steps accordingly. This can reduce test maintenance by up to 90%.
- Optimizer Agent: Ensures maximum test coverage by identifying gaps and redundancies in your test suite.
Key Benefits of Testsigma for IOs Appium Testing
Setting up an Appium test environment for iOS devices locally requires managing Xcode, developer accounts, provisioning profiles, physical devices, and signing configurations. This process is time-consuming, error-prone, and hard to scale. Testsigma solves this with its cloud-based real device lab that comes pre-configured for Appium testing. You can instantly run tests on thousands of real iPhones and iPads without worrying about infrastructure setup or maintenance.
- Access to 3000+ Real Devices and OS Versions: Test your iOS applications across a wide range of iPhone and iPad models, including the latest iOS versions. This helps uncover device-specific issues early.
- Author Tests Using AI Agents: Choose a no-code approach using the Generator Agent for faster test development. Either way, your tests integrate seamlessly with the Appium ecosystem.
- Cloud-Based Parallel Testing: Run multiple tests simultaneously on different real devices. This significantly reduces test execution time and accelerates feedback cycles.
- Seamless CI/CD Integrations: Testsigma integrates easily with CI/CD pipelines using tools like Jenkins, GitHub Actions, GitLab, CircleCI, and more, ensuring continuous quality throughout development.
- Detailed Reports and Debugging Tools: Get actionable insights through step-by-step test reports, screenshots, logs, and video recordings. This makes it easier to debug failures and track quality trends.
- Scalable and Maintenance-Free: You focus on writing quality tests while Testsigma takes care of infrastructure, device availability, environment setup, and updates.
Conclusion
Appium iOS testing gives teams the flexibility to automate across simulators and real devices, catch UI and performance bugs early, and speed up releases. But to truly mirror real-world conditions, testing on actual hardware is a must. With the right setup or platforms like Testsigma, you can make real-device testing fast, reliable, and scalable.

