- Projects
- Test Cases
- Data Sets
- Imports and Exports
- Step Groups
- Test Runs
- Test Plans
- Integrations
- Testsigma Two-way Integration
- Settings
- Manage Users
- Reports & Analytics
- CI/CD Integrations
Manage Test Runs in Jira App
Learn how to manage test runs and update test case status directly within Jira using Arcus by Testsigma.
The Arcus by Testsigma app simplifies your workflow by allowing you to manage test runs and test case results directly within Jira. You can update test results, add or link defects, and manage linked test cases from within the Jira issue view.
Prerequisites
Before you begin, ensure that your Testsigma project is connected to a Jira project in Arcus by Testsigma.
View Linked Test Runs from Testsigma
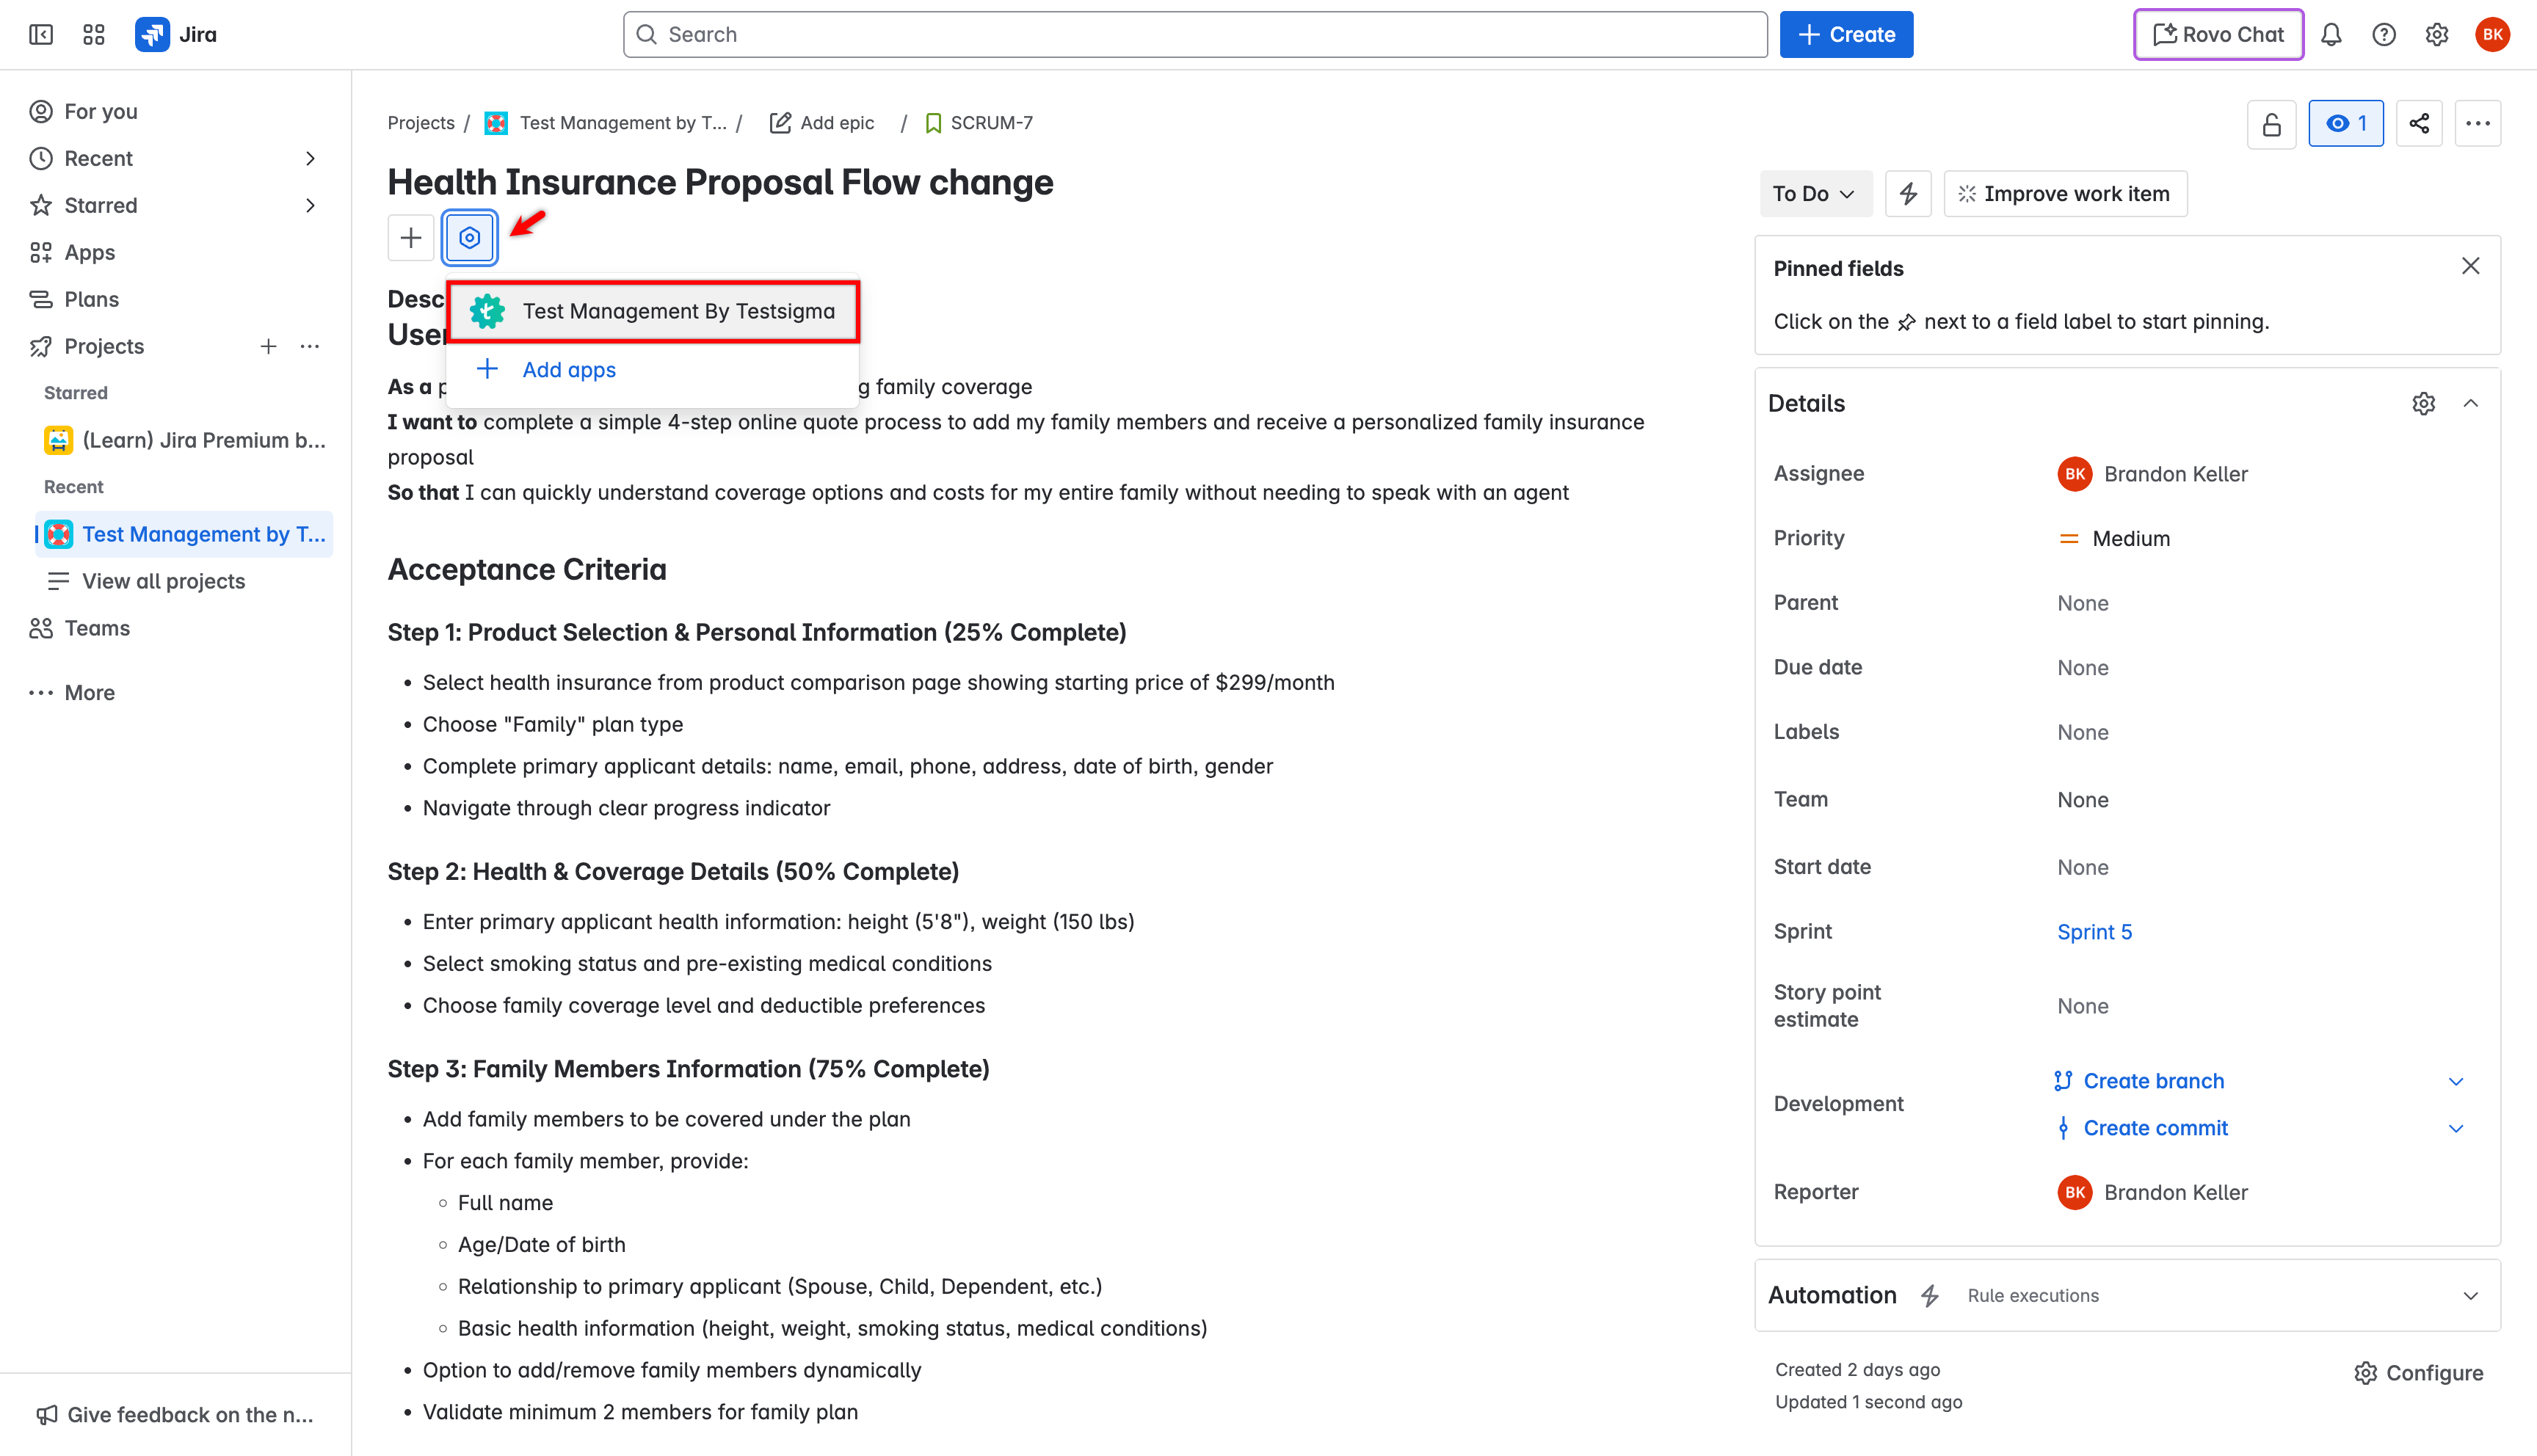
- Open the Jira issue in a linked Jira project.
- Click Jira App Actions, and then select Arcus by Testsigma.
NOTE:
Test runs that include test cases associated with the Jira issue are automatically displayed.
Update Test Case Results from Jira
- In the Jira issue, go to Arcus by Testsigma > Linked Test Runs.
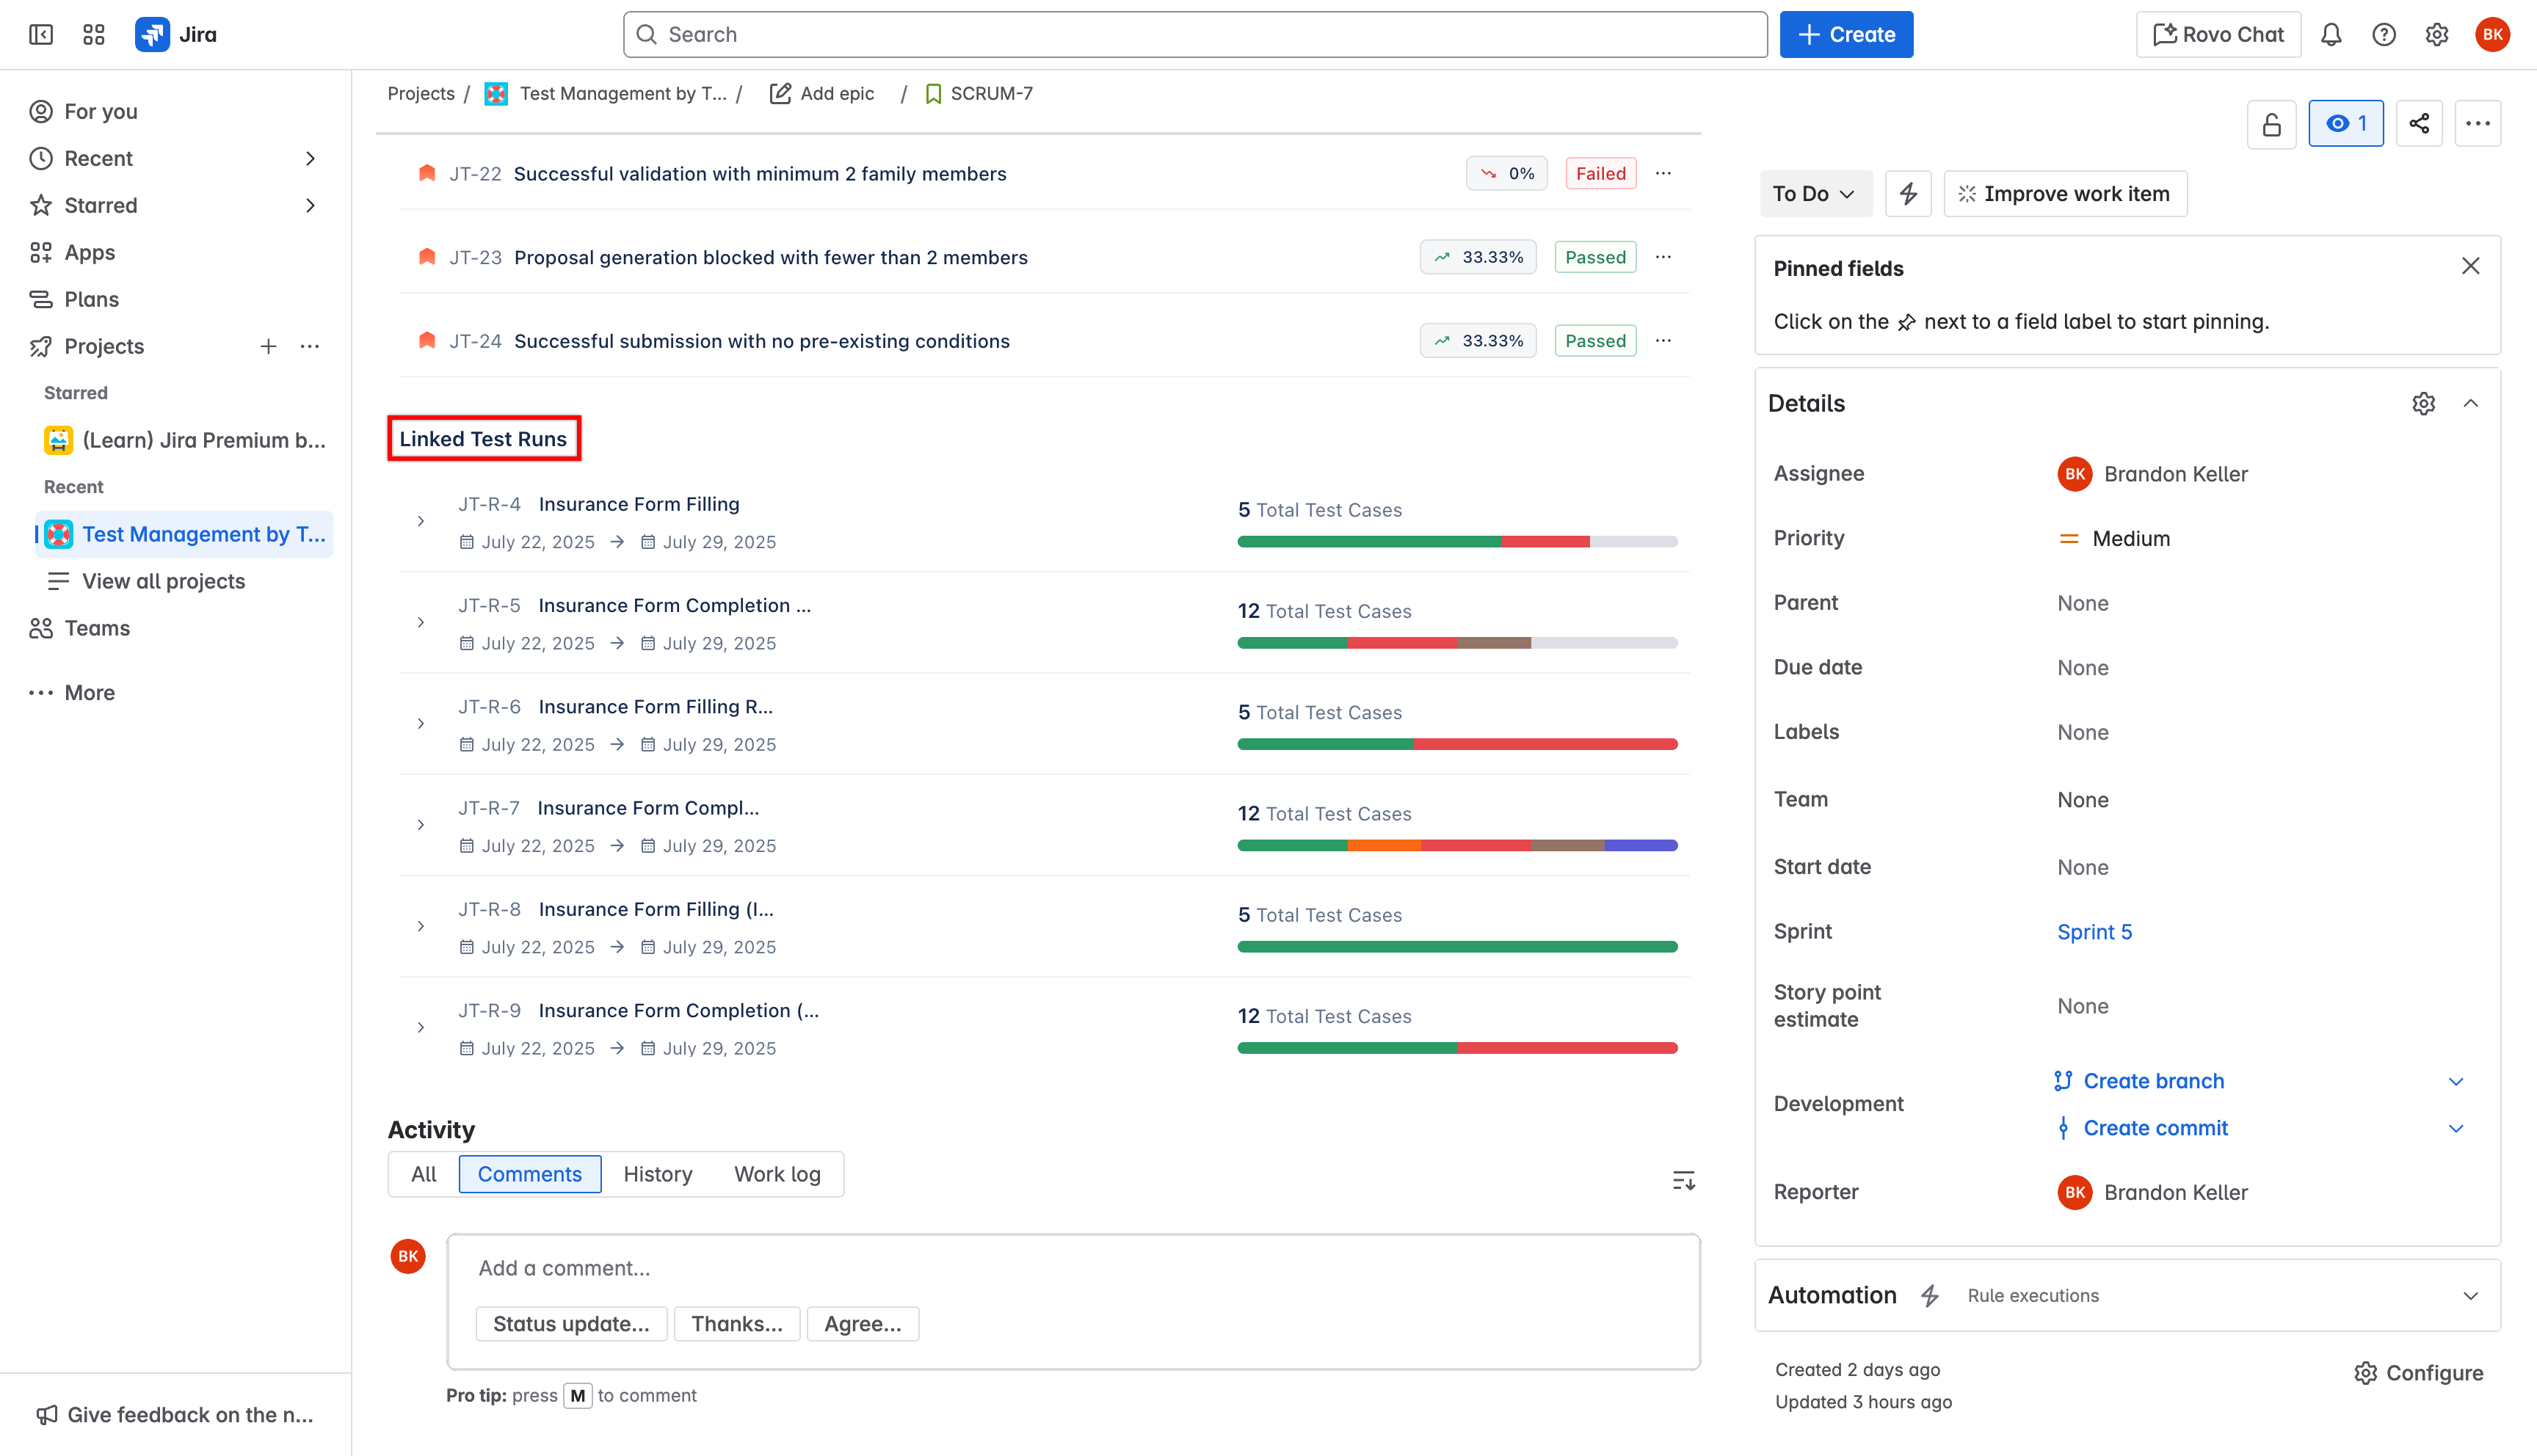
- Expand the test run.
- Click the Status next to the test case, and choose the appropriate result from the dropdown.
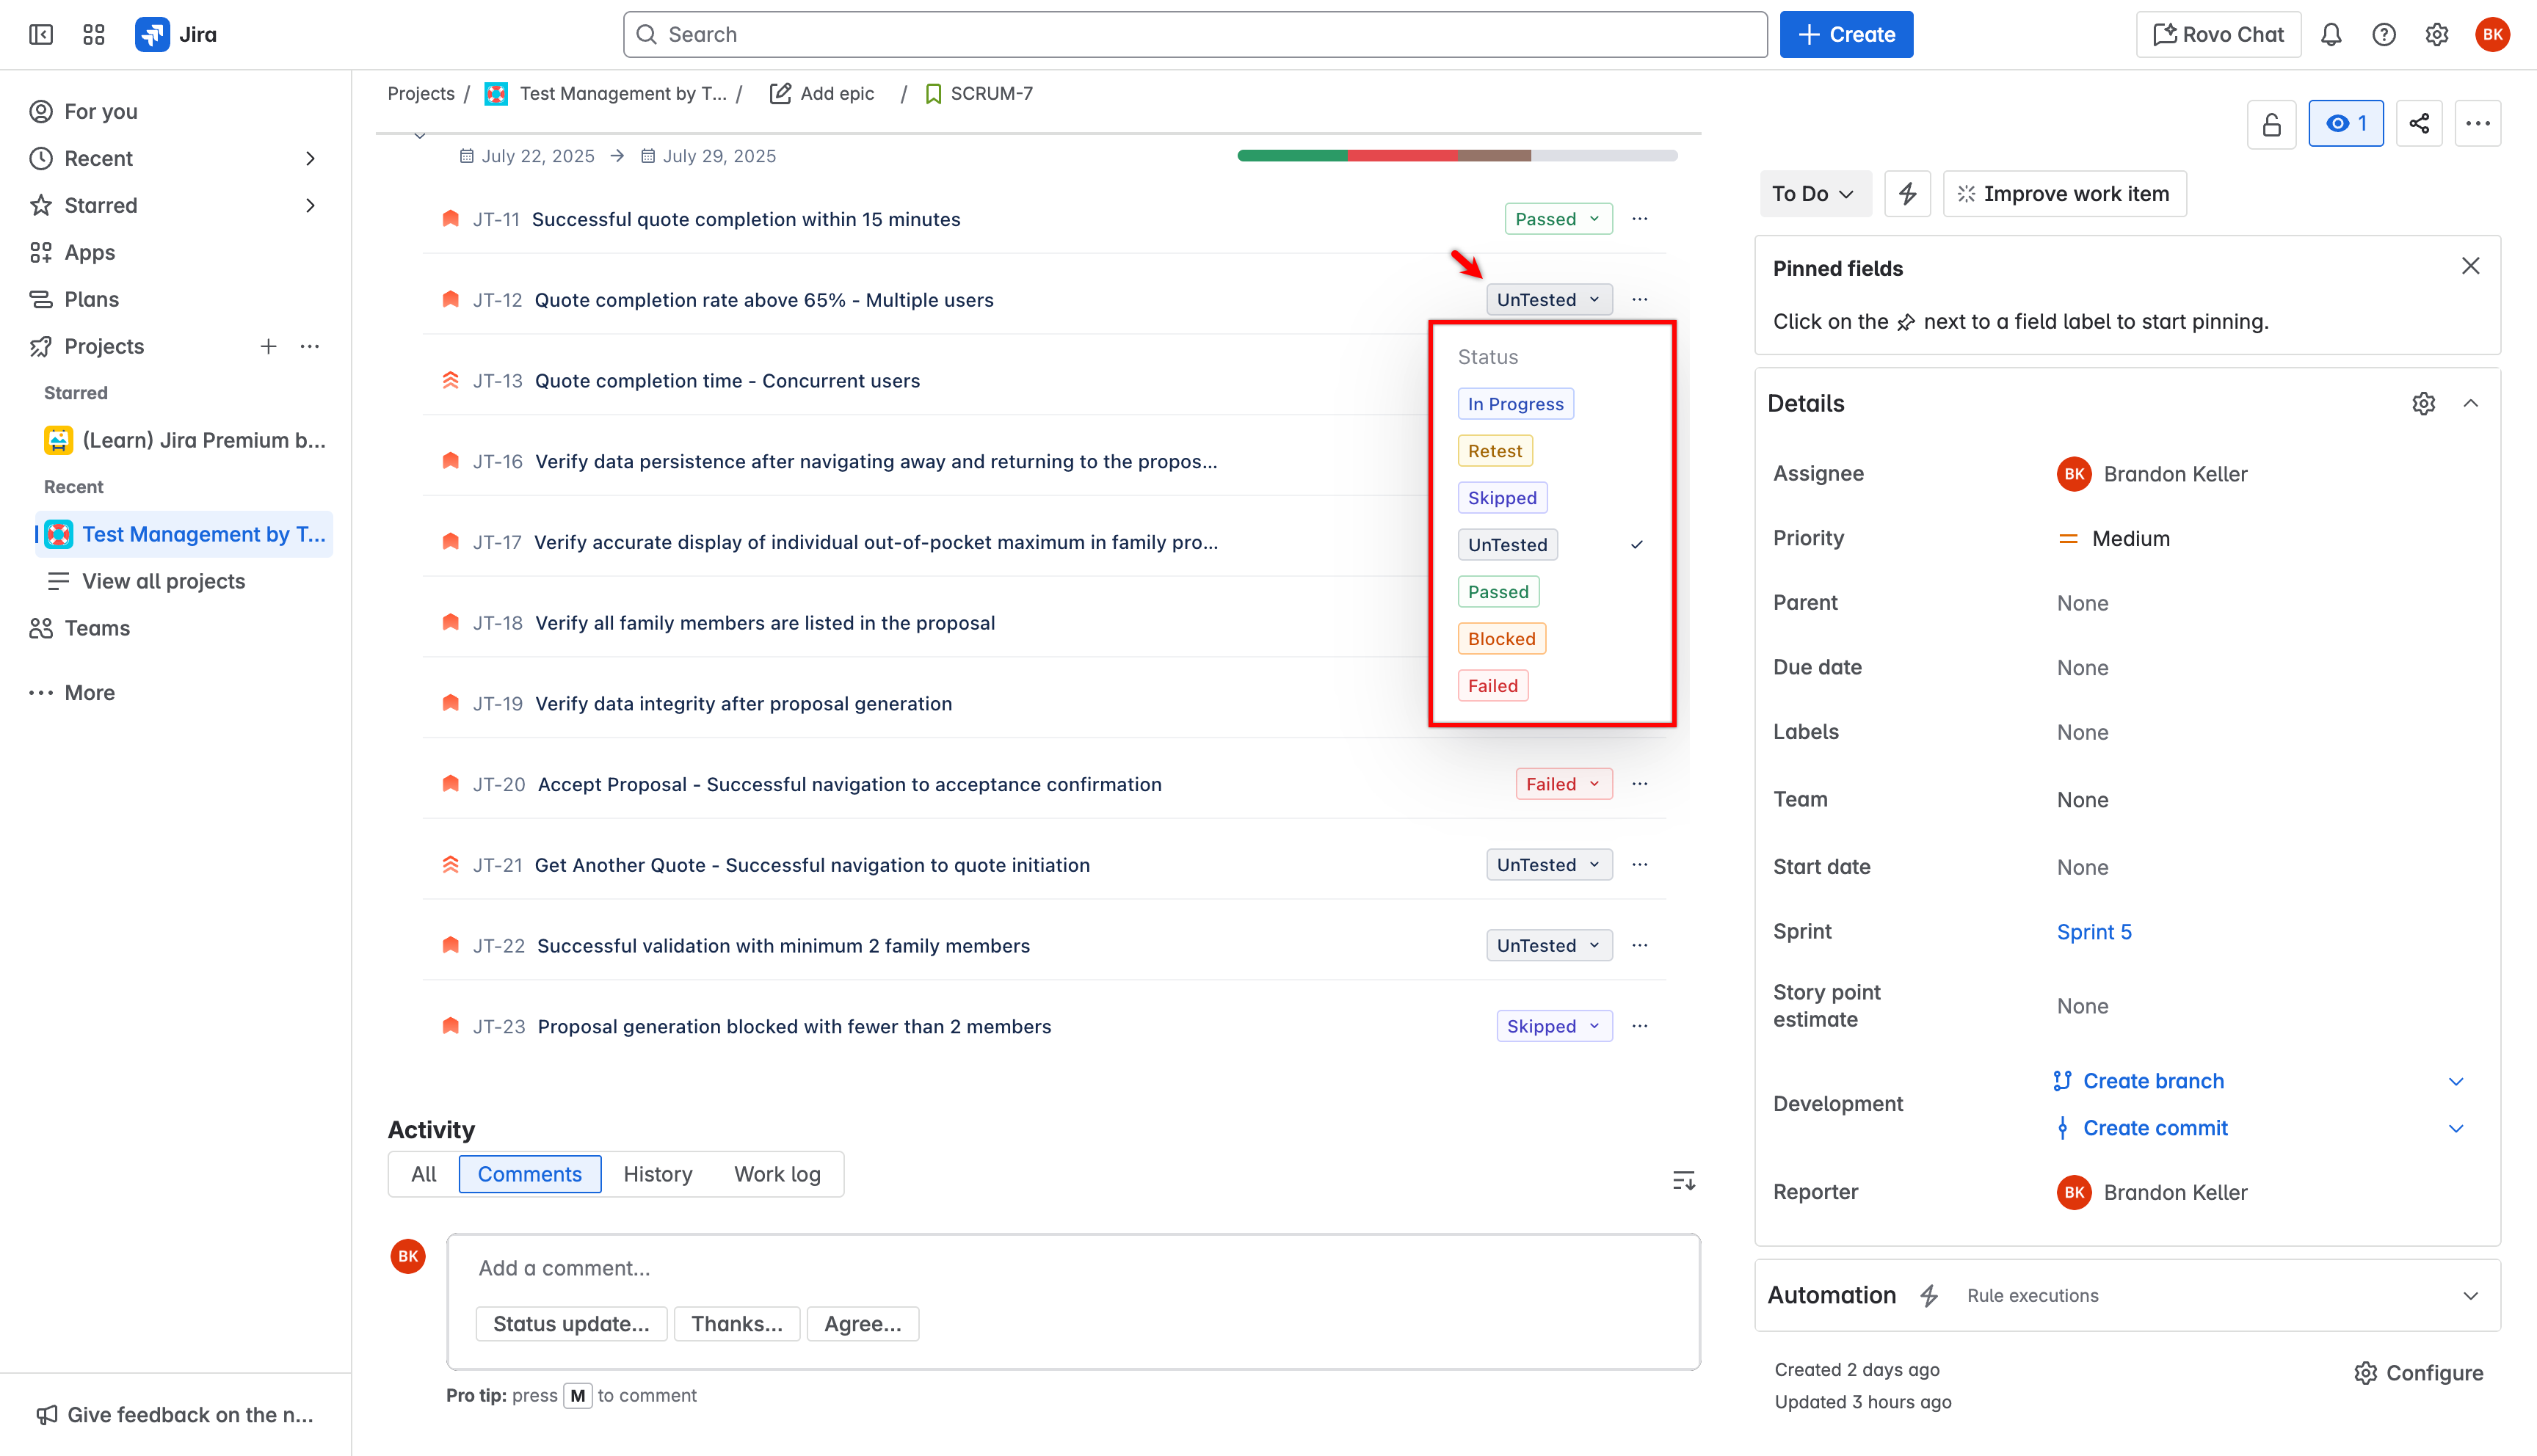
- Refresh the page to view the updated status in Linked Test Cases.
NOTE:
The test case status will also update in Arcus by Testsigma.
Add Defects from the Jira App
- In the Jira issue, go to Arcus by Testsigma > Linked Test Runs.
- Expand the test run.
- Click the meatballs menu (⋯) next to the test case, and click Add defect.
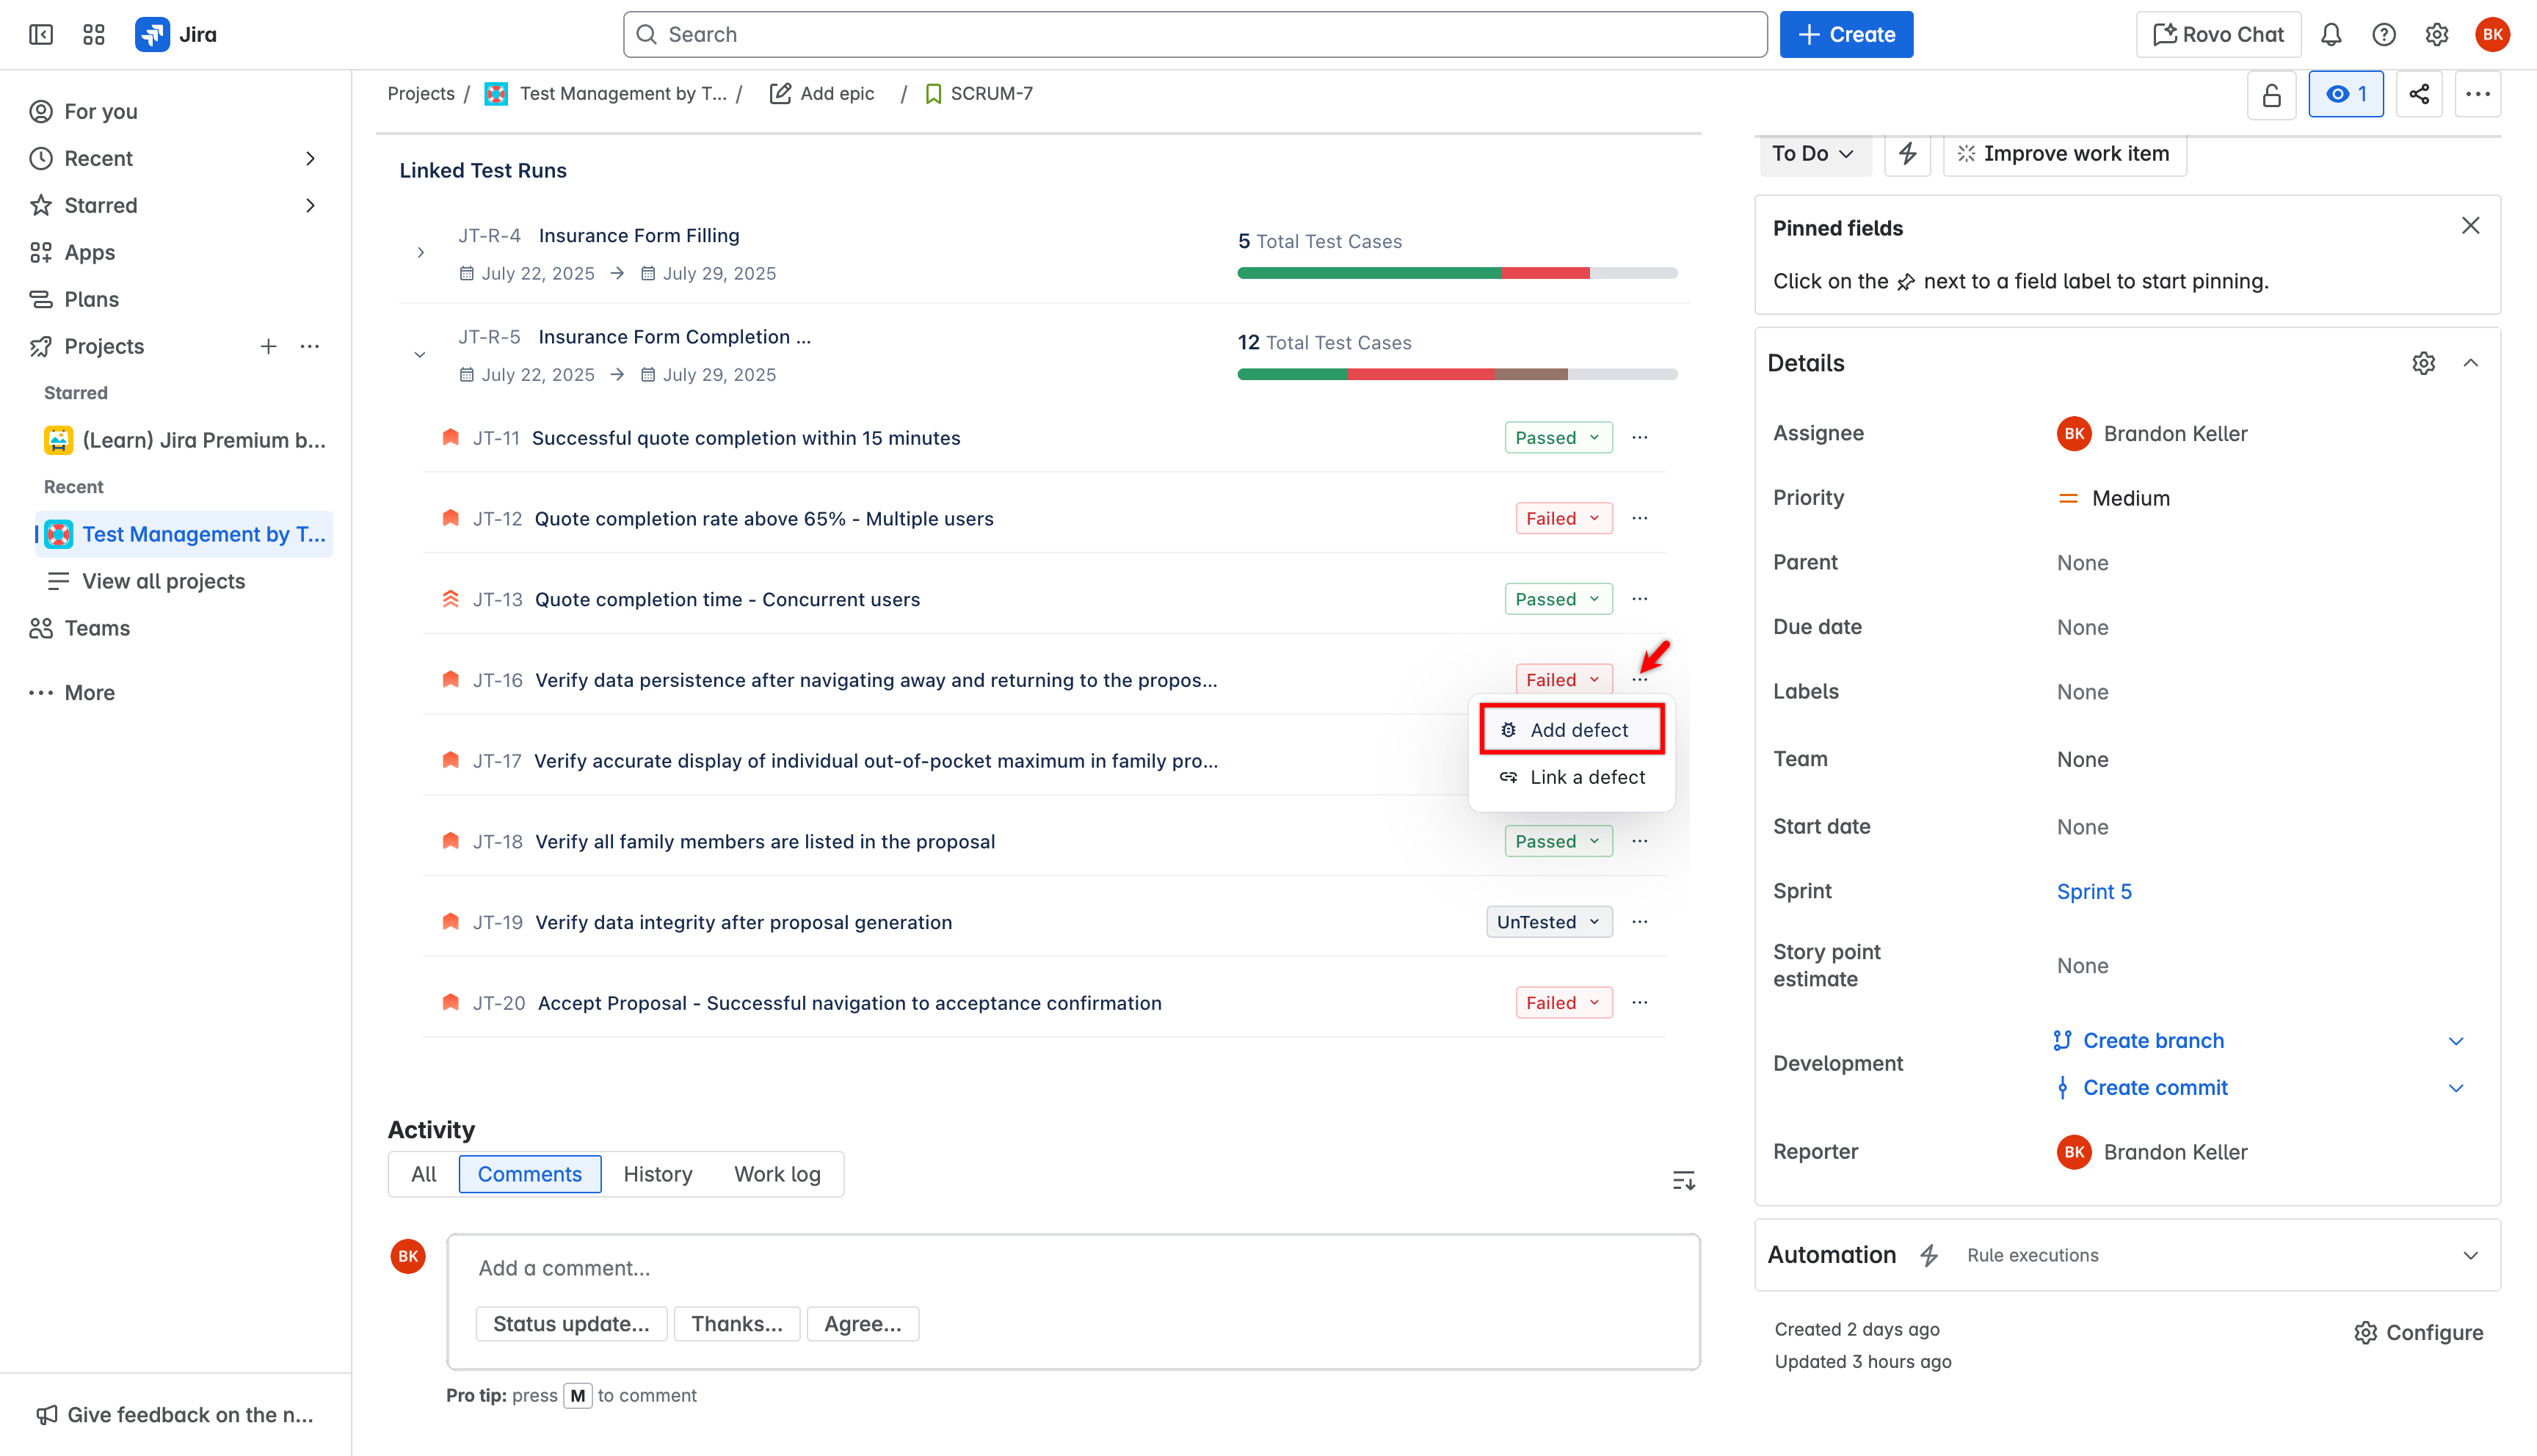
- In the Add Defect dialog, the Issue Type, Summary, Description, and Status are automatically filled in by the Atto AI agent. If needed, edit the fields and click Add.
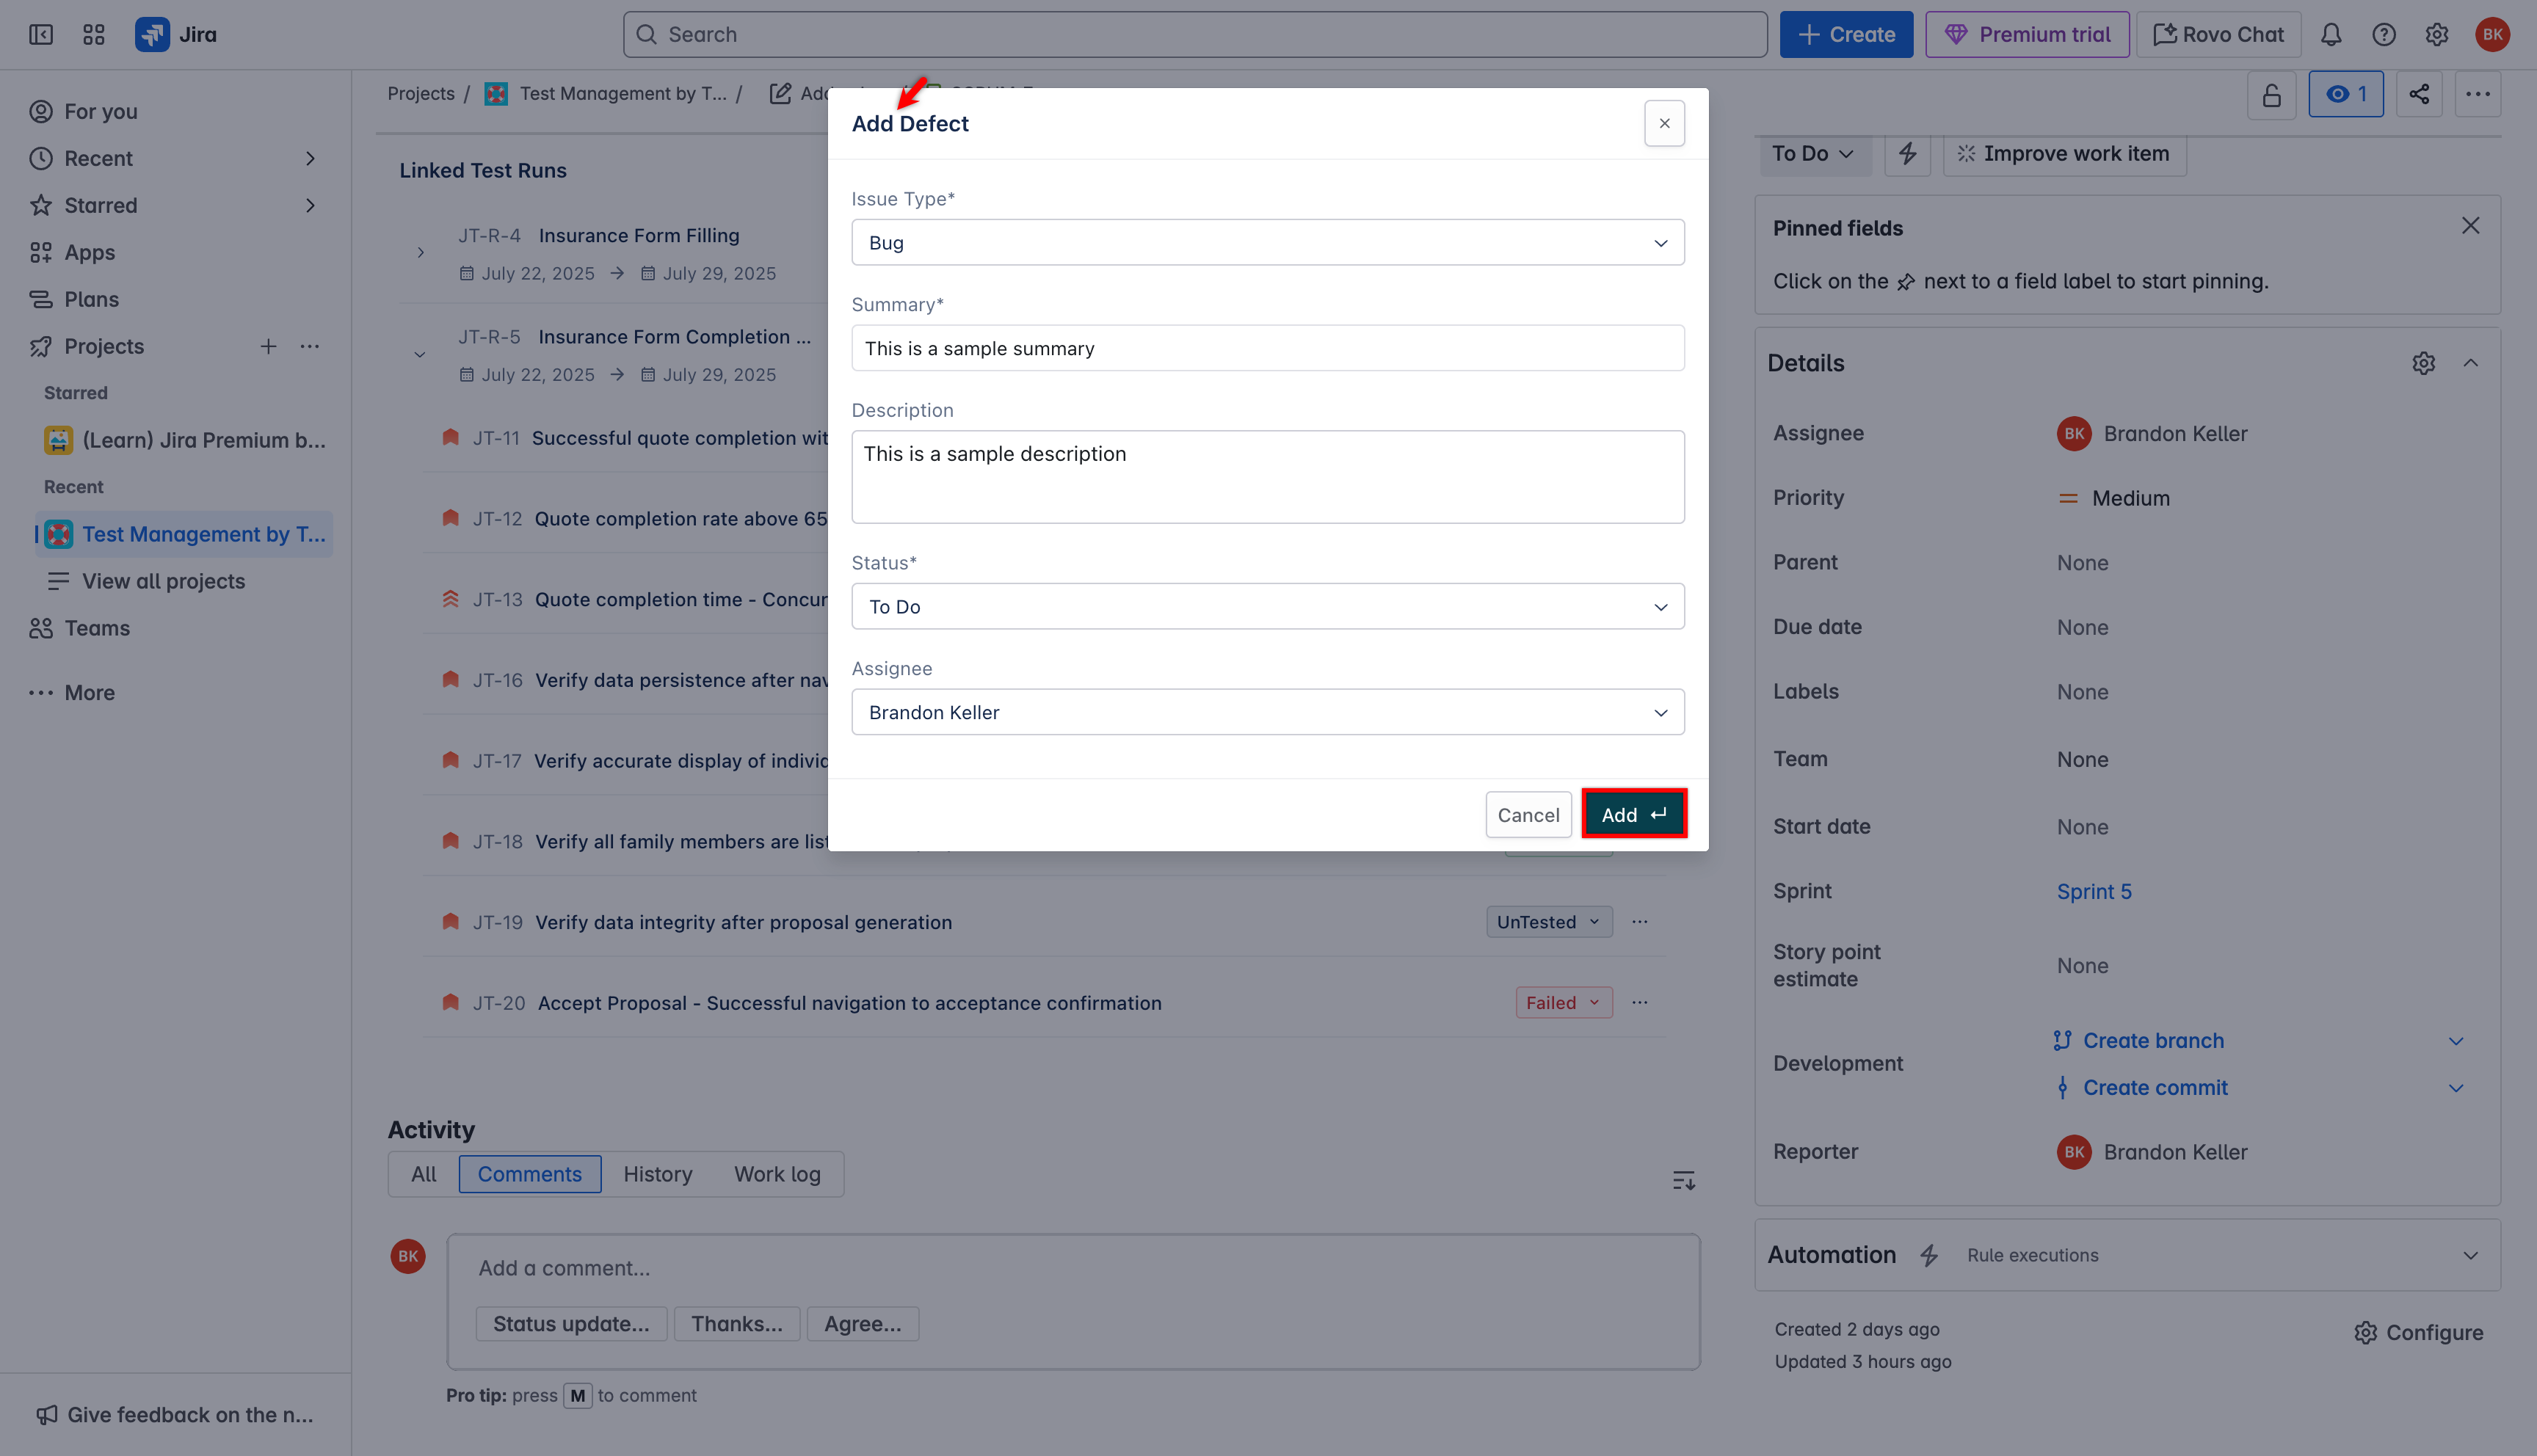
- The defect is created and added to Jira.
Link Defects to Existing Issues
- In the Jira issue, go to Arcus by Testsigma > Linked Test Runs.
- Expand the test run.
- Select the meatballs menu (⋯) next to the test case, and click Link a defect.
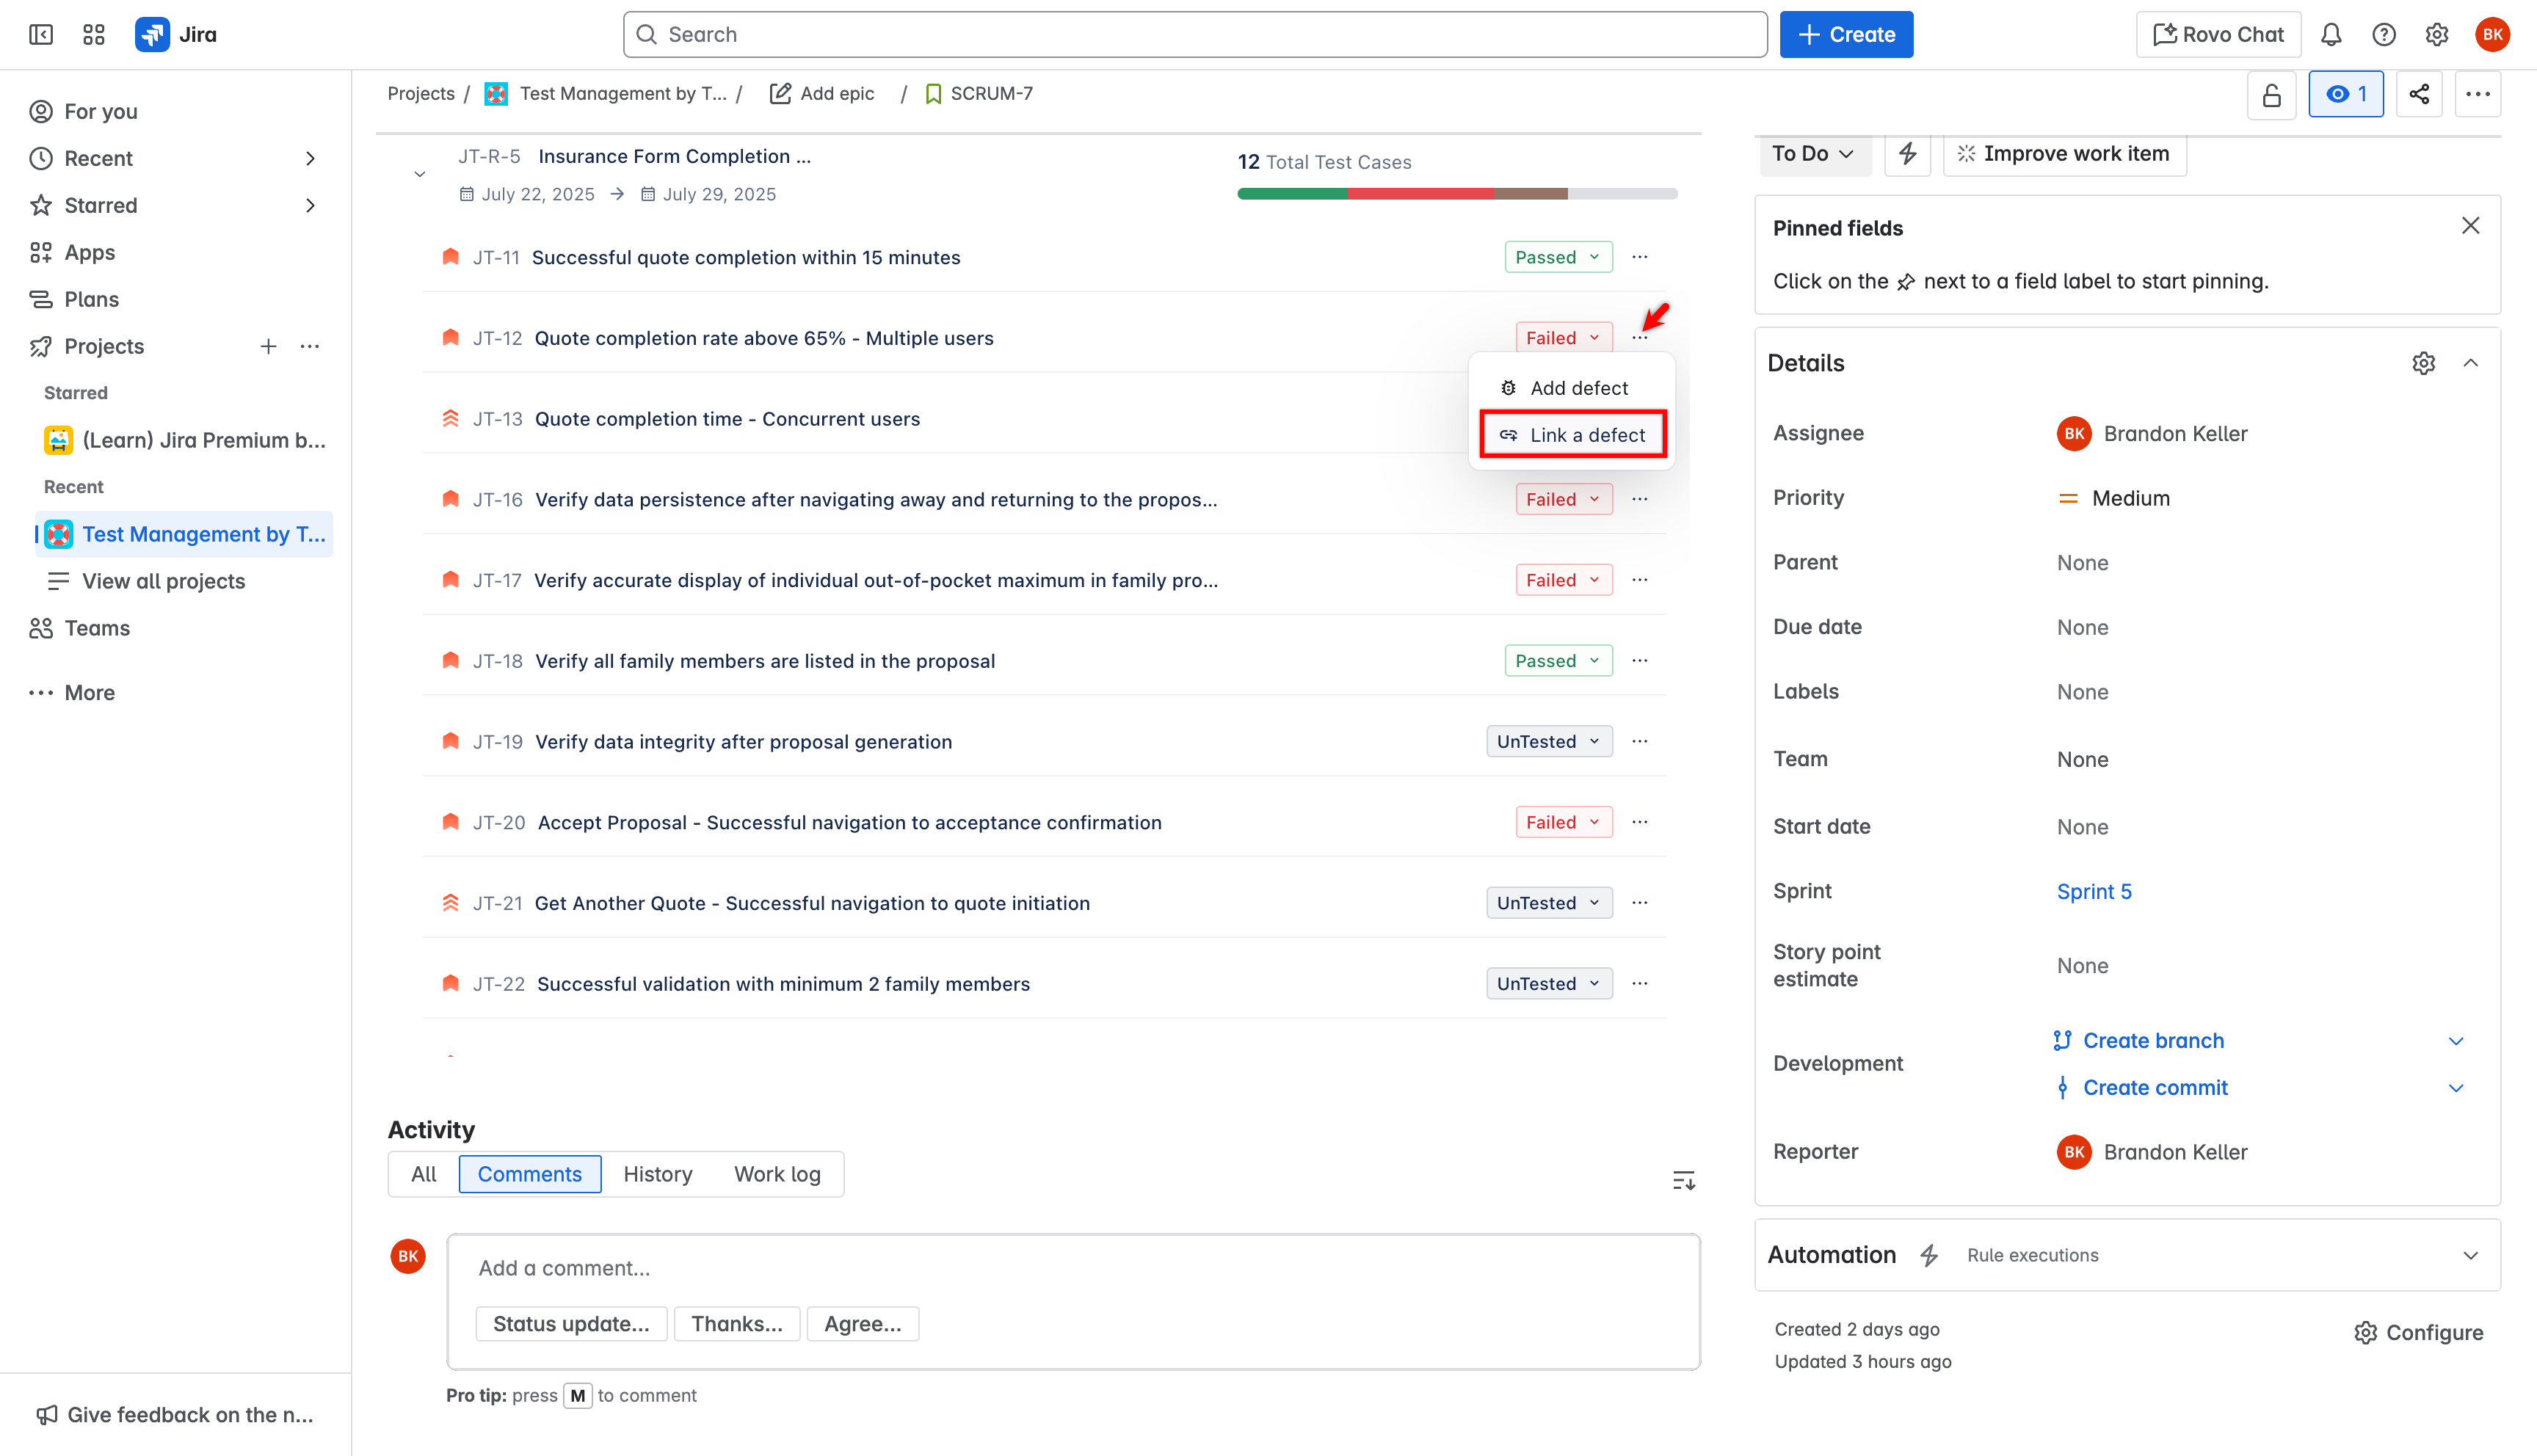
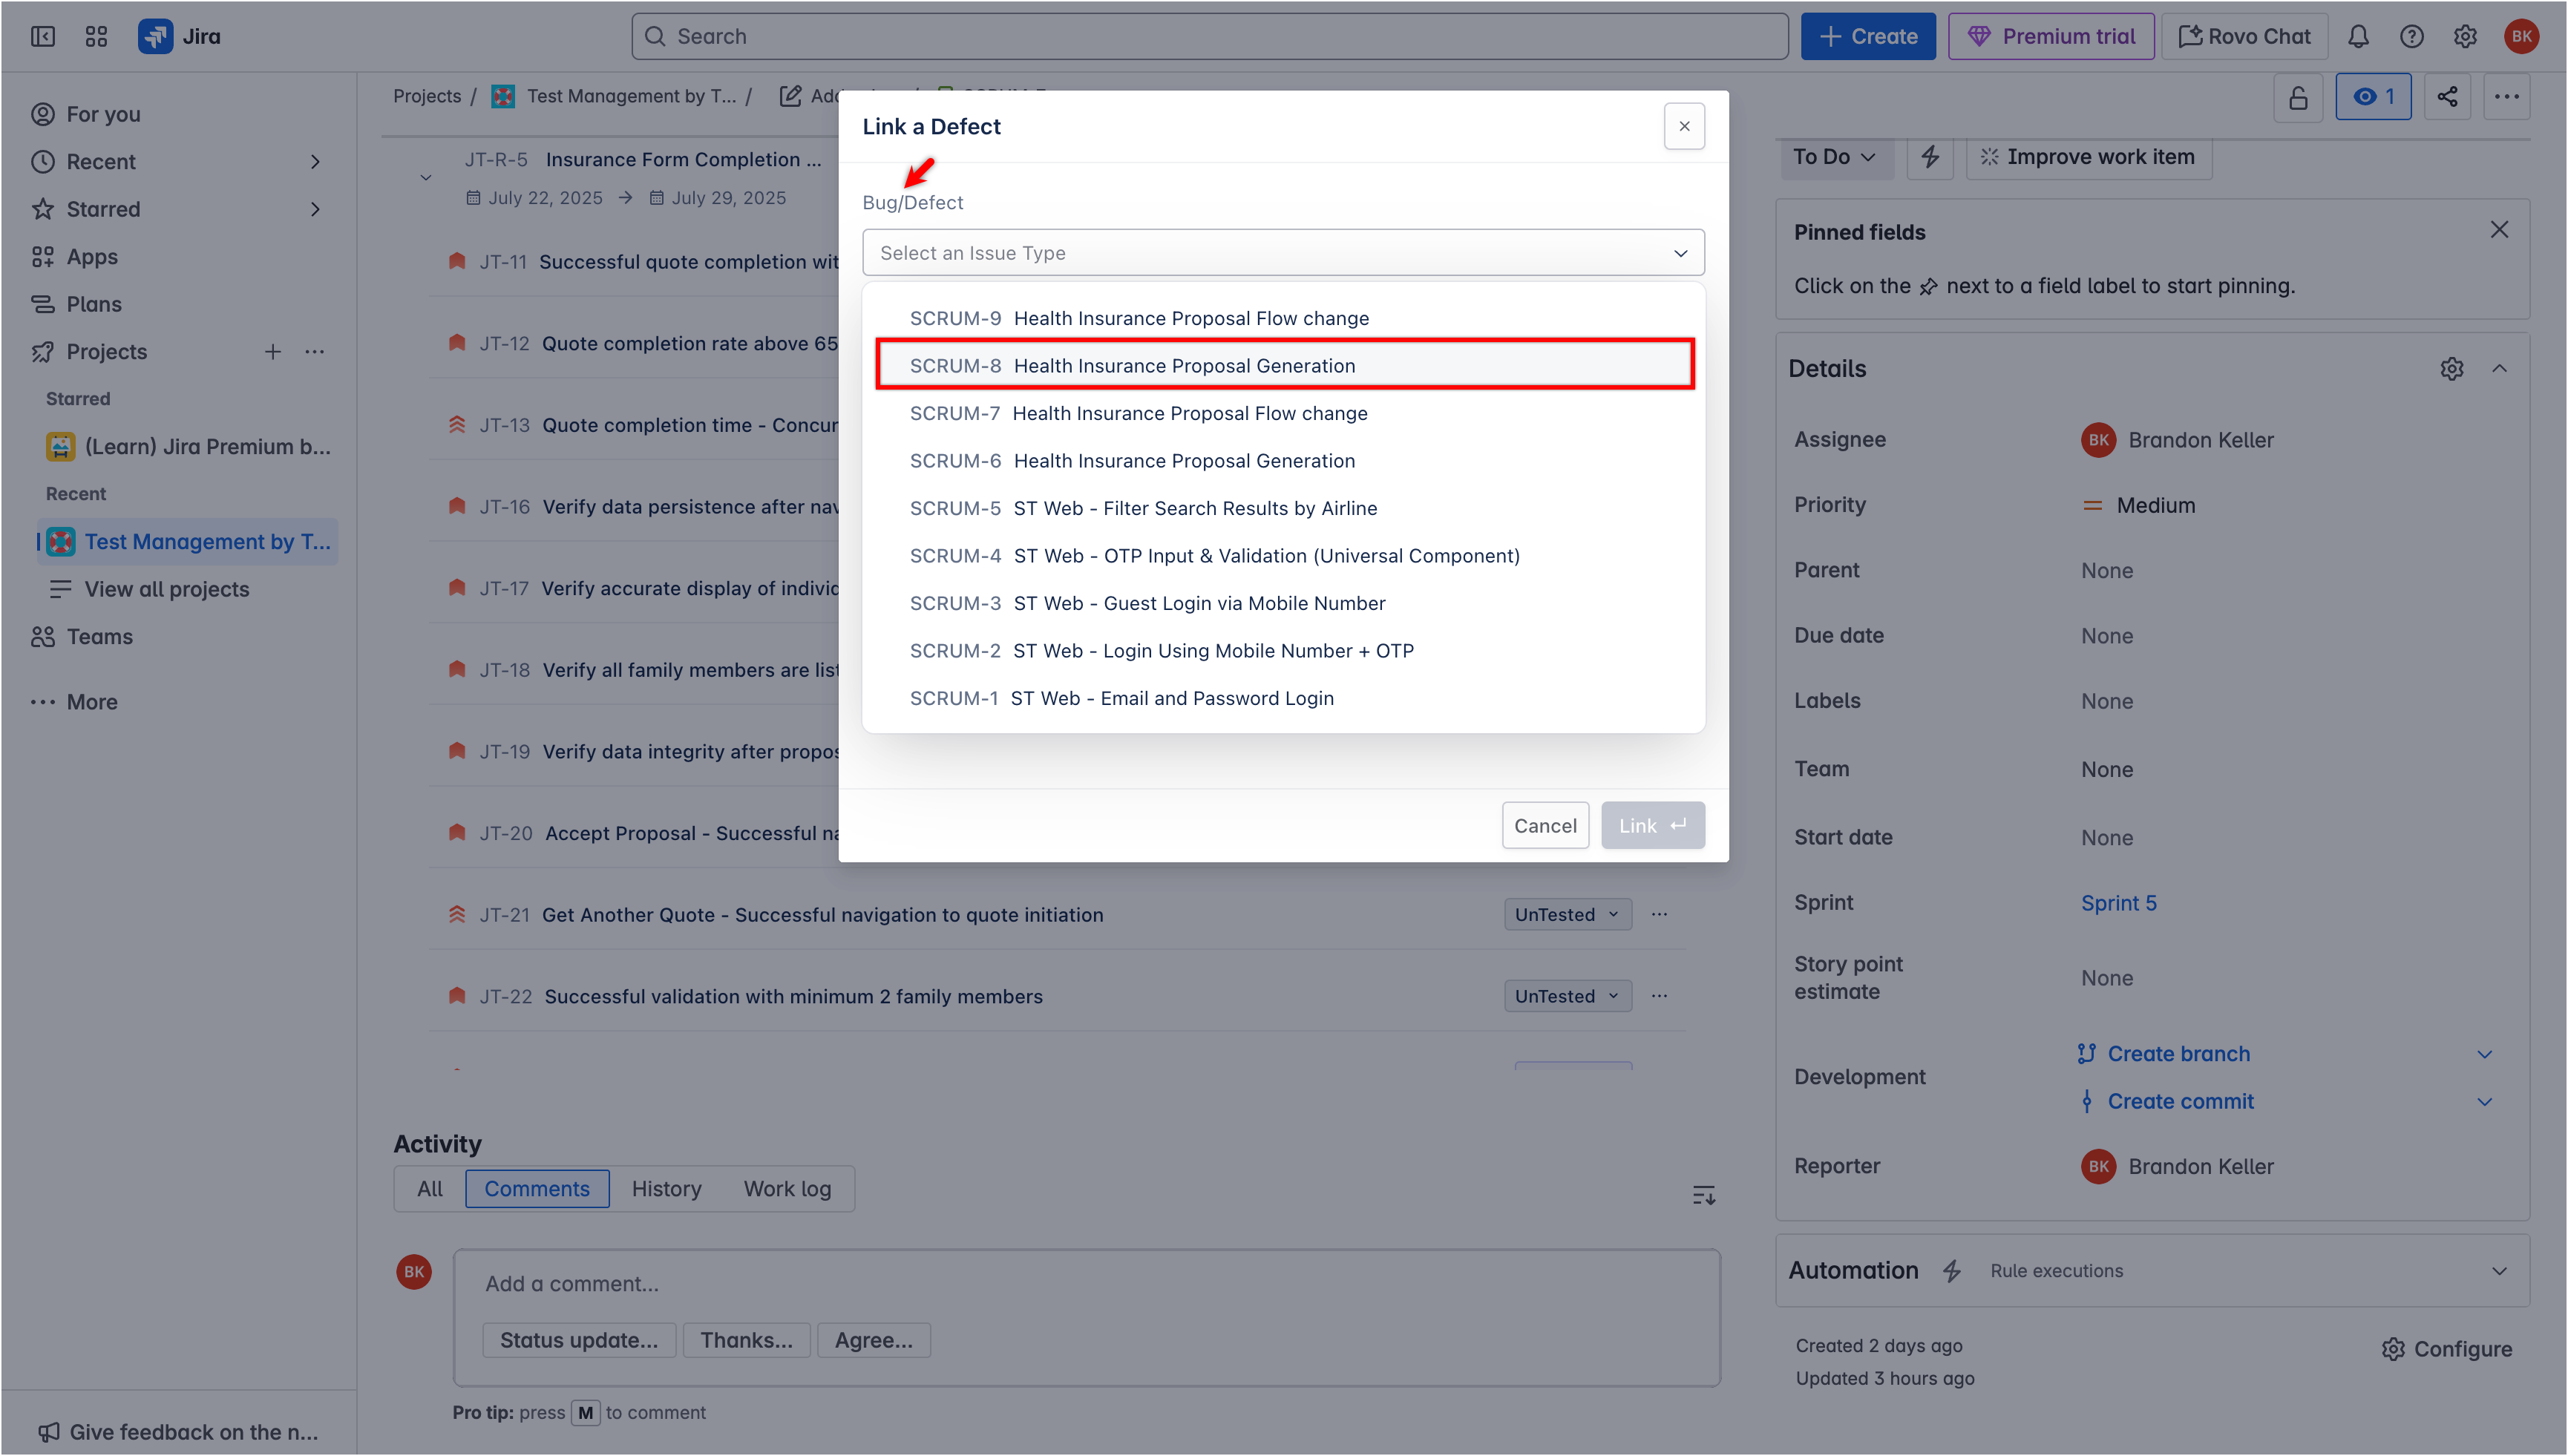
- In the Link a Defect dialog, select the existing issue to link from the Bug/Defect dropdown.
- Click Link.
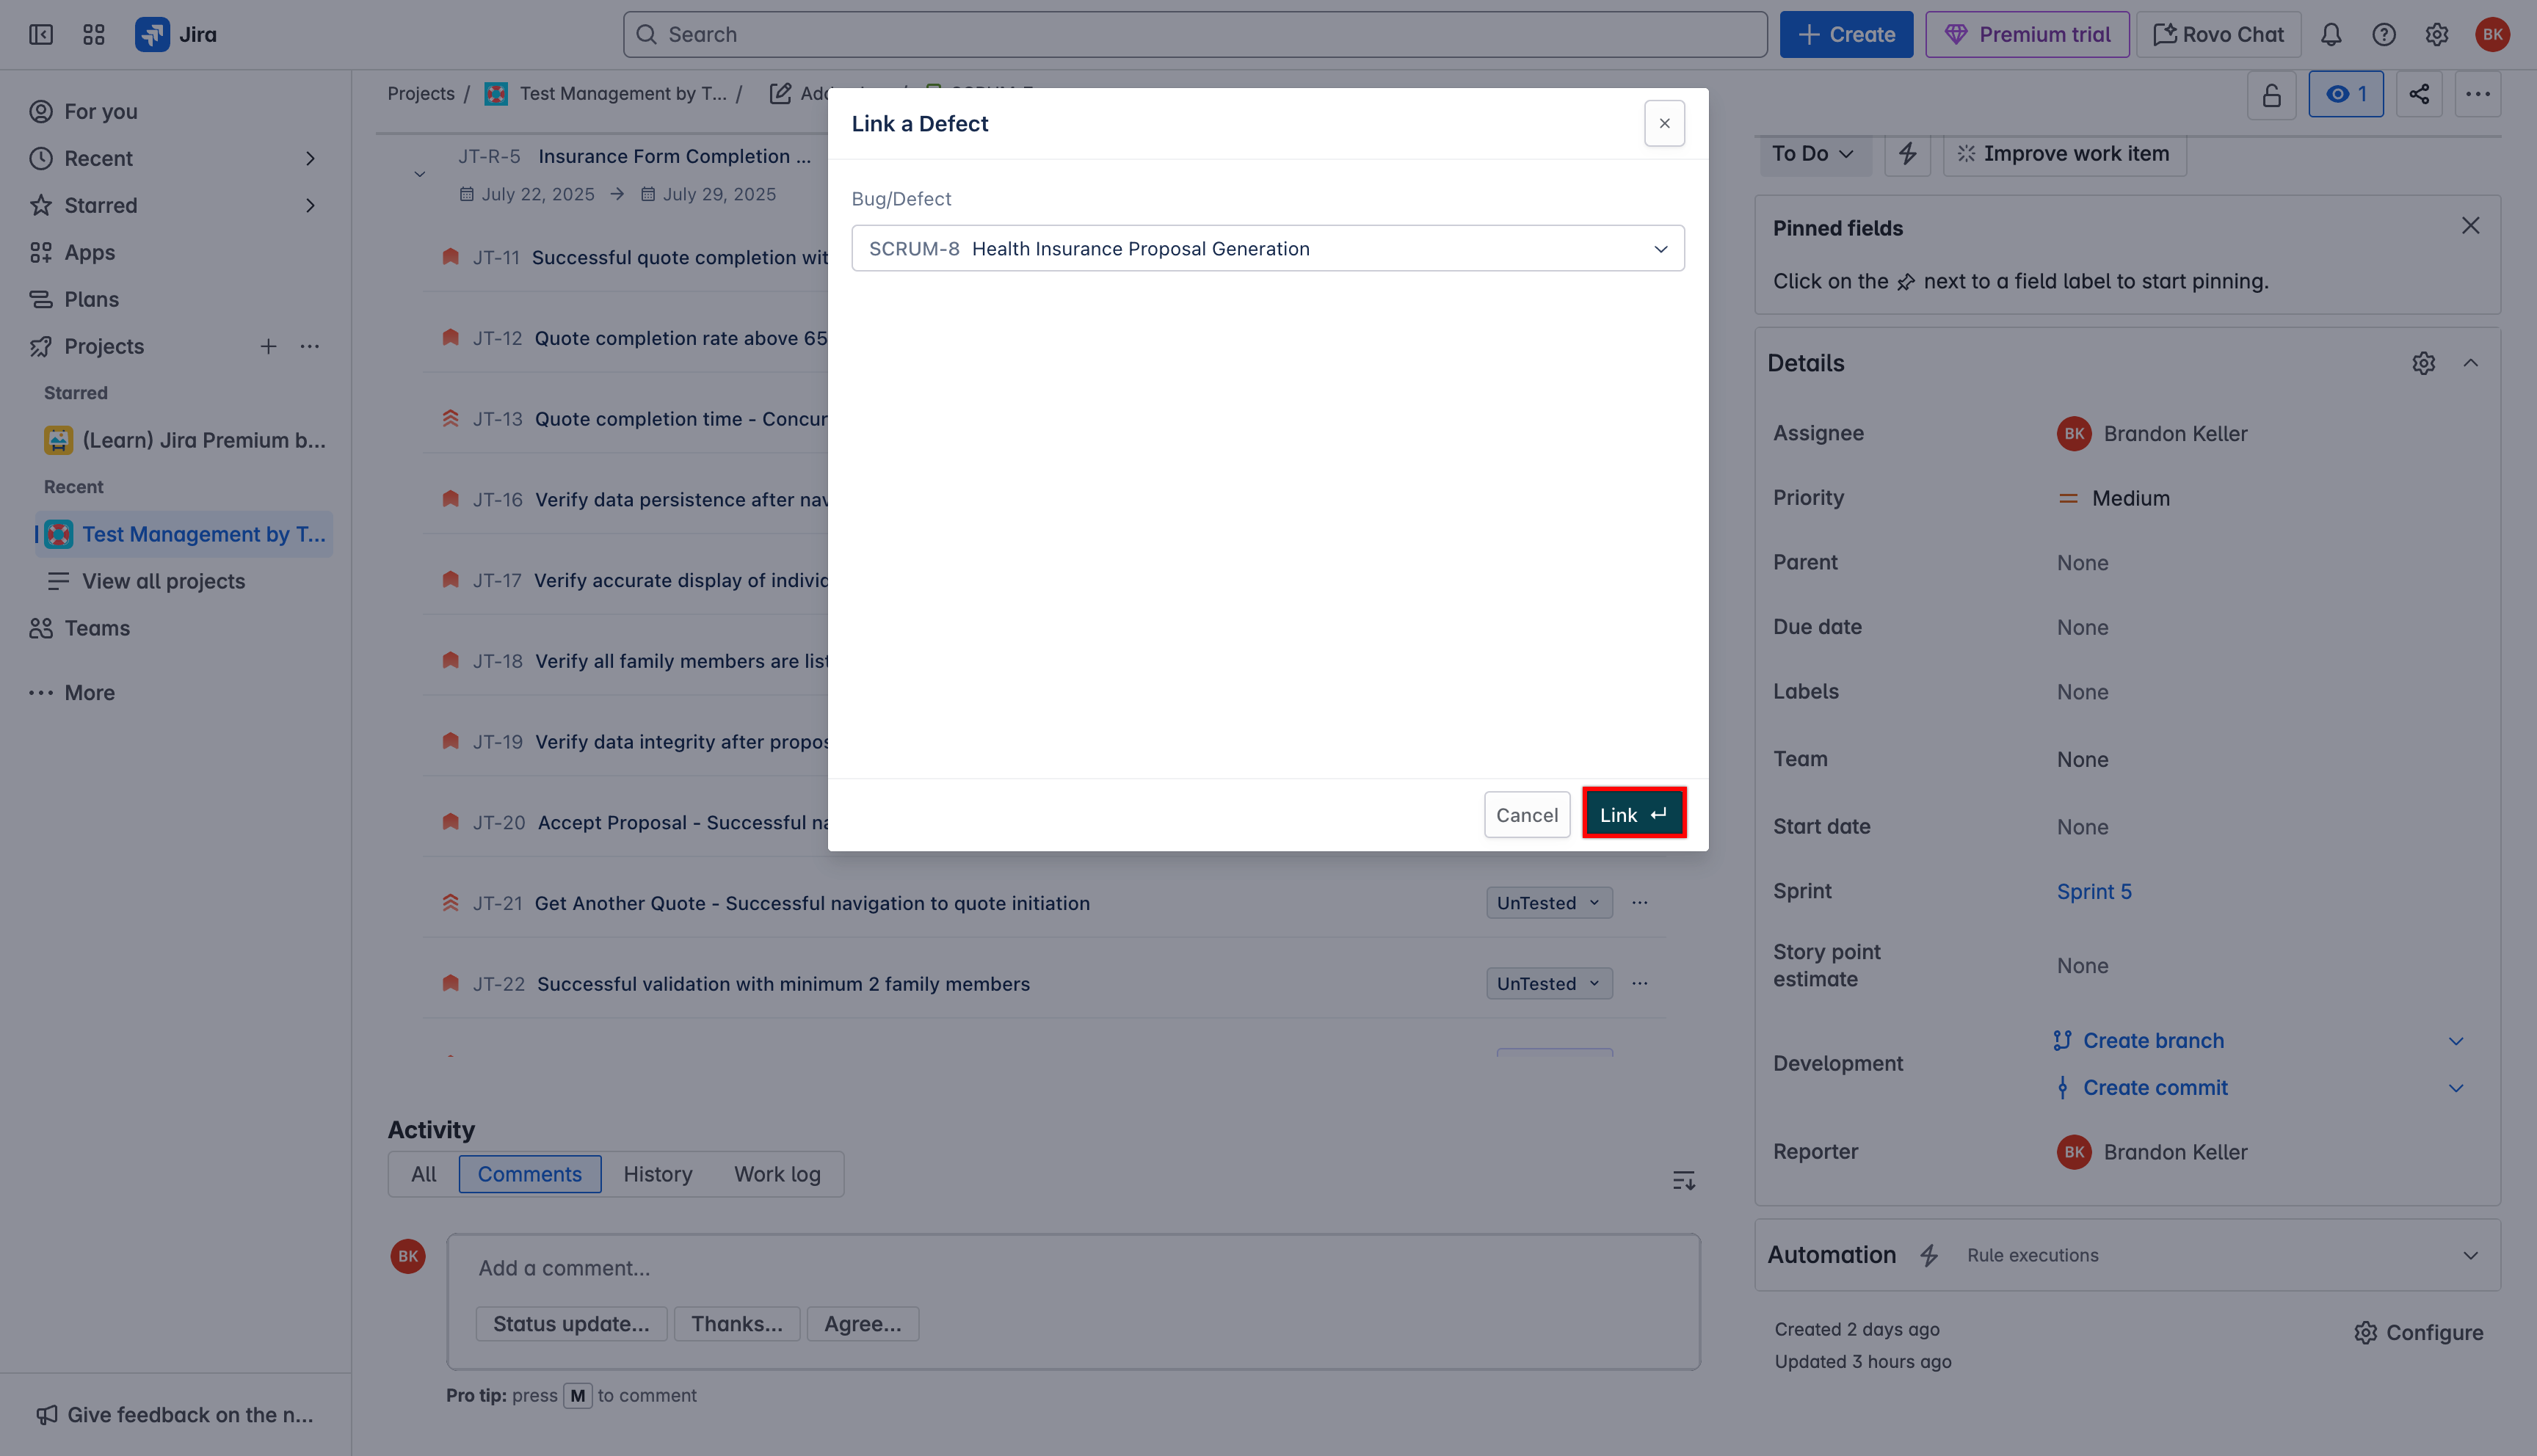
- The defect is linked to the selected issue.

Want to contribute or report missing content?